4
4
4-16
4-16
Parts Replacement and Cleaning Procedure > External Covers > Removing the Grate-shaped Lower Guide
Parts Replacement and Cleaning Procedure > External Covers > Removing the Grate-shaped Lower Guide
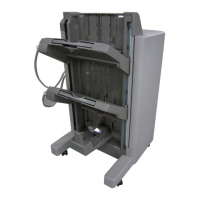
Removing the Grate-shaped Upper Guide
1) Remove the front cover.(Refer to page 4-14)
2) Remove the rear cover.(Refer to page 4-14)
3) Remove the front inside upper cover. (In the case of Staple Finisher, this procedure is
unnecessary.)(Refer to page 4-17)
4) Remove the left upper cover.(Refer to page 4-15)
5) Lower tray [1] below the grate-shaped upper guide [2] (For how the tray is moved, see the
steps under “Removing the Tray 1.”).
6) Remove ve screws [3] and remove the grate-shaped upper guide [2].
[4]
F-4-23
Removing the Grate-shaped Lower Guide
1) Remove the front cover.(Refer to page 4-14)
2) Remove the rear cover.(Refer to page 4-14)
3) Remove the front inside upper cover. (In the case of Staple Finisher, this procedure is
unnecessary.)(Refer to page 4-17)
4) Remove the left upper cover.(Refer to page 4-15)
5) Remove the grate-shaped upper guide.(Refer to page 4-16)
6) Remove the tray 1.
7) Remove the tray 2.
8) Remove ten screws [1] and remove the grate-shaped lower guide [2].
[1]
[1]
[1]
[2]
CAUTION:
When replacing, be careful not to hook the grate-shaped lower guide to the sensor ag
arm on the delivery side.
F-4-24
 Loading...