4
4
4-39
4-39
Parts Replacement and Cleaning Procedure > Other Parts > Removing the No.1 Flappers and the No.2 Flappers
Parts Replacement and Cleaning Procedure > Other Parts > Removing the No.1 Flappers and the No.2 Flappers
Removing the No.1 Flappers and the No.2 Flappers
1) Remove the front cover.(Refer to page 4-14)
2) Remove the rear cover.(Refer to page 4-14)
3) Remove the front inside upper cover. (In the case of Staple Finisher, this procedure is
unnecessary.)(Refer to page 4-17)
4) Remove the inlet feed unit.(Refer to page 4-29)
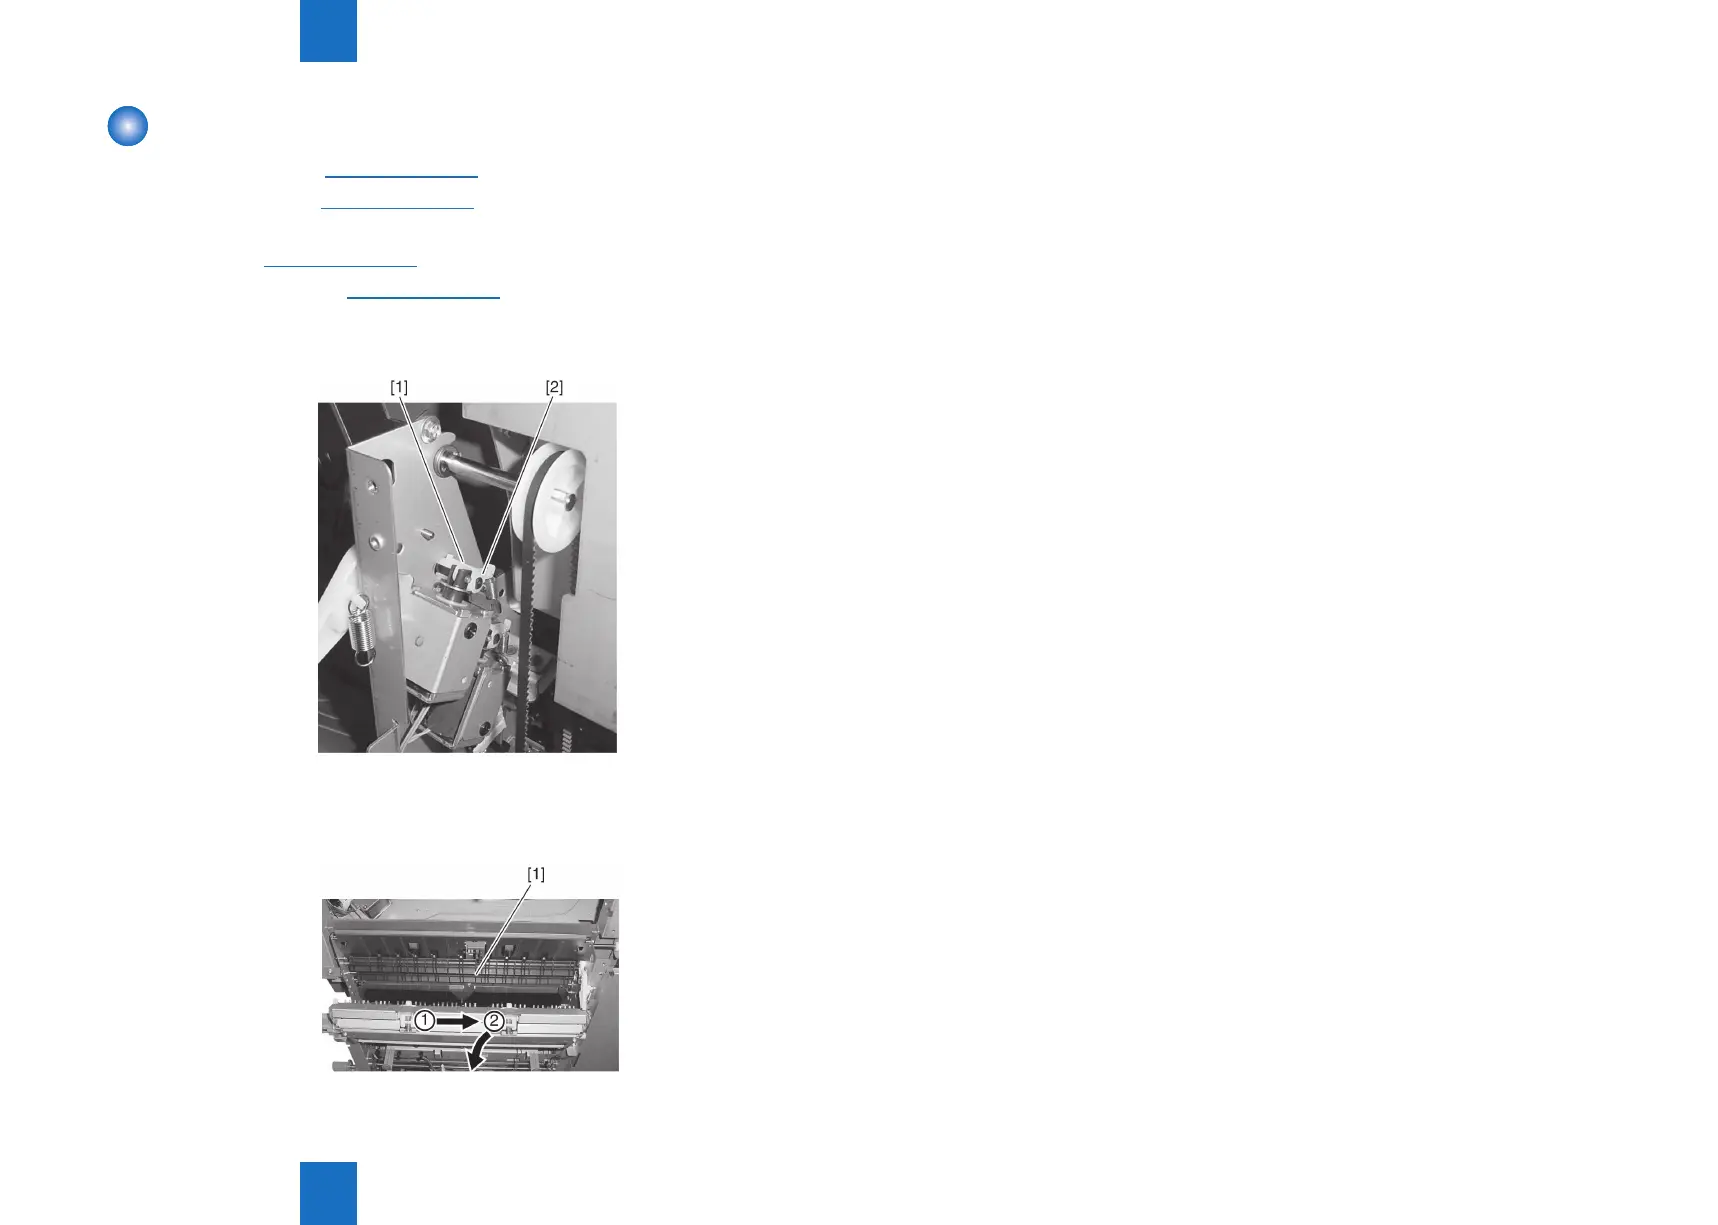
5) Remove the claw [1] of the No.1/No.2 apper bushing, and pull out the No.1/No.2 apper
shaft [2] toward the rear.
6) After detaching the front shaft of the No.1/No.2 apper [1] from the front side plate,
remove the No.1/No.2 apper.
F-4-83
F-4-84
 Loading...