4
4
4-25
4-25
Parts Replacement and Cleaning Procedure > Main Units > Removing the Return Roller Unit
Parts Replacement and Cleaning Procedure > Main Units > Removing the Return Roller Unit
6) Remove screw [1] and remove the stopper [2].
7) Remove two screws [1] and disconnect connector [2].
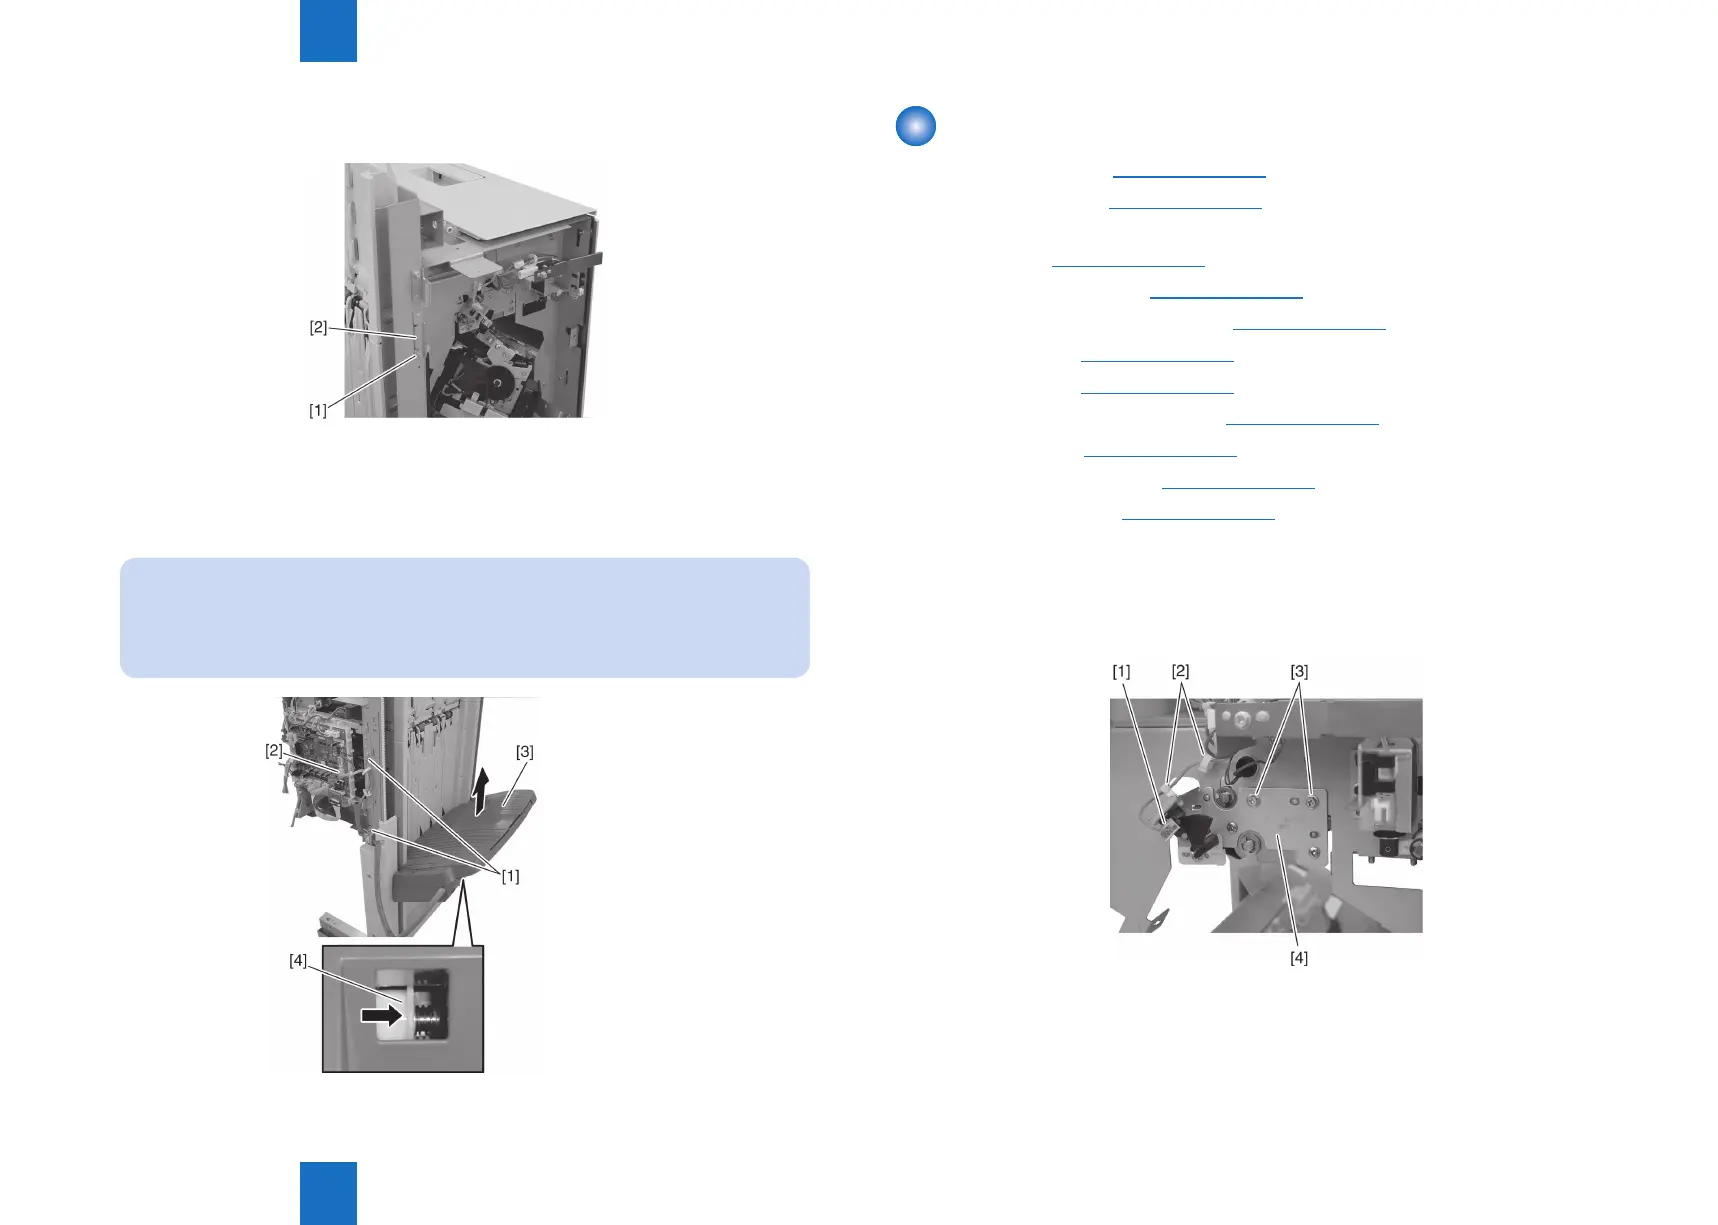
8) Insert your nger in the hole at the rear side of tray 2 [3], push the tray lift motor gear [4] to
the front to release the clutch and lift tray 2 [3].
NOTE:
When the tray lift motor gear clutch is released the tray drops by its own weight.
Therefore, hold the tray with your hand when releasing the clutch.
Also, be careful not to twist the tray cable when installing.
F-4-48
F-4-49
Removing the Return Roller Unit
1) Remove the front cover.(Refer to page 4-14)
2) Remove the rear cover.(Refer to page 4-14)
3) Remove the front inside upper cover. (In the case of Staple Finisher, this procedure is
unnecessary.)(Refer to page 4-17)
4) Remove the left upper cover.(Refer to page 4-15)
5) Remove the grate-shaped upper guide. (Refer to page 4-16)
6) Remove the tray 1. (Refer to page 4-23)
7) Remove the tray 2. (Refer to page 4-24)
8) Remove the grate-shaped lower guide.(Refer to page 4-16)
9) Remove the stapler.(Refer to page 4-31)
10) Remove the processing tray. (Refer to page 4-21)
11) Remove the swing unit. (Refer to page 4-19)
12) Remove the return roller unit front side connector [1] and remove the clamp [2] from the
harness.
13)Remove two screws [3] and pull out the return roller unit [4] from the front side.
F-4-50
 Loading...