4
4
4-27
4-27
Parts Replacement and Cleaning Procedure > Main Units > Removing the Stitcher Mount Unit
Parts Replacement and Cleaning Procedure > Main Units > Removing the Stitcher Mount Unit
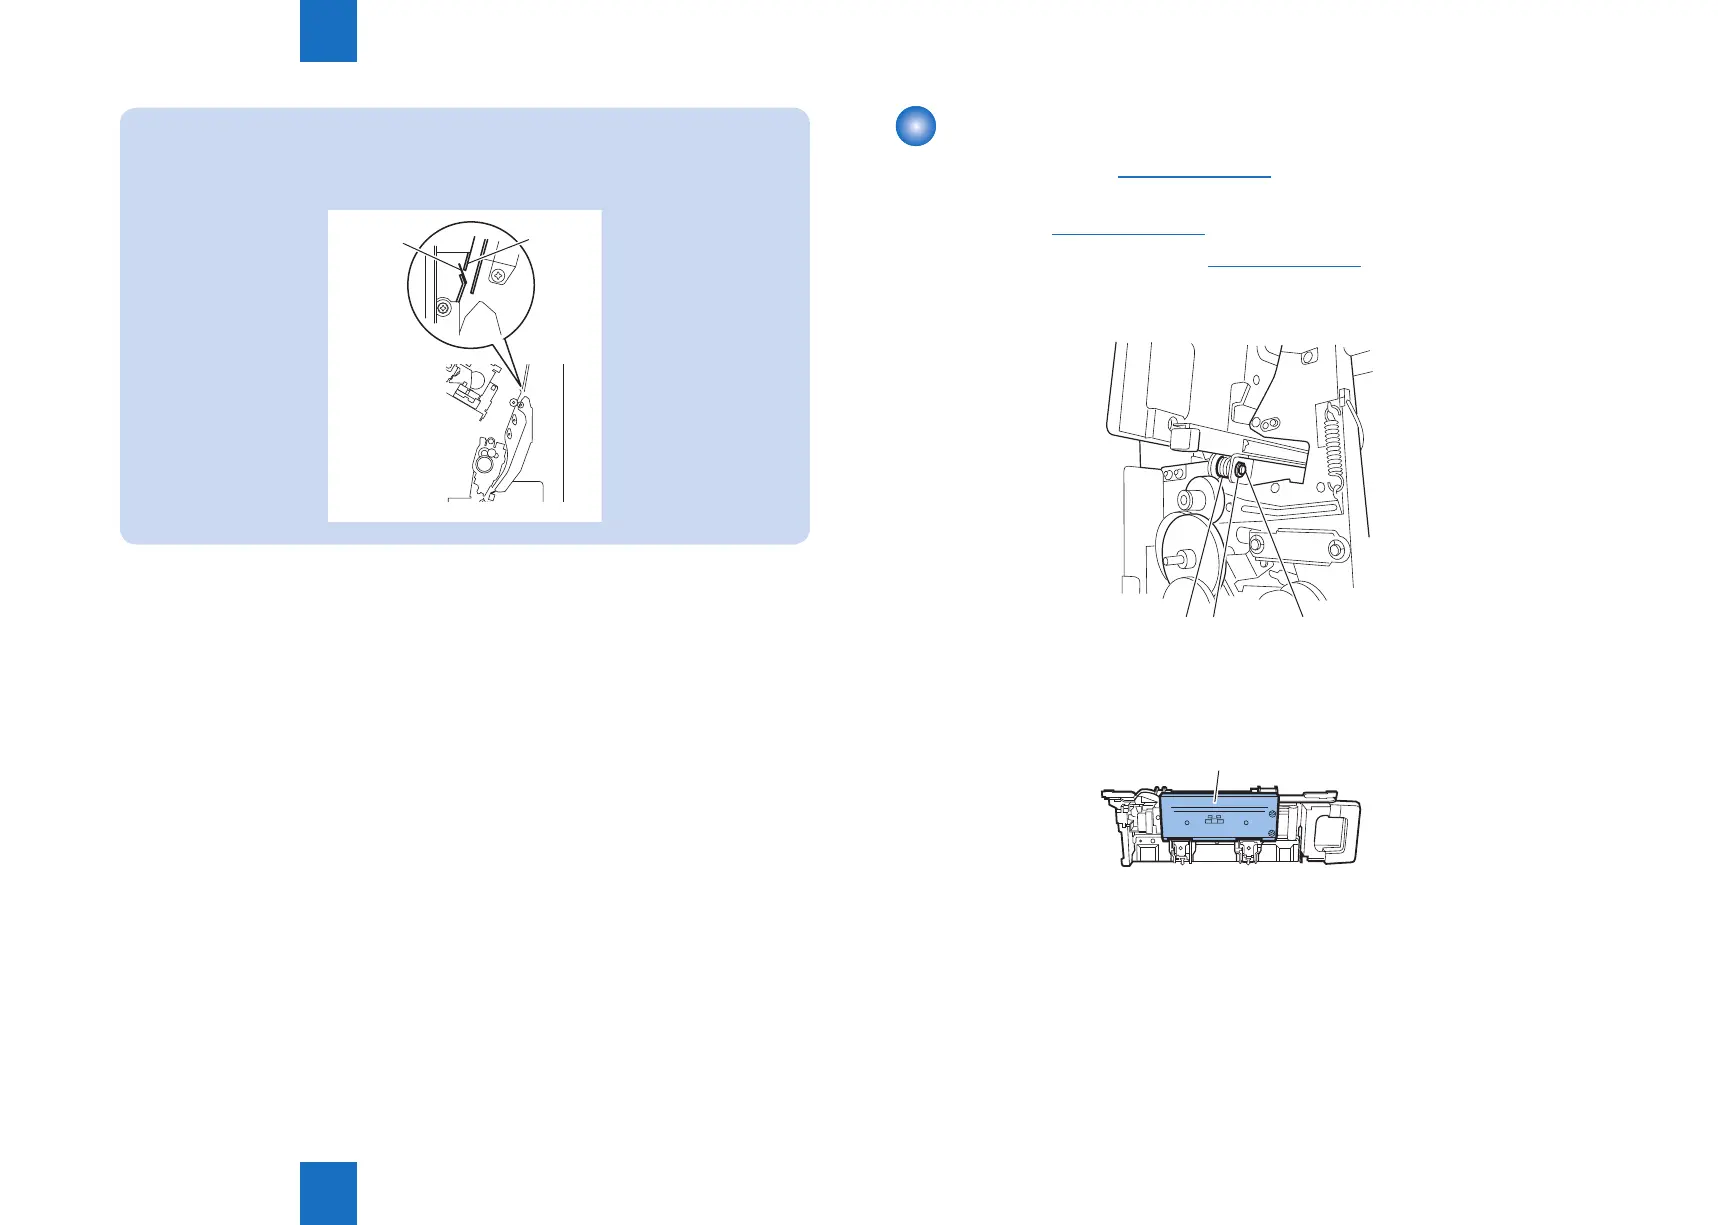
NOTE:
When installing the saddle unit, install so that the Mylar [1] at the front upper side of
the saddle is on the outside of the delivery guide plate [2] as shown in the gure.
Delivery fault will occur if it goes inside.
[1]
[2]
F-4-54
Removing the Stitcher Mount Unit
1) Remove the front cover. (Refer to page 4-14)
2) Remove the front inside upper cover. (In the case of Staple Finisher, this procedure is
unnecessary.)(Refer to page 4-17)
3) Remove the front inside lower cover.(Refer to page 4-18)
4) Remove the E ring [1], shaft [2], and roller [3].
[1][3] [2]
5) Pull out the stitcher mount unit [1] to the front.
[1]
F-4-55
F-4-56