4
4
4-31
4-31
Parts Replacement and Cleaning Procedure > Consumable Parts and Cleaning Points > Removing the Stapler
Parts Replacement and Cleaning Procedure > Consumable Parts and Cleaning Points > Removing the Stapler
Consumable Parts and Cleaning Points
Removing the Stapler
NOTE:
When replacing the consumable parts, be sure to clear the parts counter.
(COPIER > COUNTER > DRBL-2 > FIN-STPR)
1) Remove the front cover.(Refer to page 4-14)
2) Remove the front inside upper cover. (In the case of Staple Finisher, this procedure is
unnecessary.)(Refer to page 4-17)
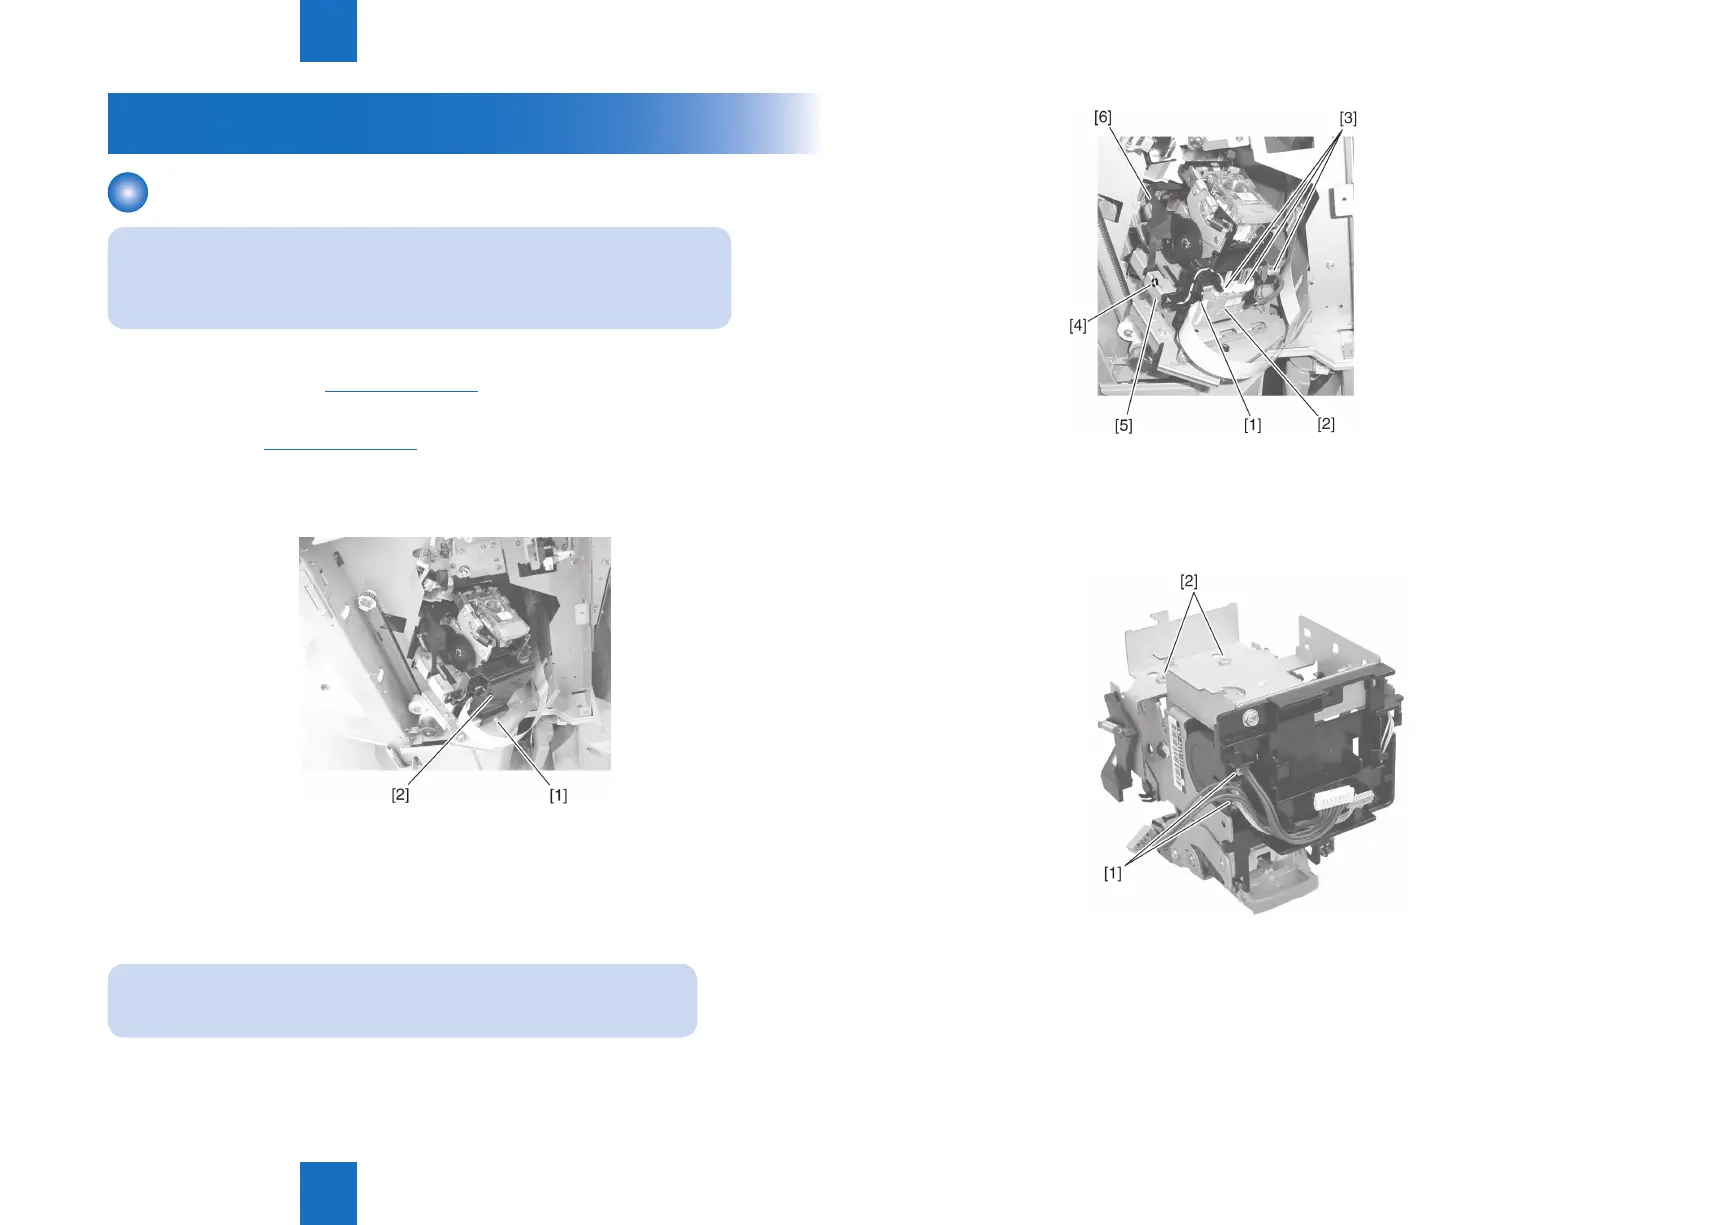
3) Pull out the stapler, remove screw [1], and remove the PCB cover [2].
4) Release the claw [1] and remove the PCB [2].
5) Disconnect three connectors [3].
6) Remove screw [4] and remove the stapler together with the stapler base [5].
NOTE:
When removing, be careful not to damage the ag [6].
F-4-63
7) Turn the stapler over, disconnect two connectors [1], remove two screws [2], and remove
the stapler from the stapler base.
F-4-64
F-4-65
 Loading...