4
4
4-26
4-26
Parts Replacement and Cleaning Procedure > Main Units > Removing the Saddle Unit
Parts Replacement and Cleaning Procedure > Main Units > Removing the Saddle Unit
Removing the Saddle Unit
1) Remove the front cover.(Refer to page 4-14)
2) Remove the rear cover. (Refer to page 4-14)
3) Remove the front inside upper cover. (In the case of Staple Finisher, this procedure is
unnecessary.) (Refer to page 4-17)
4) Remove the left upper cover.(Refer to page 4-15)
5) Remove the grate-shaped upper guide. (Refer to page 4-15)
6) Remove the tray 1.(Refer to page 4-23)
7) Remove the tray 2. (Refer to page 4-24)
8) Remove the grate-shaped lower guide.(Refer to page 4-16)
9) Remove the saddle delivery tray unit. (Refer to page 4-28)
10) Remove the PCB cover.(Refer to page 4-18)
11) Remove the inlet feed unit. (Refer to page 4-29)
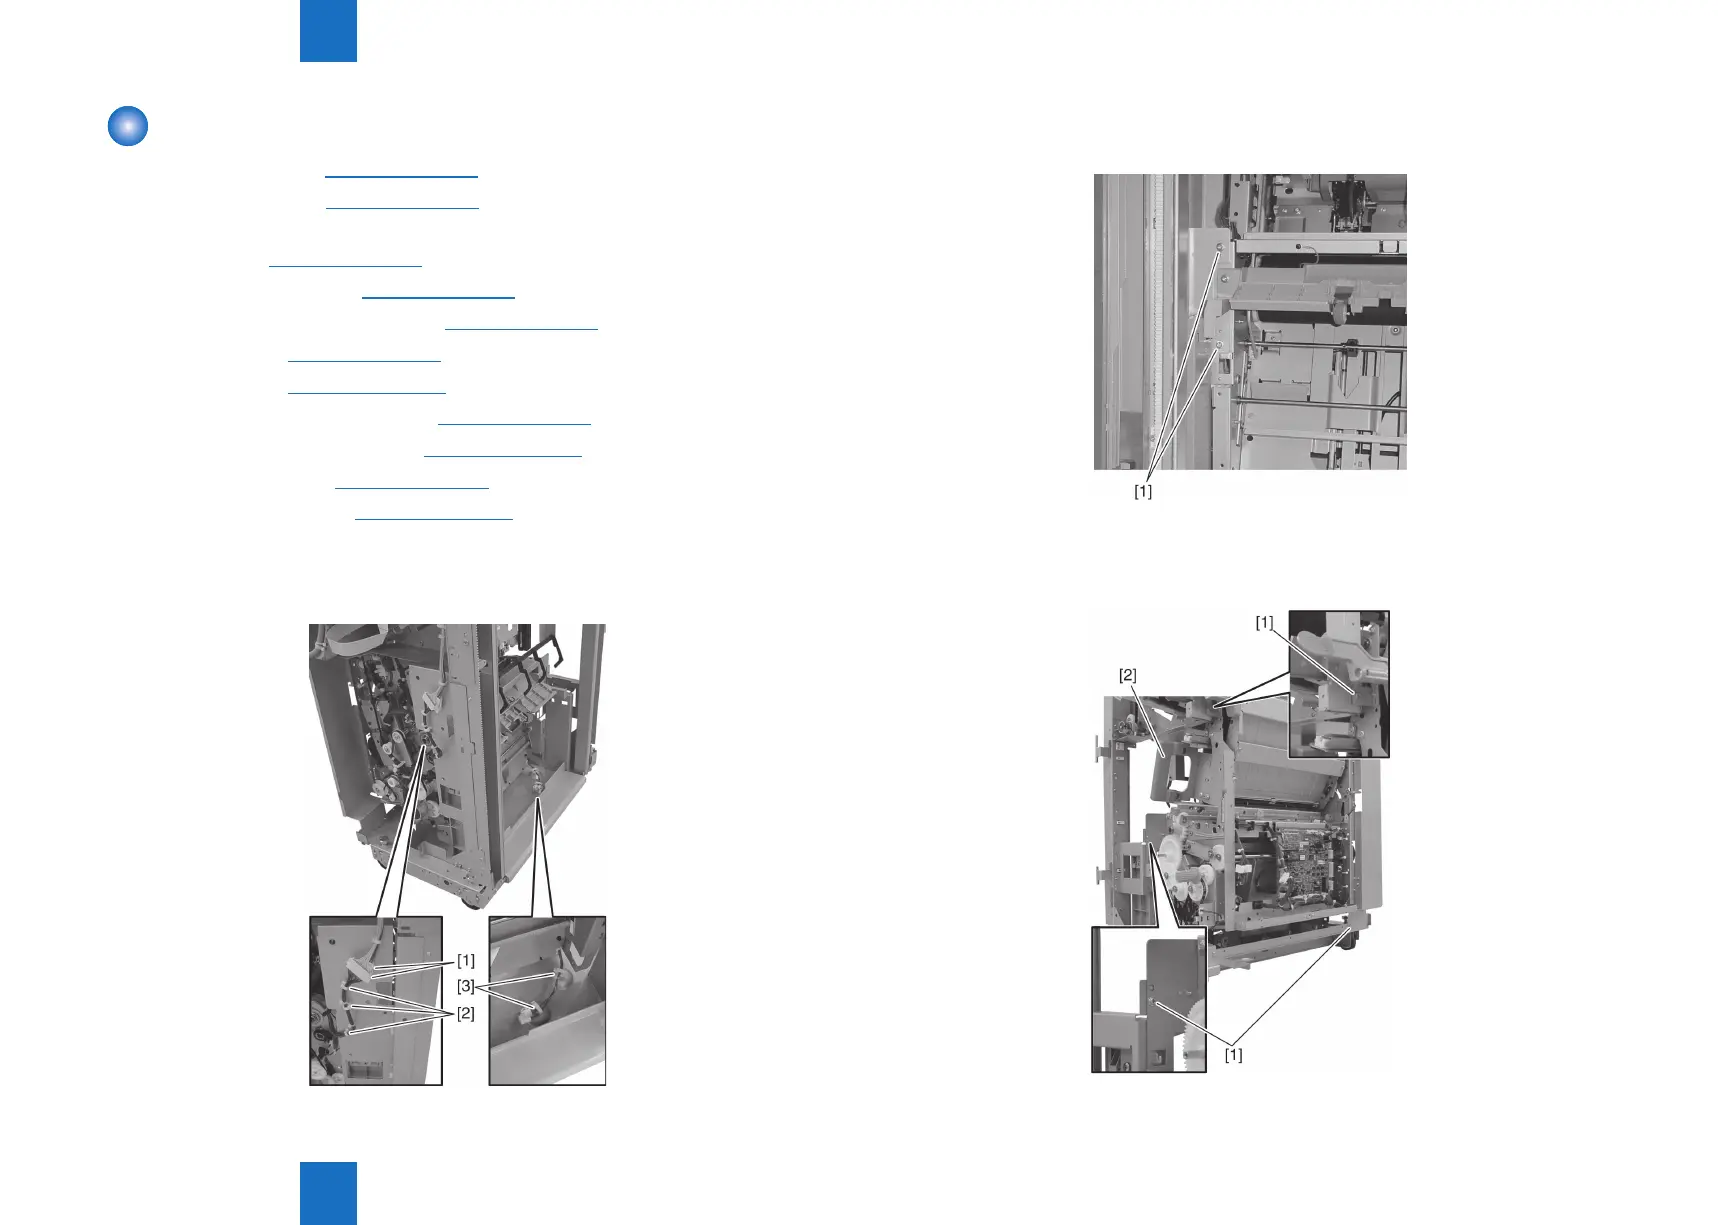
12) Disconnect two connectors [1] and remove the harness from three clamps [2].
13) Remove the harness from two clamps [3] at the bottom of the delivery side.
F-4-51
14) Remove two screws [1].
15) Remove three screws [1].
16) Remove the saddle unit [2] from the paper feeding side.
F-4-52
F-4-53