4
4
4-33
4-33
Parts Replacement and Cleaning Procedure > Consumable Parts and Cleaning Points > Removing the Swing Unit Static Charge Eliminator
Parts Replacement and Cleaning Procedure > Consumable Parts and Cleaning Points > Removing the Swing Unit Static Charge Eliminator
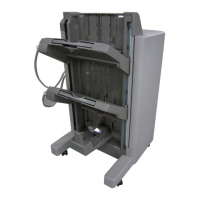
10) Remove two clips [1] of the return roller axis.
11) Pull out the return roller axis and remove two return rollers [2] together with collar.
12) Separate the return roller and collar.
F-4-67
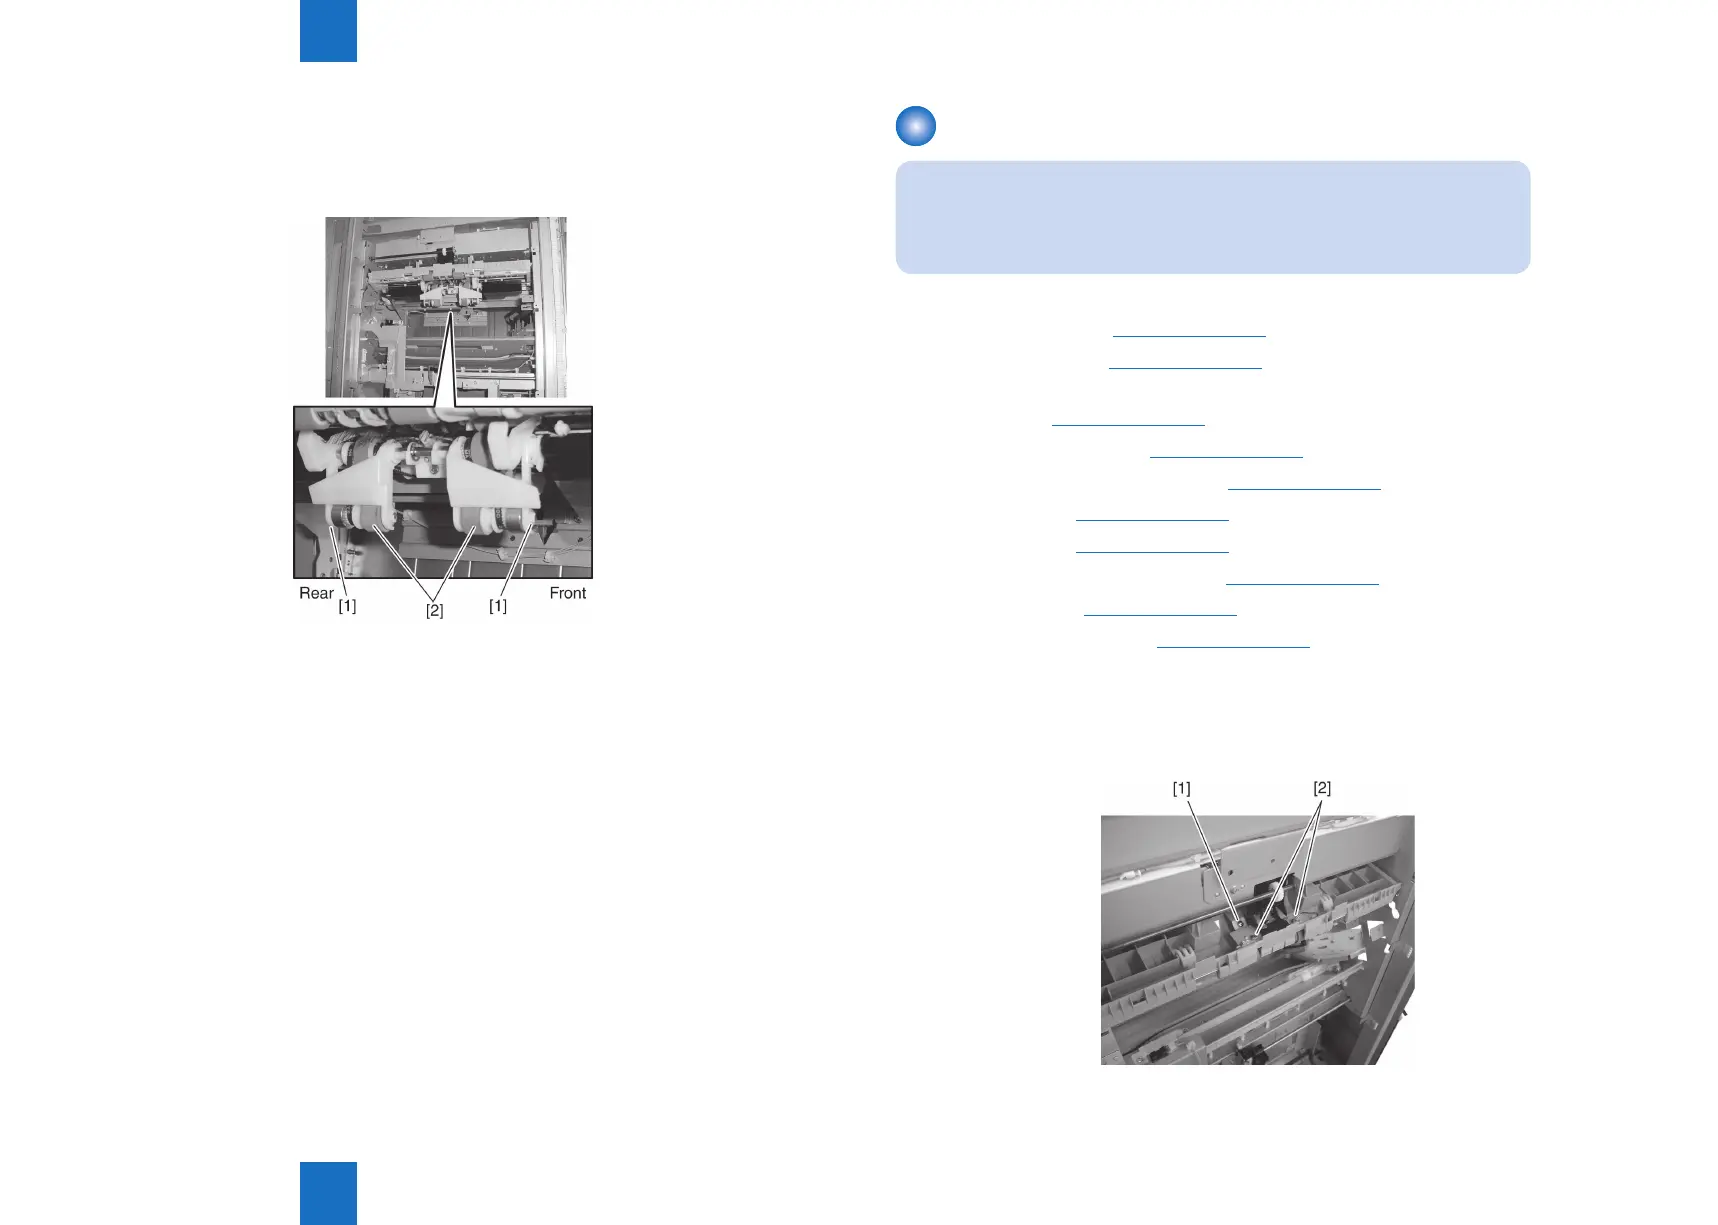
Removing the Swing Unit Static Charge Eliminator
NOTE:
When replacing the consumable parts, be sure to clear the parts counter.
(COPIER > COUNTER > DRBL-2 > FSWG-STC)
(COPIER > COUNTER > DRBL-2 > DL-STC)
1) Remove the front cover.(Refer to page 4-14)
2) Remove the rear cover.(Refer to page 4-14)
3) Remove the front inside upper cover. (In the case of Staple Finisher, this procedure is
unnecessary.)(Refer to page 4-17)
4) Remove the left upper cover.(Refer to page 4-15)
5) Remove the grate-shaped upper guide.(Refer to page 4-16)
6) Remove the tray 1.(Refer to page 4-23)
7) Remove the tray 2.(Refer to page 4-24)
8) Remove the grate-shaped lower guide.(Refer to page 4-16)
9) Remove the stapler.(Refer to page 4-31)
10) Remove the processing tray.(Refer to page 4-21)
11) Remove the screw [1] securing the static charge eliminator at the center of the swing
unit.
12) Remove two screws [2] securing the ground of the delivery side static charge eliminator.
F-4-68
 Loading...