4
4
4-24
4-24
Parts Replacement and Cleaning Procedure > Main Units > Removing the Tray 2
Parts Replacement and Cleaning Procedure > Main Units > Removing the Tray 2
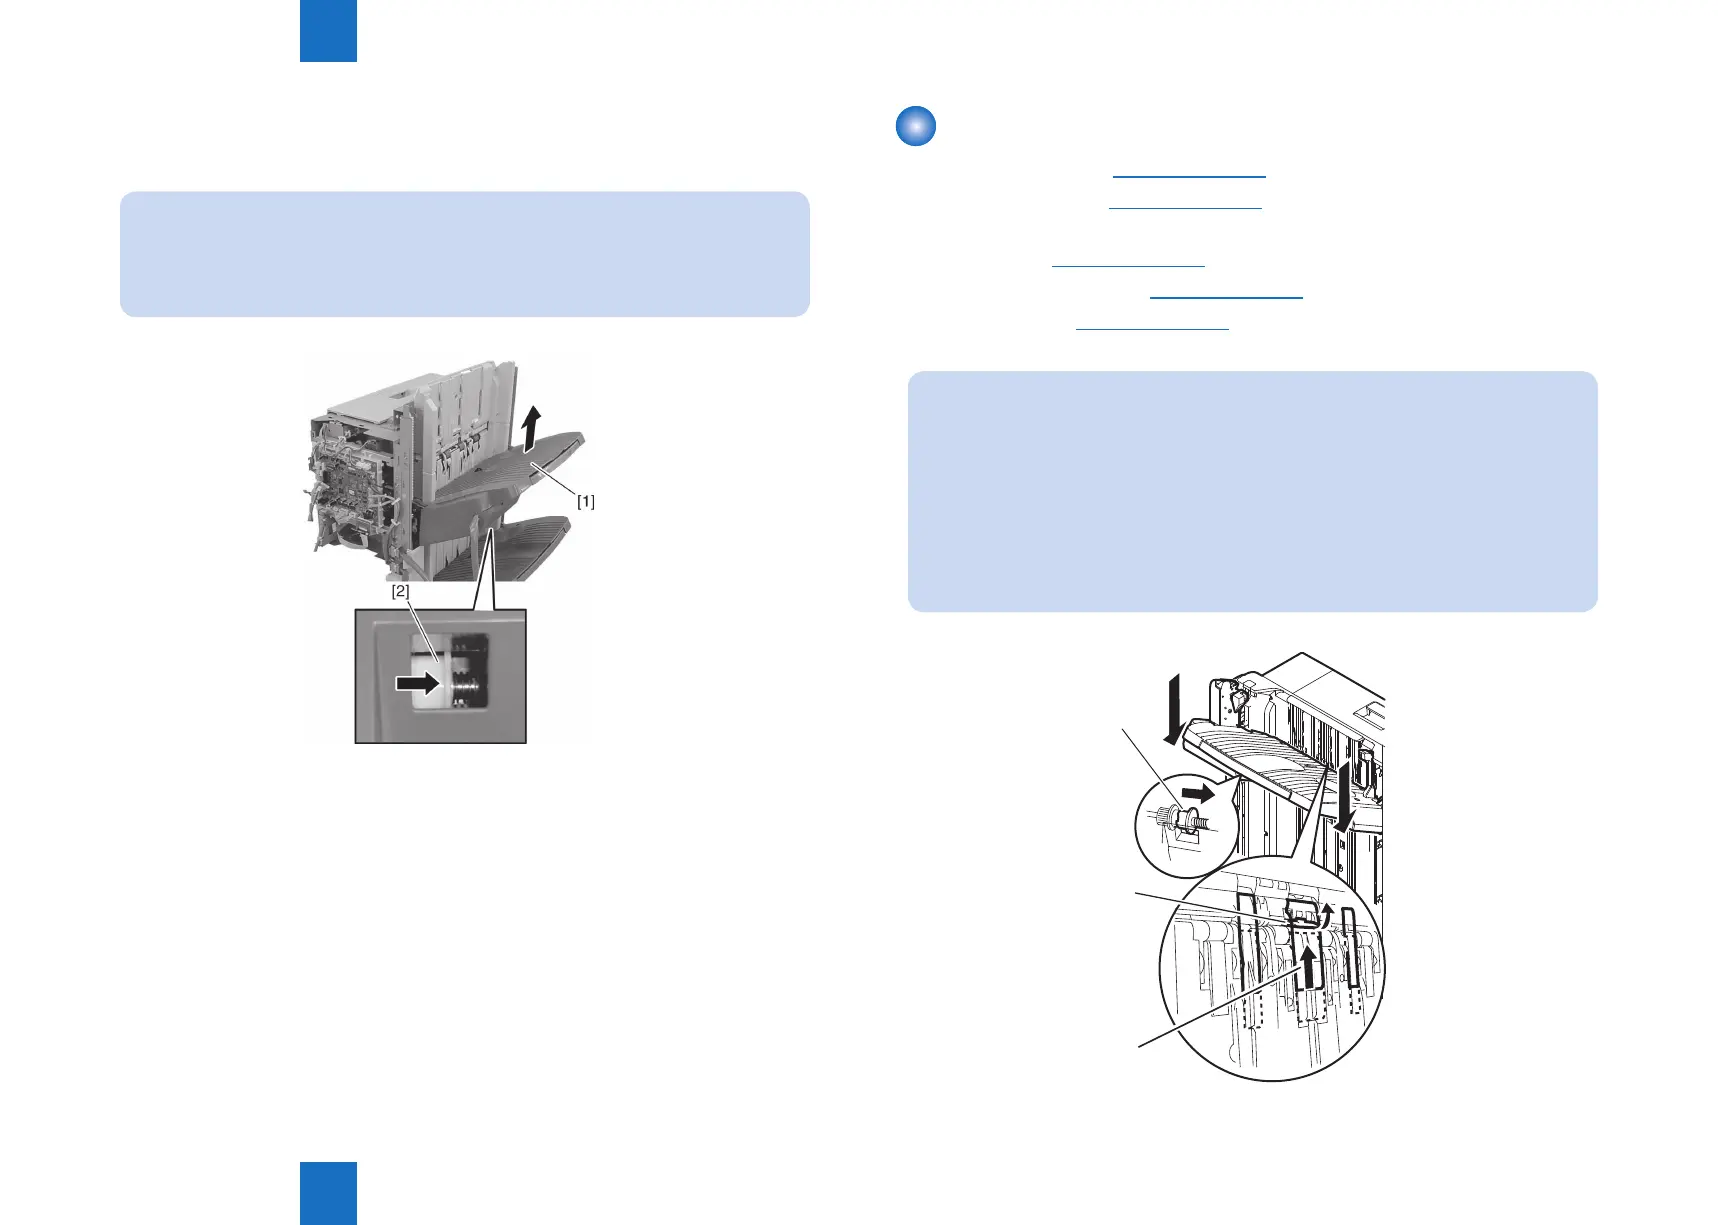
8) Insert your nger in the hole at the rear side of tray 1 [1], push the tray motor gear [2] to
the front to release the clutch and lift tray 1 [1].
NOTE:
When the tray lift motor gear clutch is released, the tray drops by its own weight.
Therefore, hold the tray with your hand when releasing the clutch.
Also, be careful not to twist the tray cable when installing.
F-4-46
Removing the Tray 2
1) Remove the front cover.(Refer to page 4-14)
2) Remove the rear cover.(Refer to page 4-14)
3) Remove the front inside upper cover. (In the case of Staple Finisher, this procedure is
unnecessary.)(Refer to page 4-17)
4) Remove the left upper cover.(Refer to page 4-15)
5) Remove the tray 1.(Refer to page 4-23)
NOTE:
When you attach or remove the tray, please be sure to raise the shutter [1], release
the latch [3] on the rear surface of the tray while the stack delivery gate [2] of the
delivery opening is lifted (covered), and then move down the tray. If you move down
the tray without lifting the shutter of the delivery opening, the stack delivery gate
comes off from the Finisher. If the stack delivery gate comes off, remount it while
paying attention so as not to lose the spring for the shaft of the stack delivery gate.
The tray falls by its own weight when the latch is released, so be sure to hold the
tray with hands.
[3]
[2]
[1]
F-4-47