16
When the CYCLE function is active, when the torch button is pressed and released within less than 1 second the welding current goes
to the I2 CYCLE. value, and by repeating this operating you can switch between the I1 and I2 . current levels an infinite number of times.
When the torch button is held down for more than 1 second, you exit the cycle.
This welding mode is especially indicated for welding profiles with different thickness, where continuous current variation is required.
Also, when welding aluminium, it allows you to have a higher initial current, thereby facilitating pre-heating of the workpiece.
7. PRE-GAS duration.
8. “Absolute” initial welding current value in Ampere (default) or as % of the main current for I1 welding, or of the peak current when
pulsation is set.
9. SLOPE UP duration.
10. SLOPE DOWN duration.
11. “Absolute” final welding current value in Ampere (default) or as % of the main current for I
1
welding, or of the peak current when
pulsation is set.
12. POST-GAS duration.
13. Select the diameter of the electrode to achieve the best control of ignition in synergic mode (Default and settable function only for
“HF” / “HF PERFECT POINT” types of ignition).
If the “CONFIGURATION”
menu is used to select manual ignition, you can set:
Ignition current
NOTE: If the value of these 2 parameters is too low, this could prejudice ignition.
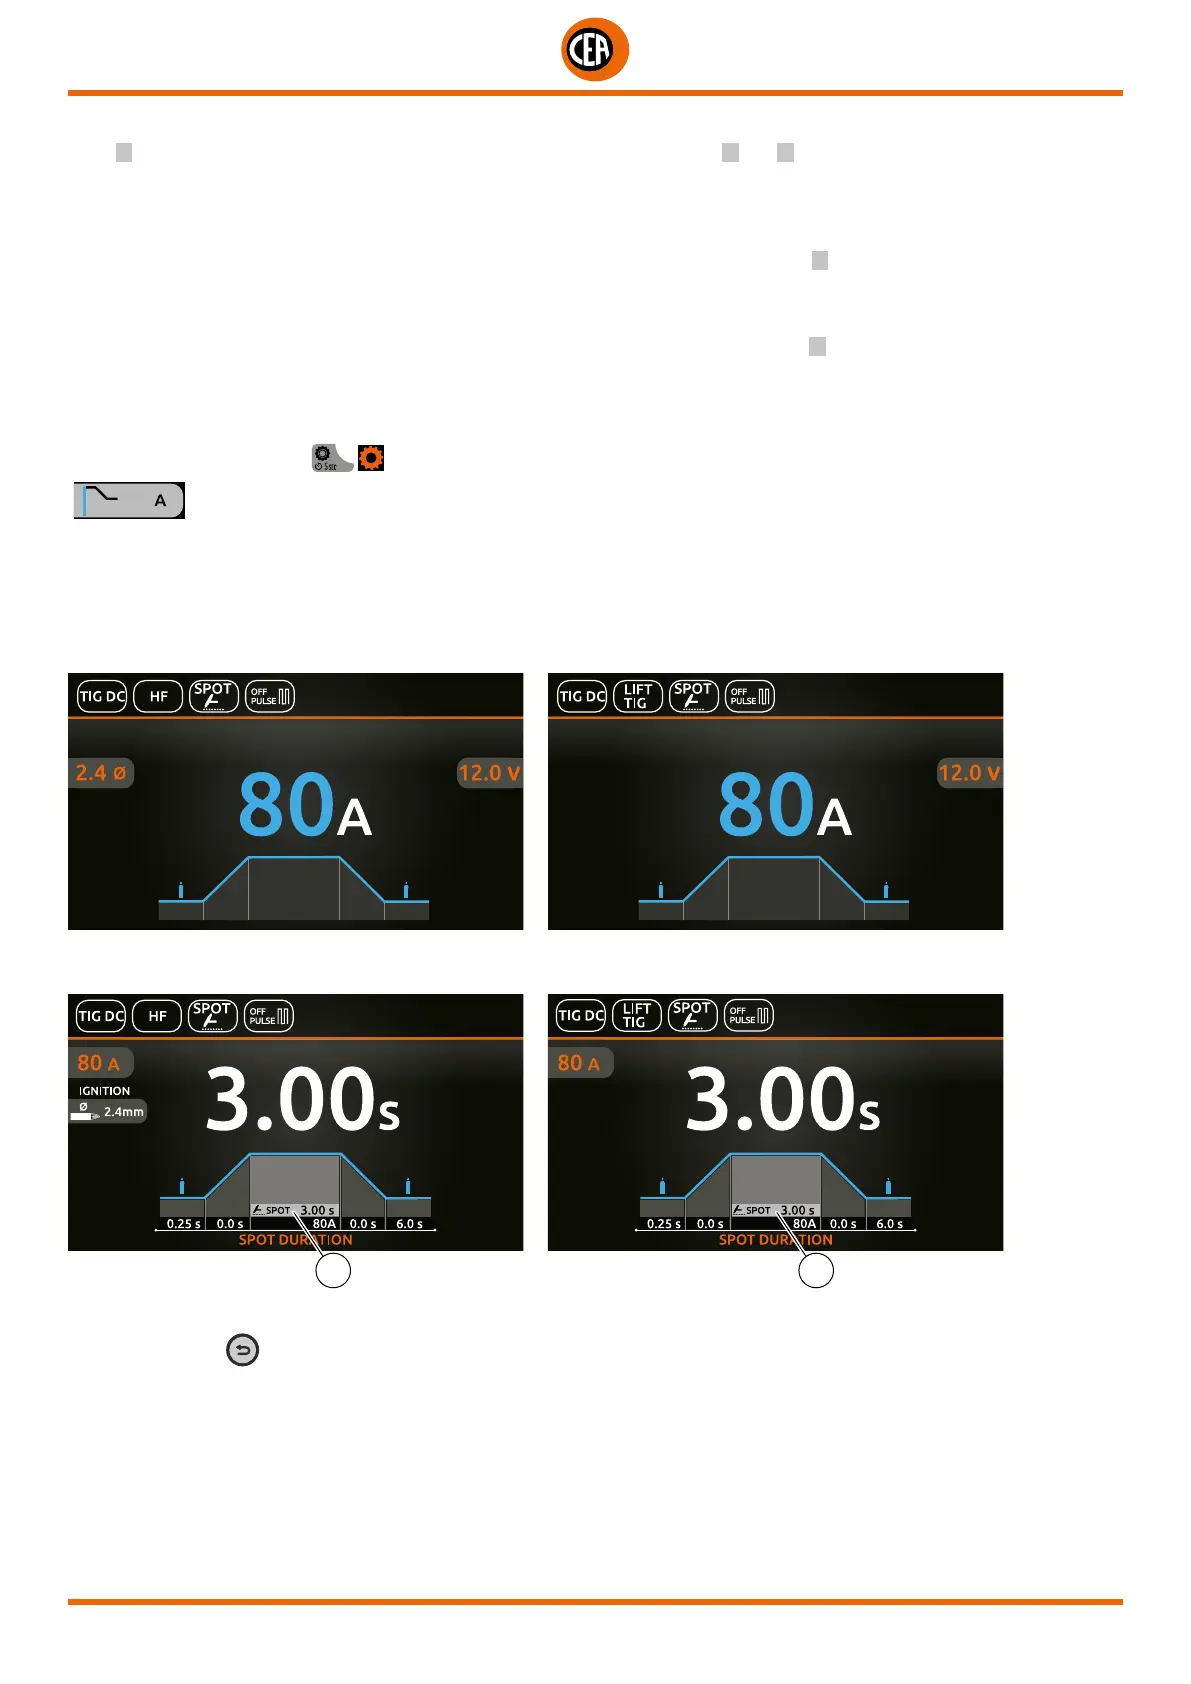
SPOT welding mode
An example of the configuration of parameters with SPOT welding mode active is shown below.
This can be used by pushing the torch button to spot weld for a pre-set period of time (in seconds) at the end of which the arc switch-
es off automatically.
Push the knob to enter the SET page.
By pushing and rotating the knob, besides the parameters described above, you can set:
11
1. Spot time.
NOTE: If the BACK
key is held down for 2 seconds, the parameter goes back to its default setting.
Once the all the selections/settings indicated above have been made, welding can begin.
During the welding process the display shows the current and the real voltage at which the operator is actually welding.
 Loading...