Step 25: Slide Section Assemblies
Part 2
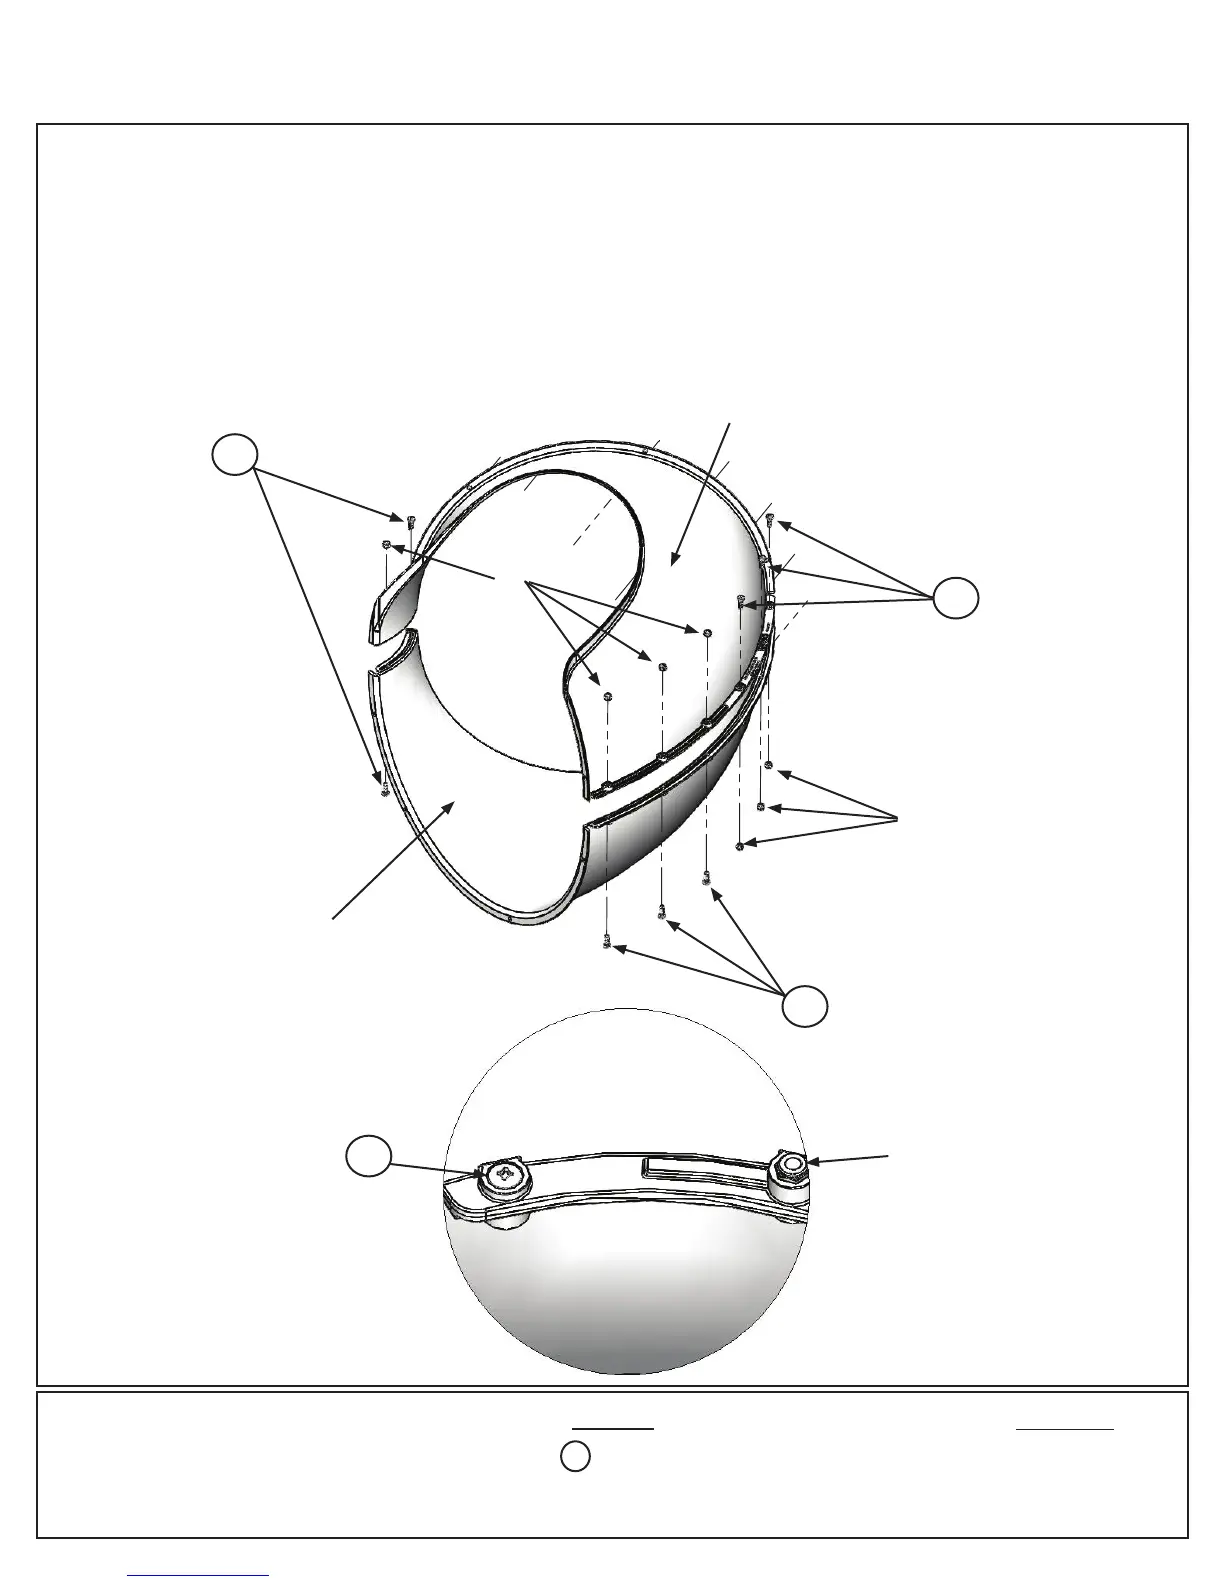
Note: When installing Pan Bolts make sure to look at holes so bolts go through the side with the
round recess and the lock nuts go through the side with the hexagonal recess. (g. 25.3)
D: Attach TNR2 Slide Exit Top and the remaining TNR2 Slide Elbow together using 8 (PB1) 1/4 x 3/4” Pan
Bolts (with lock nut) as shown in g. 25.4. It is very important to attach bolts as indicated. This creates the
Exit Elbow Assembly.
Hardware
8 x 1/4 x 3/4” Pan Bolt
(1/4”locknut)
PB1
Other Parts
1 x TNR2 Slide Exit Top
1 x TNR2 Slide Elbow
TNR2
Slide
Elbow
TNR2
Slide Exit
Top
Fig. 25.3
Lock
Nut
PB1
PB1
PB1
Lock
Nut
Lock
Nut
PB1
Fig. 25.4
70 europecustomerservice@kidkraft.com