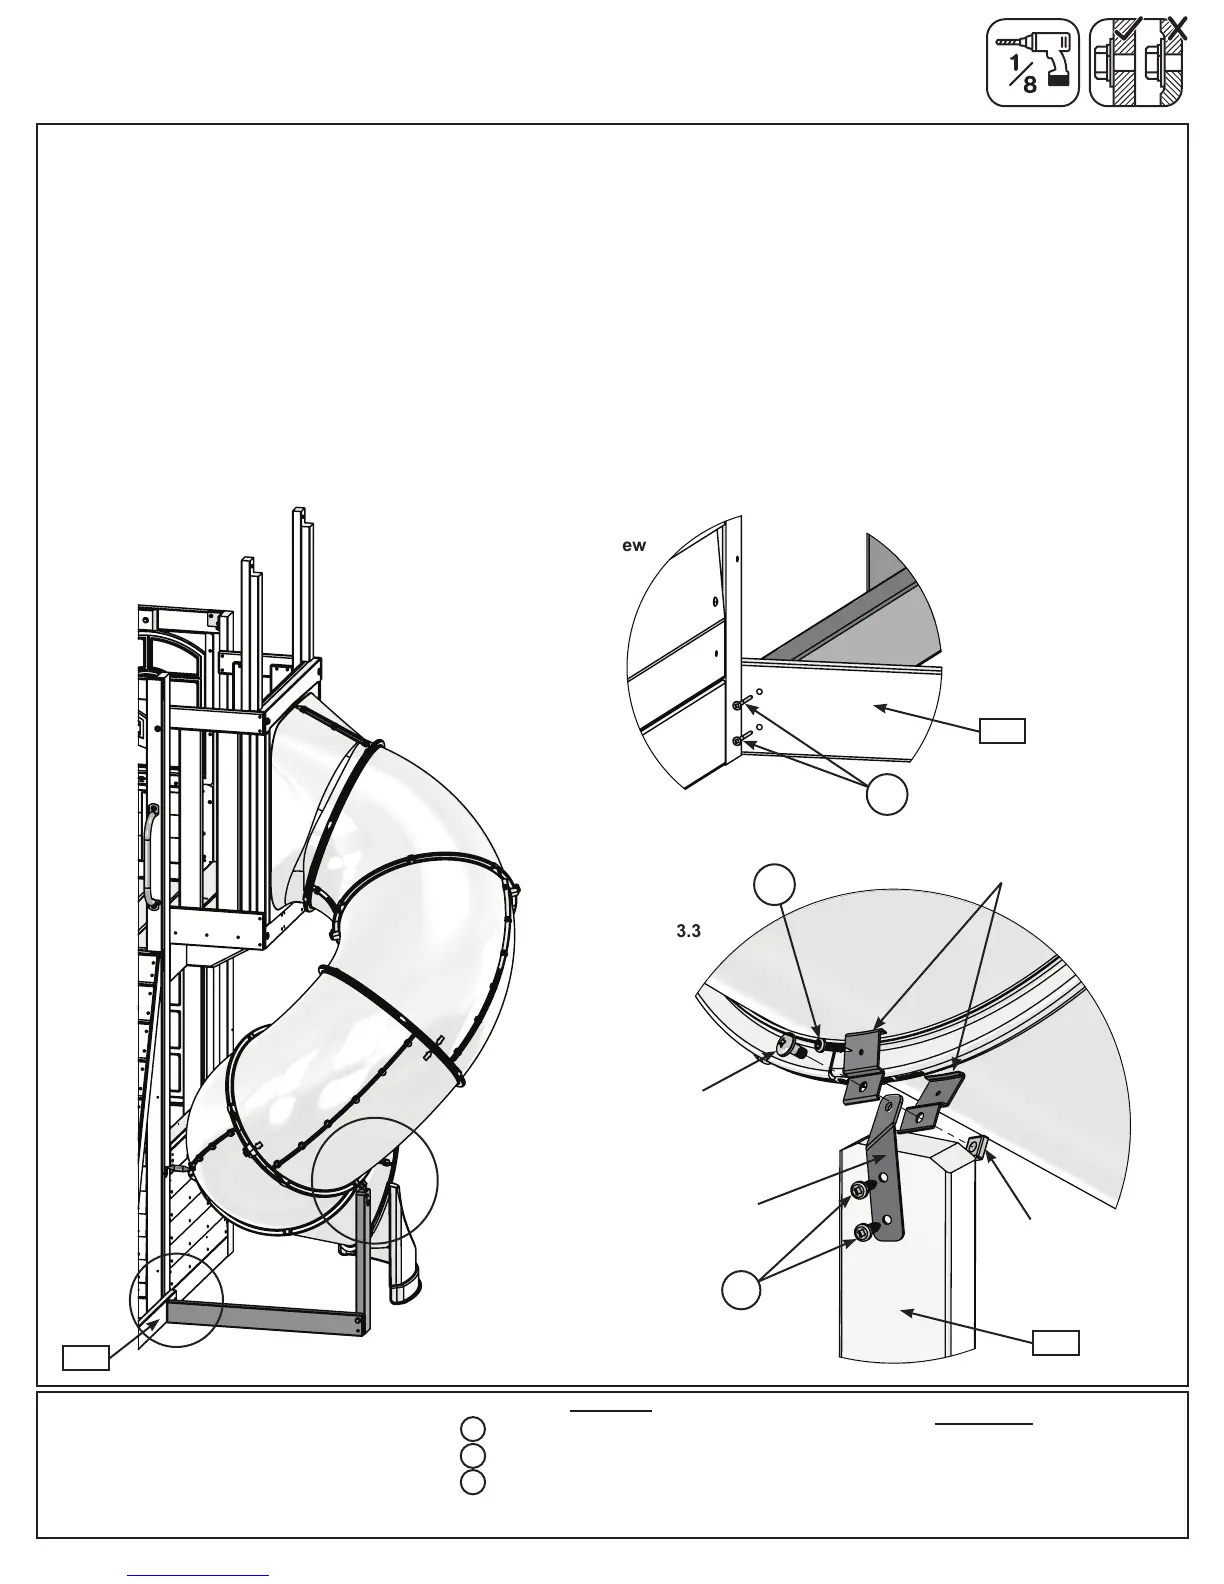
Step 33: Attach Elbow Assemblies and TNR4 Slide
Hardware
2 x #12 x 1” Pan Screw
2 x #8 x 3” Wood Screw
1 x #7 x 5/8” Pan Screw
Other Parts
1 x TNR4 Post Mount
1 x 1/4 x 14.5 mm Pan Head Bolt
1 x Square Lock Nut
A: Place TNR Brace centered over pilot holes of (100) AL-RW Ground Brace. Attach with 2 (S4) #8 x 3” Wood
Screws. (g. 33.1 and 33.2)
B: Place 1 TNR4 Post Mount Clamp on either side of the Clamp Ring so that the bent tops clip in behind the
Clamp Ring. (g. 33.3)
C: Insert the TNR4 Post Mount Base in between the 2 TNR4 Post Mount Clamps and bolt all pieces together
using one ¼ x 14.5mm Pan Head Bolt and Square Lock Nut. (g. 33.3)
D: Attach TNR4 Post Mount Base to (321) TNR Upright, pre-drill with a 1/8” drill bit then attach with 2 (S6) #12 x
1” Pan Screws. (g. 33.3)
E: Attach the Post Mount Clamp to the clamp ring using 1 (S37) #7 x 5/8” Pan Screw. (g. 33.3)
Fig. 33.1
Fig. 33.2
Inside View
Fig. 33.3
S6
S4
S37
100
100
100
TNR4 Post
Mount Base
TNR4 Post
Mount Clamp
S37
S4
Square
Lock
Nut
S6
321
¼ x 14.5mm
Pan Head Bolt
78 europecustomerservice@kidkraft.com