Fig. 39.1
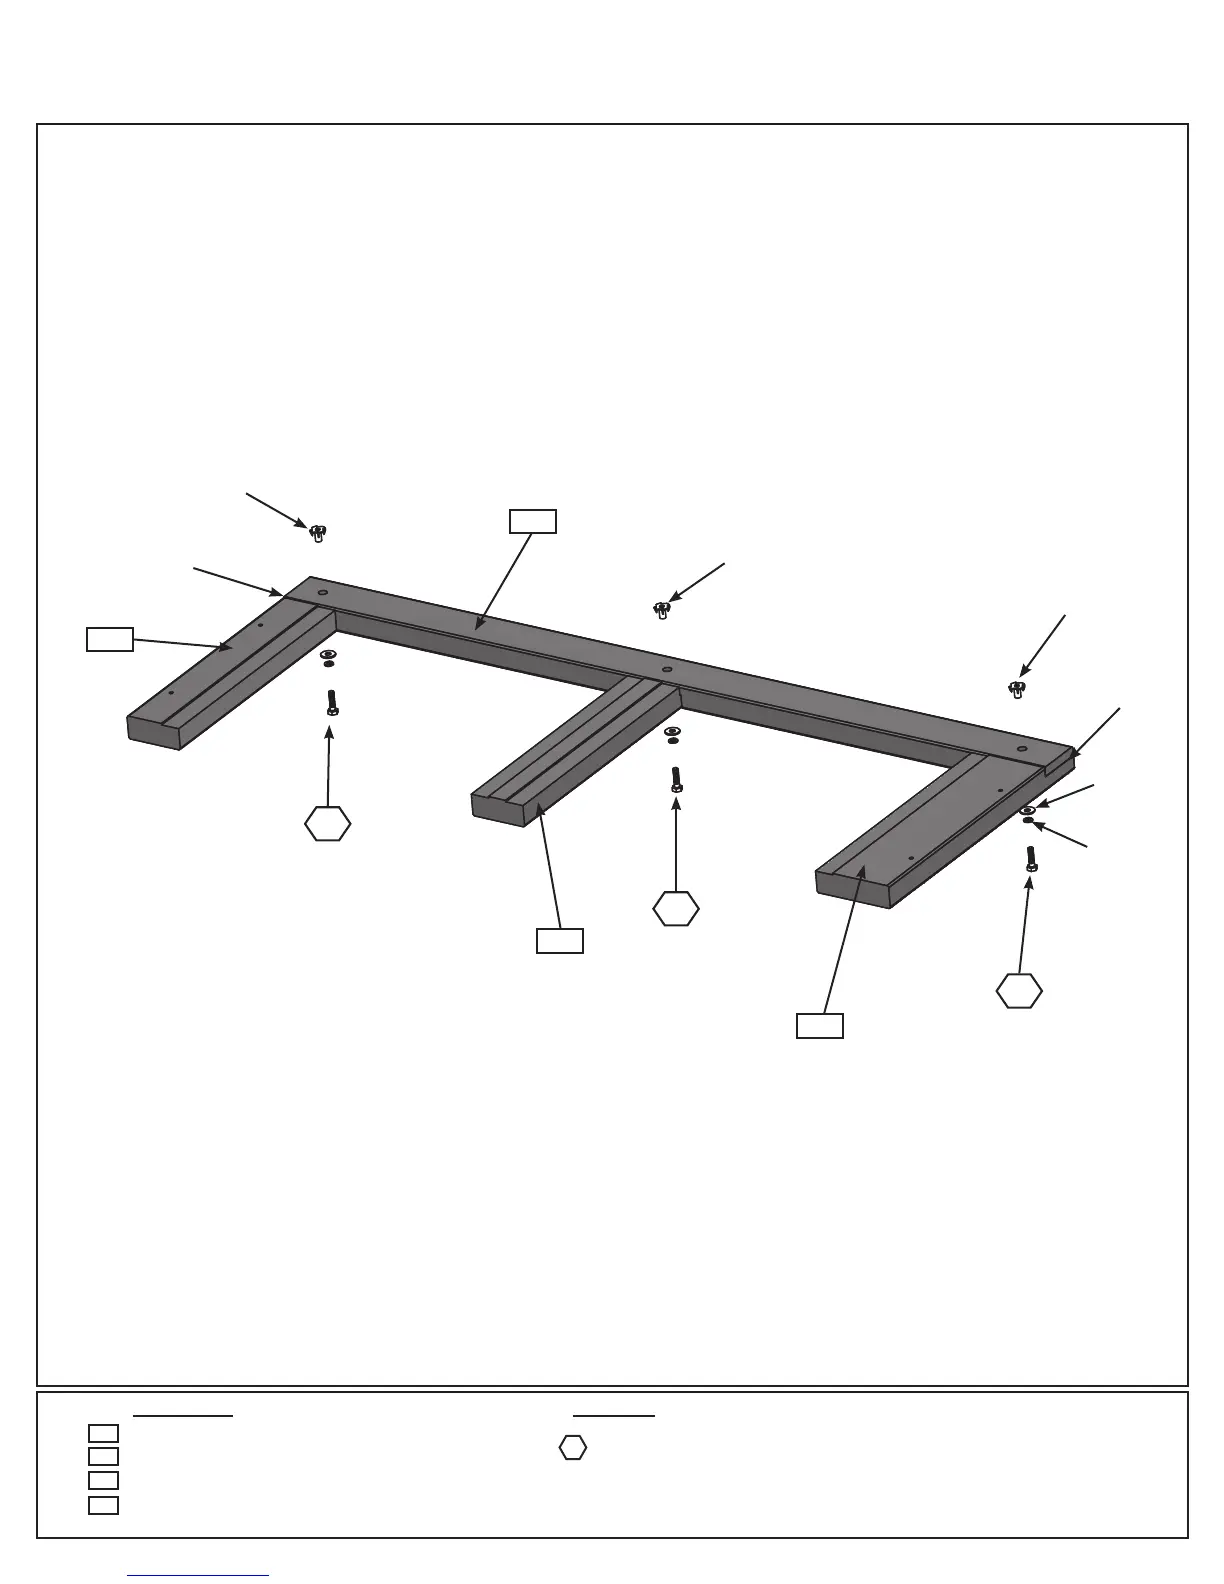
Step 39: Transom Assembly
Part 1
Flush
Wood Parts
2 x TB Support 1-1/4 x 2-1/2 x 44-1/4”
2 x Right Upright 1-1/4 x 3 x 16-1/2”
2 x Left Upright 1-1/4 x 4-1/4 x 16-1/2”
2 x Centre Upright 1-1/4 x 3 x 16-1/2”
390
Hardware
6 x 1/4 x 1-1/4” Hex Bolt
(1/4”lockwasher,1/4”atwasher,1/4”t-nut)
A: With the notches facing down tap 3 1/4” T-nuts into (390) TB Support then t (392) Left Upright, (391) Right
Upright and (393) Centre Upright into the notches so the ends and tops are ush. Attach with 3 (H9) 1/4 x 1-1/4”
Hex Bolts (with lock washer and at washer). (g.39.1)
393
391
390
H9
H9
392
393
1/4” T-Nut
1/4” Flat
Washer
1/4” T-Nut
1/4” Lock
Washer
1/4” T-Nut
H9
H9
391
392
Flush
86 europecustomerservice@kidkraft.com