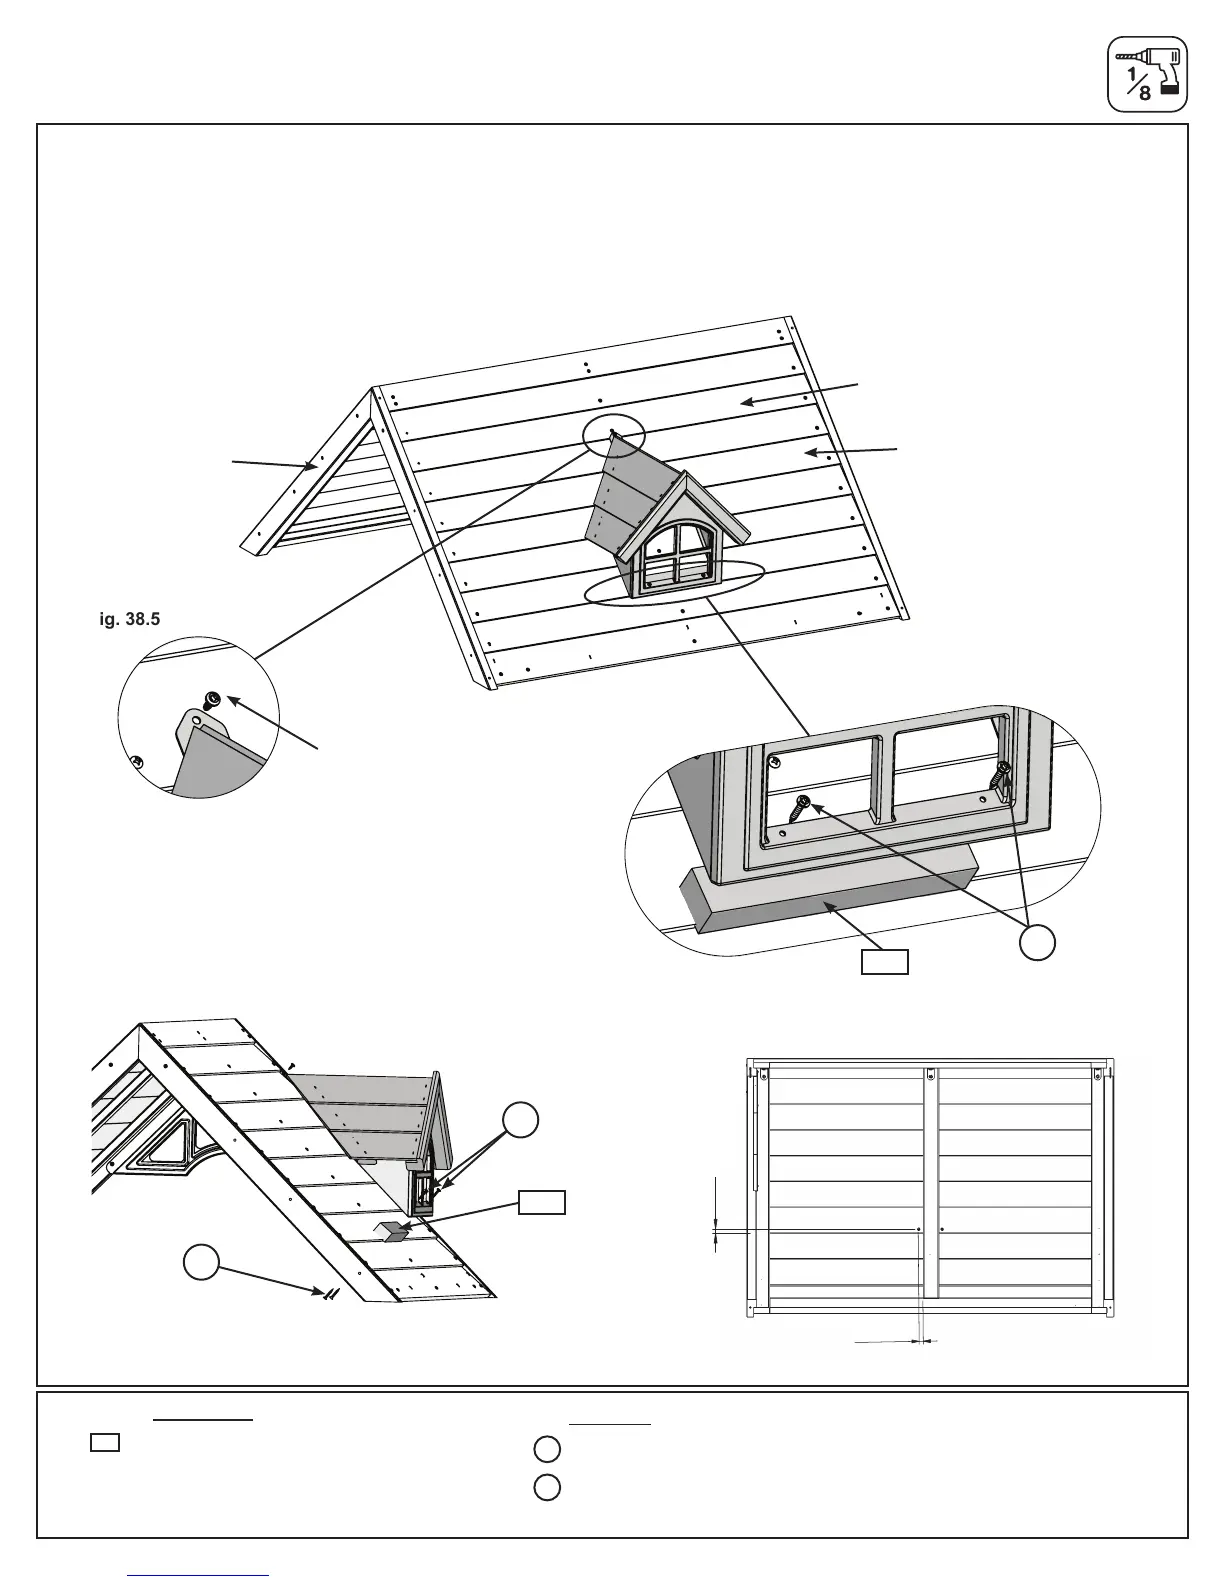
D: On the front of the Roof Assembly, on the third slat from the bottom, place (382) Window Dormer Cleat
so that it’s centered. Pre-drill using a 1/8” drill bit then attach Window Dormer Cleat to Roof Assembly from
underneath the assembly with 2 (S0) #8 x 7/8” Truss Screws. (Fig. 38.4, 38.6, 38.7 and 38.8)
E: On the 8th slat remove the middle screw and set aside. Place Dormer Assembly over the (382) Dormer
Cleat and attach window to Cleat using 2 (S37) #7 x 5/8” Pan Screws. Secure the Dormer Bracket to the roof
using the screw that was previously removed. (Fig. 38.4, 38.5, 38.6 and 38.7)
Step 38: Gable Dormer Assembly
Part 2
Wood Parts
1 x Window Dormer Cleat-5/4 x 2 x 8”
Hardware
2 x #8 x 7/8” Truss Screws
2 x #7 x 5/8” Pan Screws
S0
S37
the 8th slat
Front Roof Panel
Back Roof Panel
S37
S37
Fig. 38.5
remove the
middle screw
and set aside
382
1
9
.1
0
12.70
x 2
S0
Fig. 38.7
Fig. 38.8
Fig. 38.4
Fig. 38.6
382
382
1-1/4”
1-1/4”
85 europecustomerservice@kidkraft.com