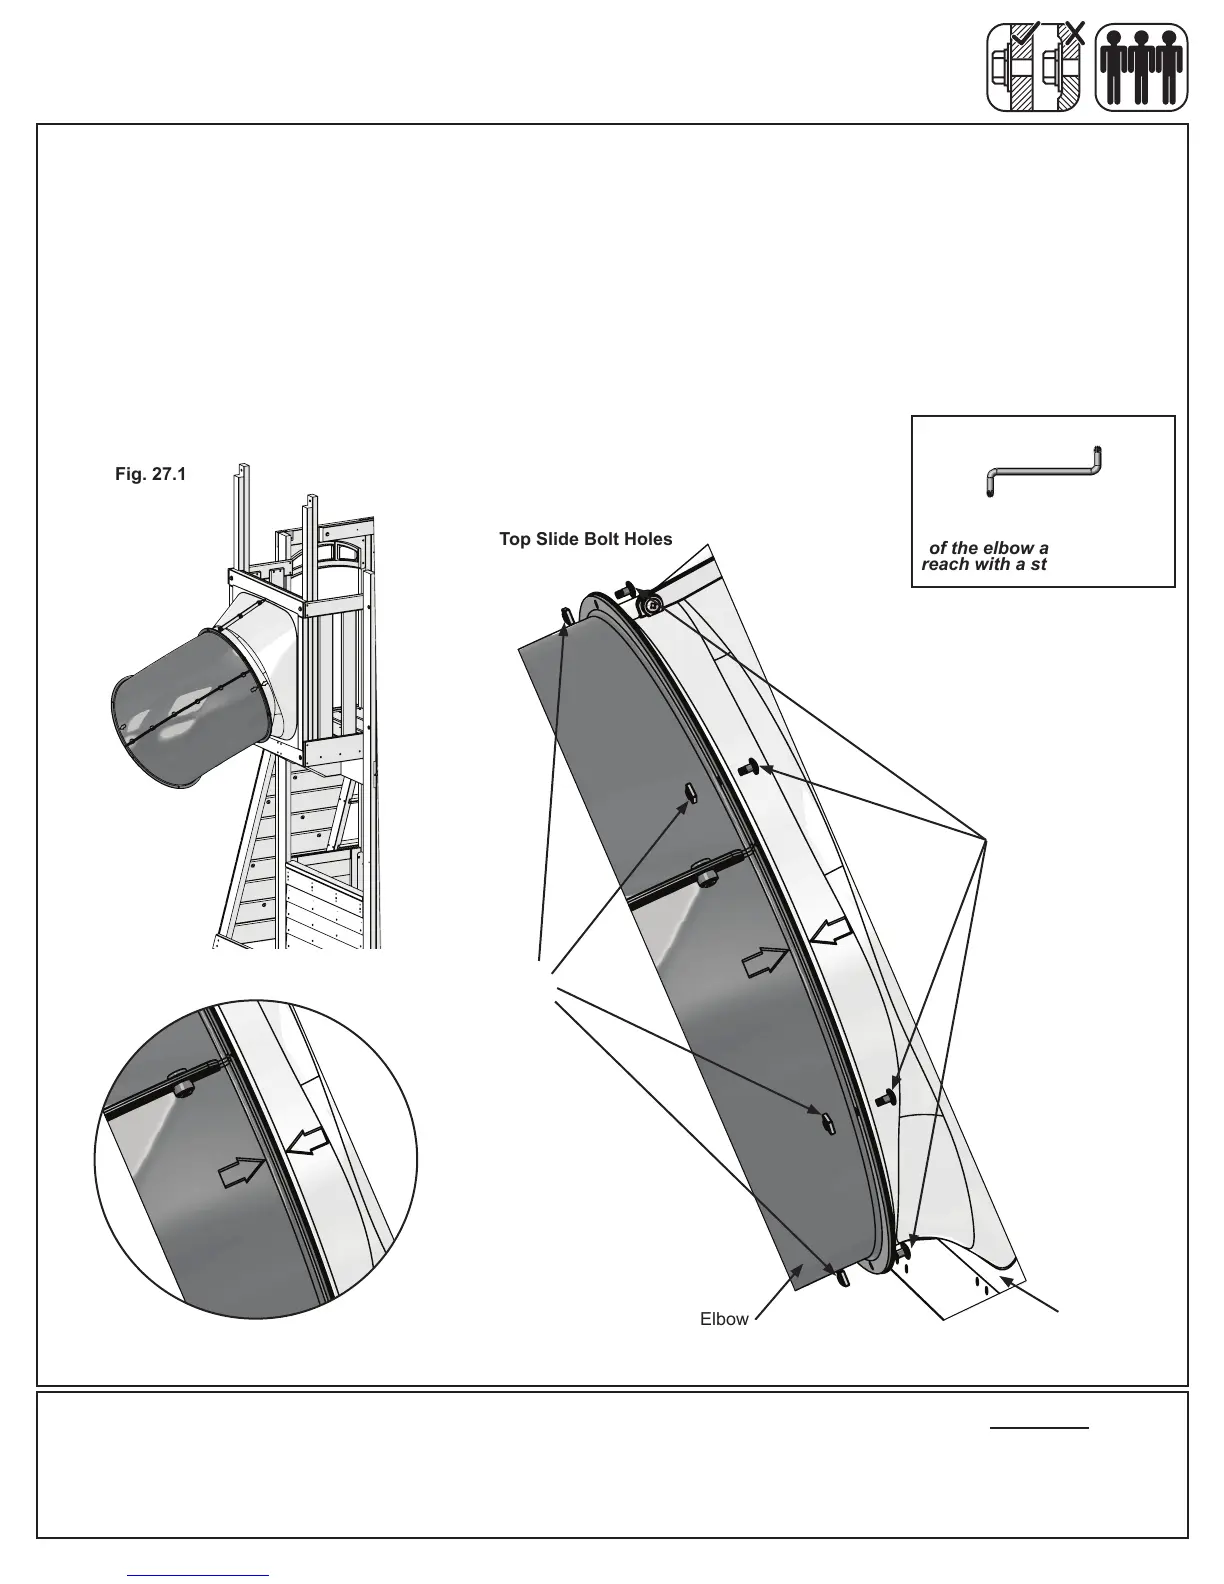
Step 27: Attach Elbow Assembly to Flange Assembly
Other Parts
1 x Quadrex Driver
24 x 1/4 x 12.7mm Pan Bolt
24 x 1/4” Square Lock Nut
Fig. 27.3
Align each elbow using the
molded arrows.
Fig. 27.2
Top Slide Bolt Holes
Elbow
Assembly
Fig. 27.1
Quadrex Driver
Use special driver provided
in locations where the curve
of the elbow are difcult to
reach with a standard driver.
Note: Keep all bolts loose until further step.
A: Fit one of the Elbow Assemblies to the Flange Assembly by lining up the arrows on each assembly. Attach
Elbow Assembly to Flange Assembly using 6 ¼ x 12.7mm Pan Bolts and Square Lock Nut. (g. 27.1, 27.2 and
27.3)
B: Attach one of the Elbow assemblies to another Elbow Assembly making sure to line up the arrows on each
assembly. Attach 6 ¼ x 12.7mm Pan Bolts with Square Lock Nut. Repeat this instruction for 2 more. (g. 27.2
and 27.3)
Use Quadrex Driver as a guide pin for each hole before inserting bolt.
Flange
Assembly
Square
Lock Nut
¼ x 12.7mm
Pan Bolt
72 europecustomerservice@kidkraft.com