Step 44: Attach Mid Top
Part 2
C: Place (441) Porch Top onto the (243) Porch Support so that the holes in Porch Top align with the holes in
(241) Porch Post. Attach using 2 (H3) 1/4 x 2-1/2” Hex Bolts( with at washer, lock washer and t-nut). (g. 44.5
and 44.6)
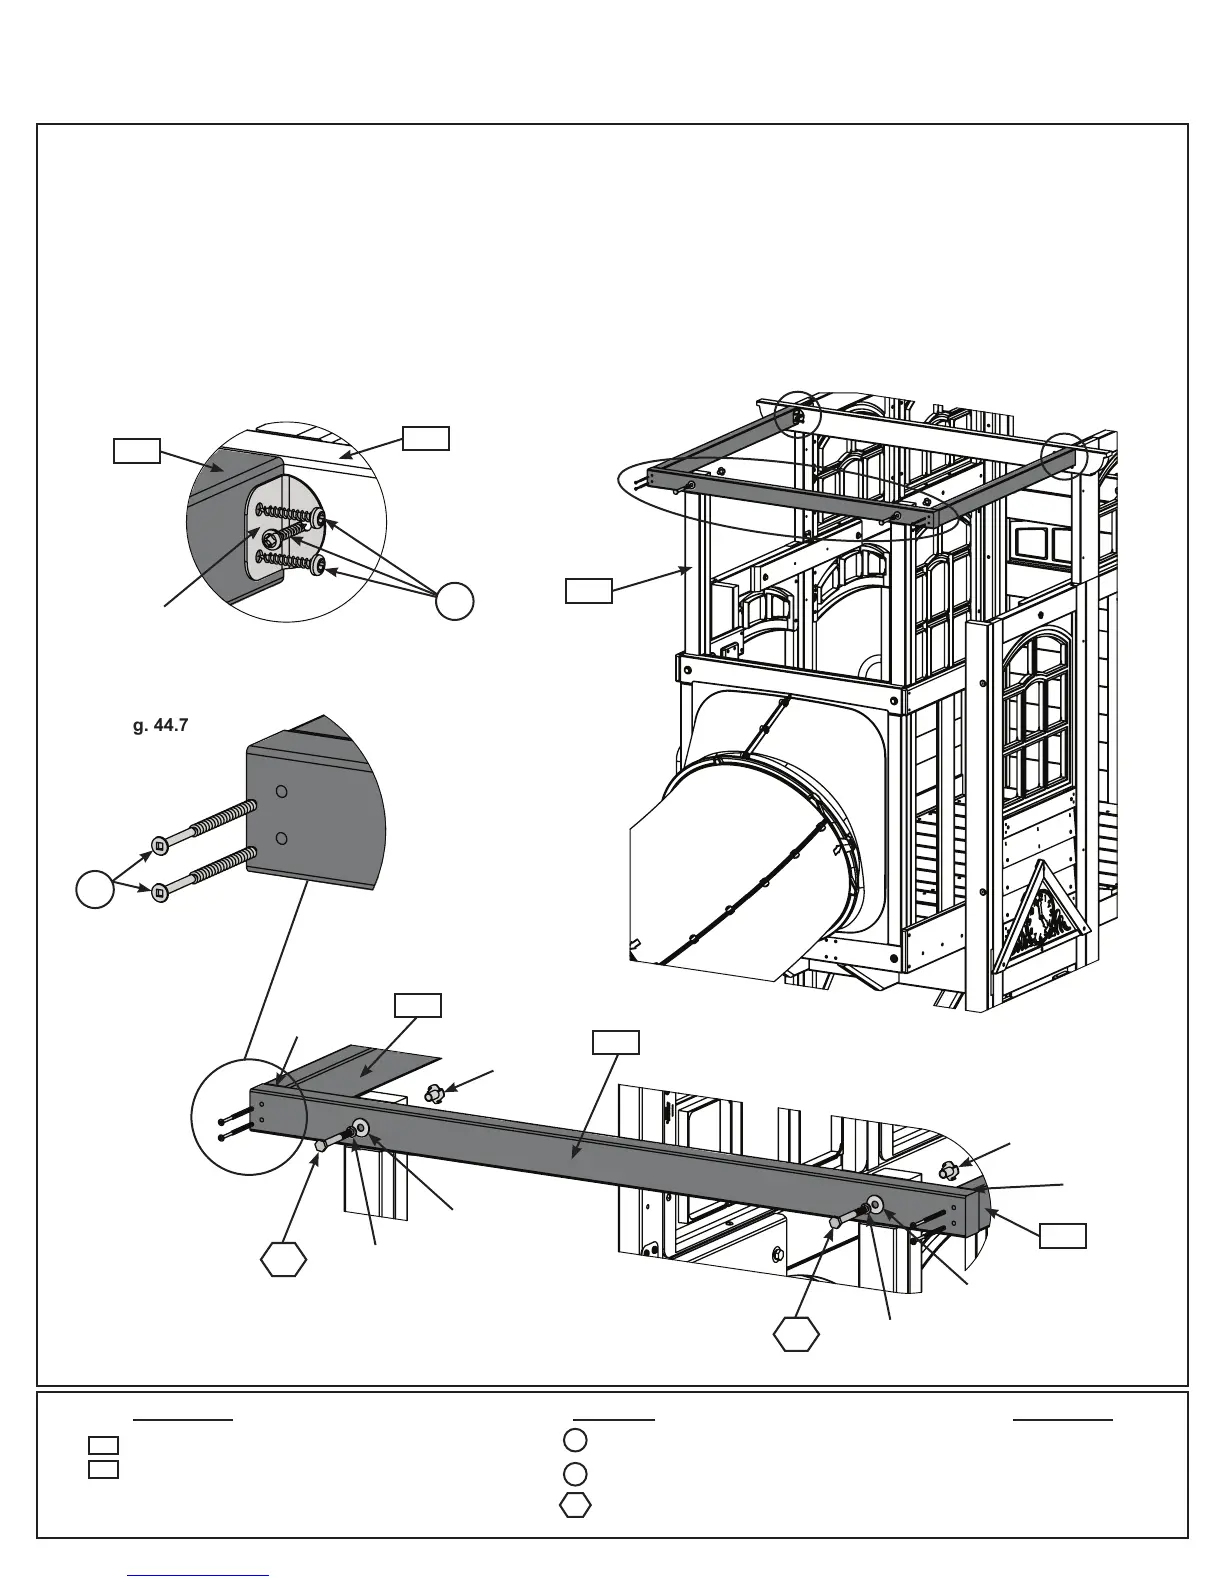
D: Flush to the (441) Porch Top attach (442) Porch Side using 2 (S4) #8 x 3” Wood Screws per side. From the
inside, attach the other end of (424) Porch side to (440) Mid Top using 2 Corner Brackets with 4 (SO) #8 x 7/8”
Truss Screws per bracket. (g. 44.5, 44.6, 44.7 and 44.8)
Fig. 44.5
Fig. 44.6
Fig. 44.7
Fig. 44.8
Wood Parts Wood Parts
1 x Porch Top 1-1/4 x 2 x 38-1/4”
2 x Porch Side 1-1/4 x 2 x 31-35/64”
2 x Corner Bracket
Hardware
6 x #8 x 7/8” Truss Screw
4 x #8 x 3” Wood Screw
2 x 1/4 x 2-1/2” Hex Bolt
441
442
S0
S4
Flush
Flush
A
B
C
D
if this is too
busy
break into 2
steps
A
B
C
D
if this is too
busy
break into 2
steps
A
B
C
D
if this is too
busy
break into 2
steps
A
B
C
D
if this is too
busy
break into 2
steps
442
440
442
442
S0
S4
Corner
Bracket
1/4” Flat
Washer
1/4” Flat
Washer
1/4” Lock
Washer
1/4” Lock
Washer
1/4”
T-Nut
1/4”
T-Nut
H3
H3
H3
441
243
94 europecustomerservice@kidkraft.com
(1/4”atwasher,1/4”lockwasher,1/4”t-nut)