3-49
Catalyst 3750 Switch Hardware Installation Guide
78-15136-03
Chapter 3 Switch Installation
Installing and Removing XENPAK Modules
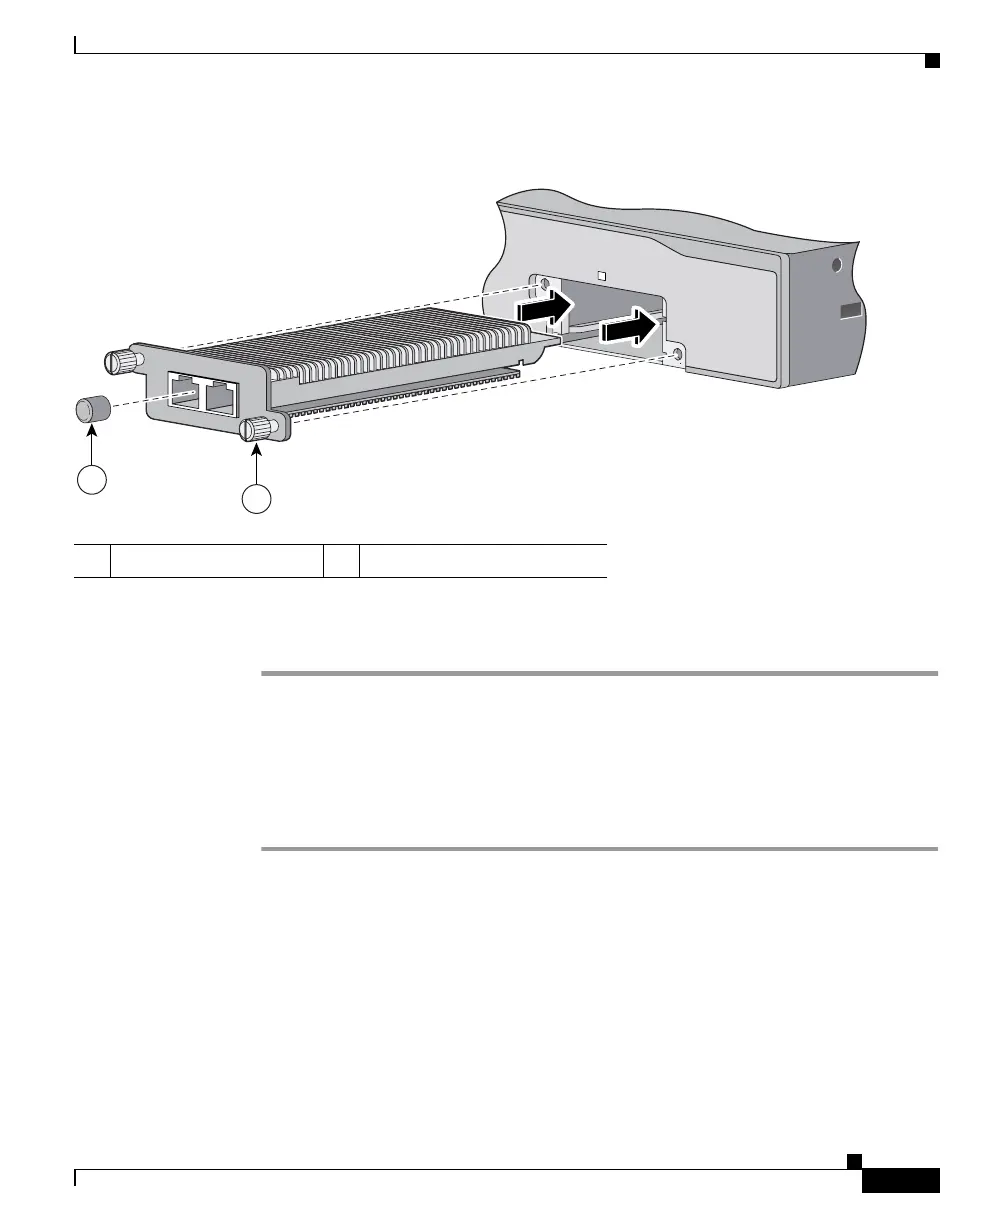
Figure 3-42 Installing a XENPAK Module in the Catalyst 3750G-16TD Switch
Step 6 Secure the XENPAK module in place by tightening the two captive installation
screws. Do not overtighten the captive screws.
Removing a XENPAK Module
To remove a XENPAK module, follow these steps:
Step 1 Attach an ESD-preventive wrist strap to your wrist and to a bare metal surface on
the chassis.
Step 2 Disconnect the cable from the XENPAK module. For fiber-optic modules, install
the optical bore dust plugs.
Step 3 Loosen the two captive installation screws that secure the XENPAK module in the
slot.
Step 4 Carefully pull on the two captive installation screws to disconnect the XENPAK
module from the slot.
1 Optical bore dust plug 2 Captive installation screw
Catalyst 3750
series
104573
2
1
TX
RX
1