Form No. 56043161 - Clean Track
®
L24 - 33
16. Remove the cotter hair pins and ring pins that attach the scrub deck to the machine chassis linkage arms, then
rotate the arms out of the way.
17. Carefully slide the deck toward the front of the machine. Note that you may need to loosen the fasteners holding
the two Pivot Links together to free the deck weldment from the Pivot Links. Pull the deck forward away from the
machine to complete the removal.
18. To reinstall the scrub deck, follow the above steps in reverse order.
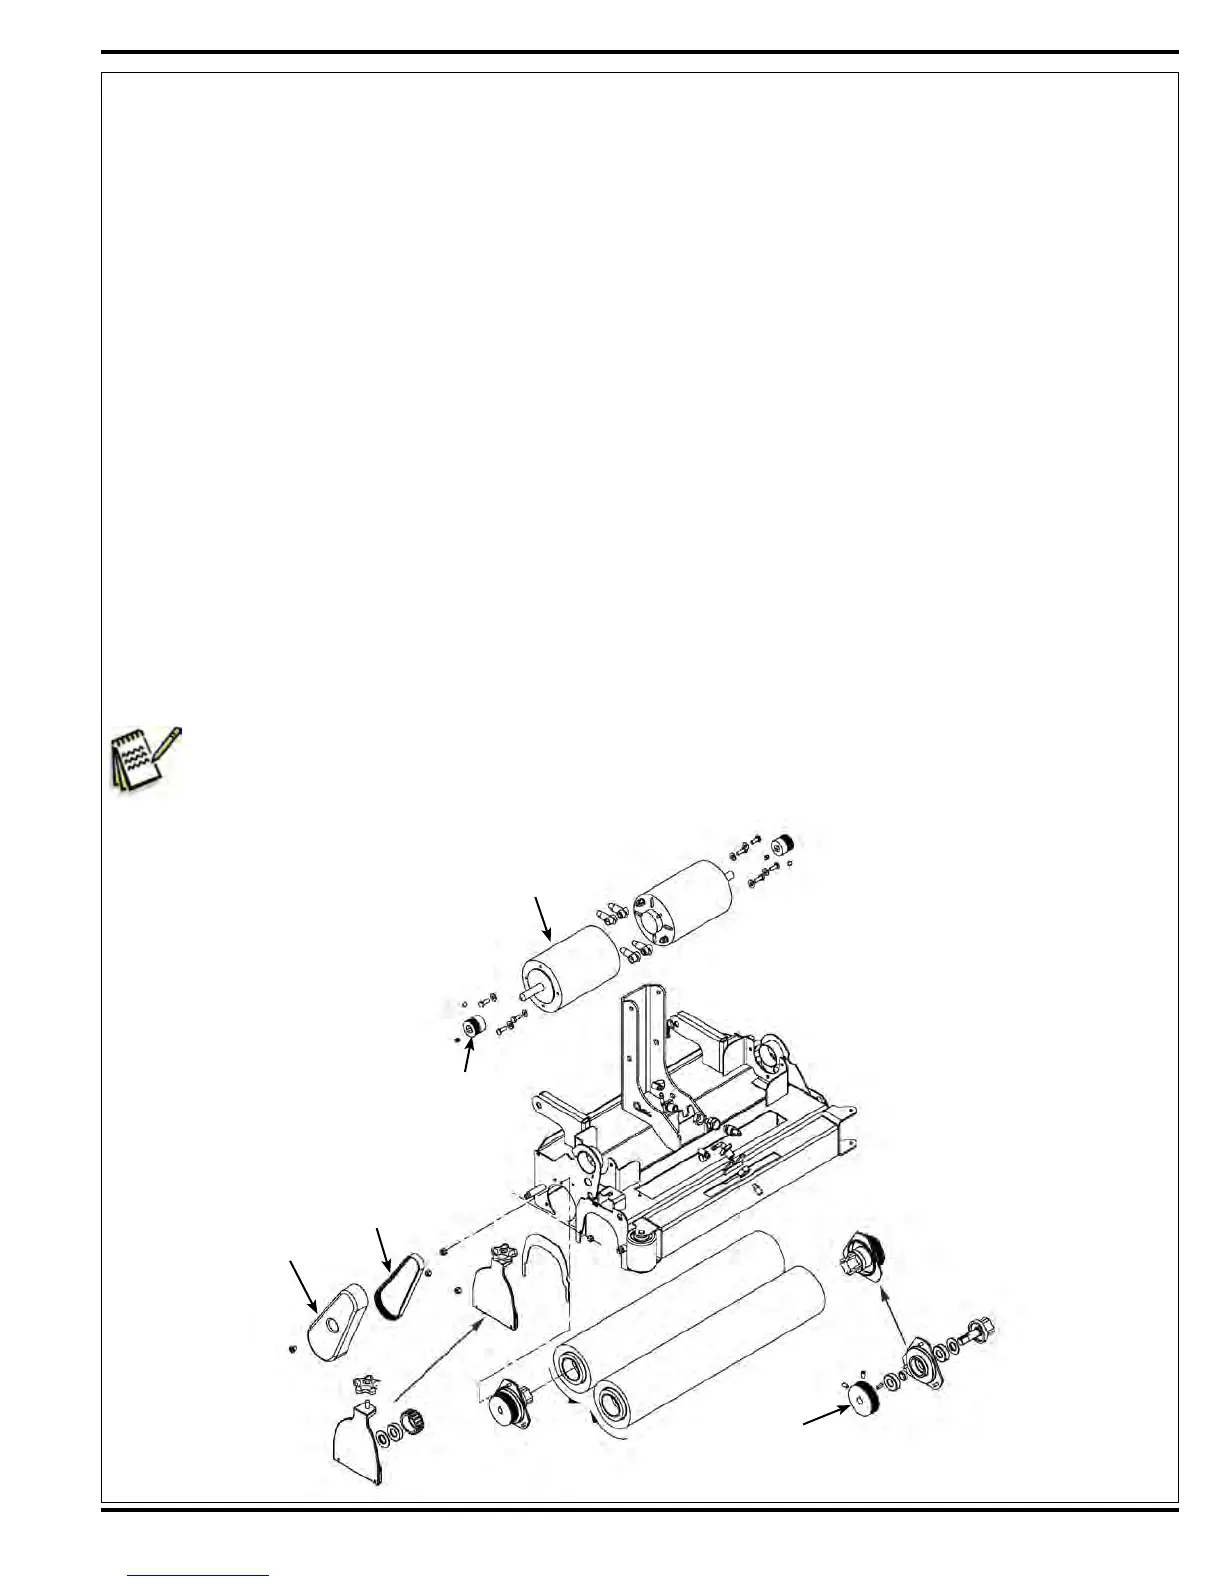
Scrub Brush Motor Removal
1. See Figure 7. Remove the Belt Cover(s) held in place by one screw.
2. Disconnect the Motor electrical connectors.
3. Remove the three screws and slide the Motor out. Note that the Belt can be removed at this time.
4. Reassemble in reverse order. Note that the belts are self-tensioning and no adjustment is needed.
Scrub Brush Belt Replacement
1. See Figure 7. Remove the Belt Cover(s) held in place by one screw.
2. Carefully roll the Belt off of the top Motor Sheave.
3. Reinstall the belt by placing it on the top Motor Sheave and carefully roll it onto the lower Brush Sheave.
Note: Make sure the Belt grooves and Sheave grooves match up (are aligned).
Figure 7
Belt
Cover
Belt
Motor (2)
Motor
Sheave (2)
Brush
Sheave (2)
 Loading...