833-3577 CB-FALCON SYSTEM OPERATOR INTERFACE
750-241 49 65-0296—01
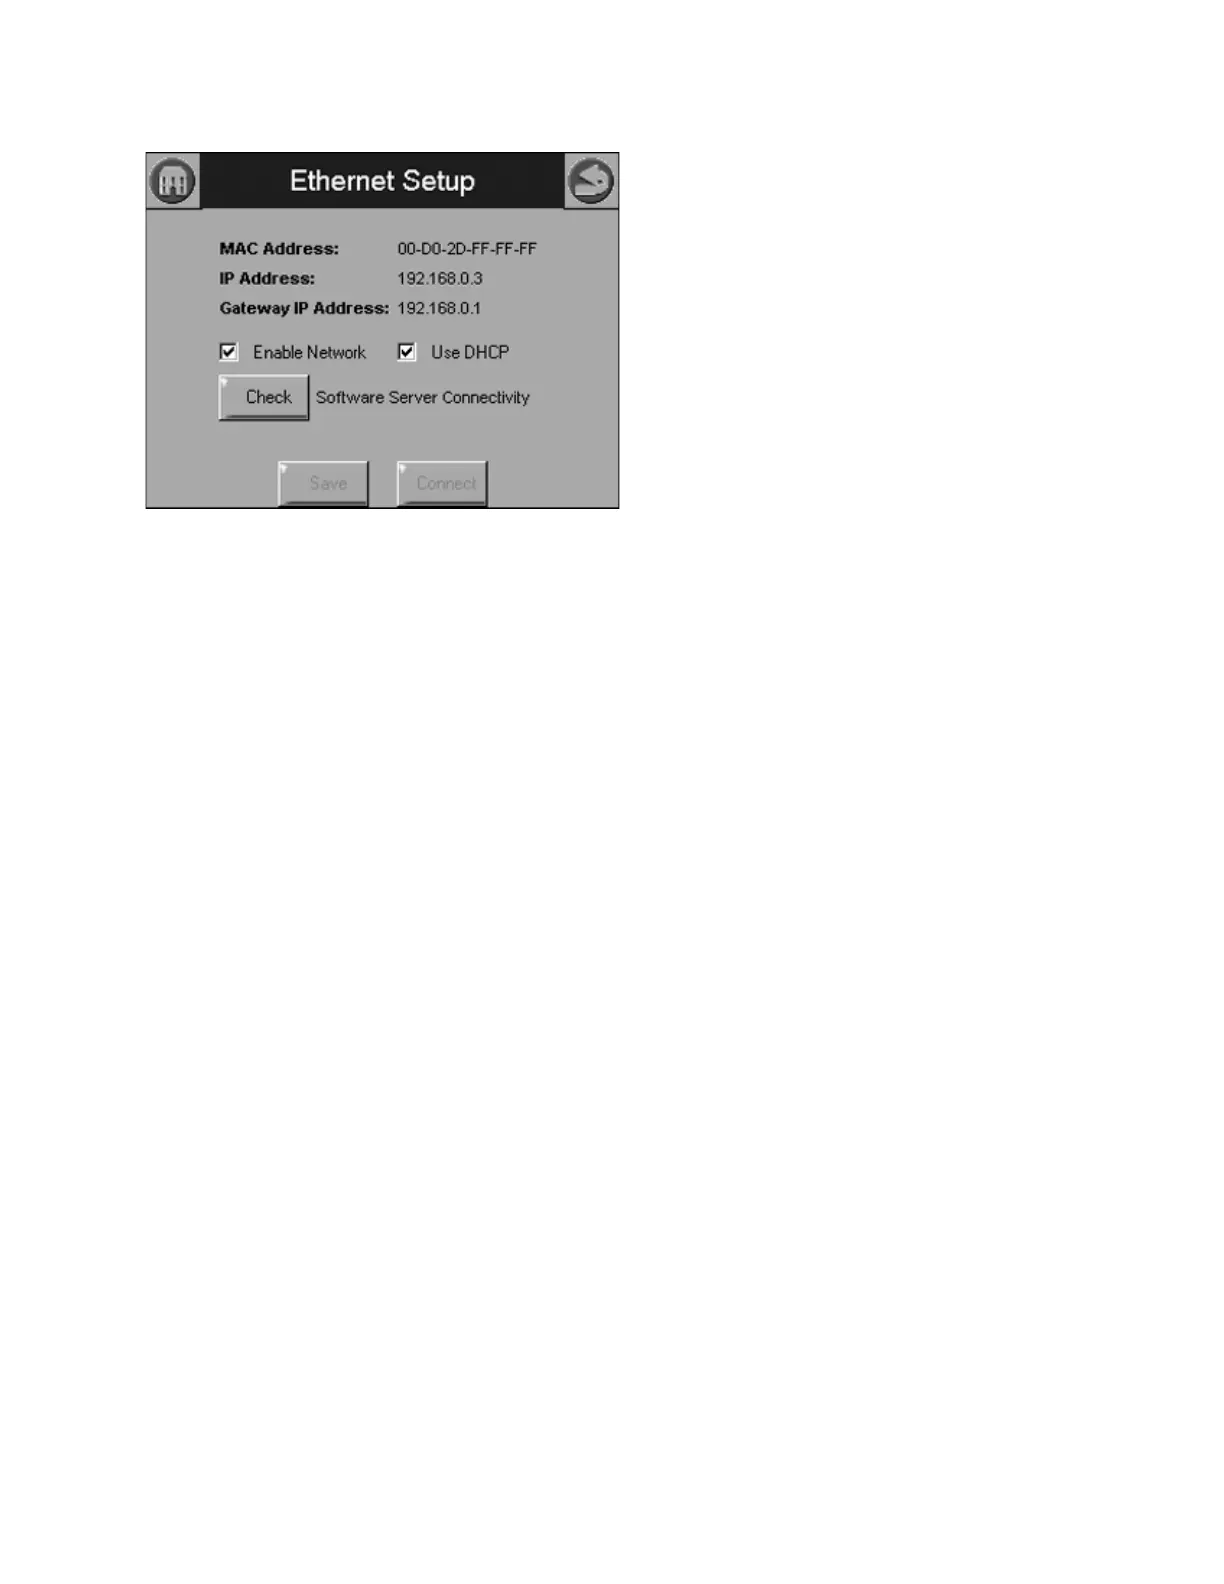
Fig. 112. Ethernet settings.
A software server connectivity check can be performed by
selecting the Check button. This button is only enabled when
the Ethernet interface is enabled and active. The connectivity
check tries for 15 seconds to connect to the software server.
Successful connection displays a “CONNECTED” message
on the screen. An unsuccessful attempt displays “NOT
CONNECTED.”
The MAC (Media Access Control) address is a hardware
address that uniquely identifies the 833-3577 on the network.
This information is likely only of interest to the network
administrator.
The IP (Internet Protocol) address is the address that the 833-
3577 has been assigned by the DHCP server in the local
network to use for others to access the 833-3577. This
address is necessary for the remote user to identify the 833-
3577 in an FTP (File Transfer Protocol) application for
transferring trend analysis information. Like the MAC address,
it is displayed for informational purposes for the network
administrator.
If the IP address has a private network designation
(192.x.x.x), remote access from outside the local network may
not be possible. Contact the network administrator for
assistance in this case. If the IP address is 255.255.255.255,
then no IP assignment has been made, and there is no
connection to the network. This possibility could be due to no
physical connection to an Ethernet network, or there is no
DHCP server present on the Ethernet network. Check with the
network administrator for assistance.
The Gateway IP address is displayed for informational
purposes for the network administrator. The gateway node
provides remote access for devices located off of the local
network to the 833-3577.
The Enable Network checkbox specifies that the Ethernet
interface is on or not when the 833-3577 is powered up. The
selection must be saved to permanent storage (flash) with the
Save button for it take effect at boot time. This checkbox
should normally be disabled, and enabled when Ethernet
access to the 833-3577 is necessary. This interface must also
be enabled for the Software Server Connectivity check to
function properly (the Check button). If the Ethernet interface
is disabled, the check procedure fails.
The 833-3577 must be assigned an IP address by a DHCP
server for it to operate on the local network, so the Use DHCP
box should be checked. However, because the 833-3577
requires this feature, it ignores the checkbox and always
regards it as checked. The checkbox is included for future
purposes when dynamic IP addressing isn’t required.
SOFTWARE UPGRADE
You can download new software for the 833-3577 through the
Internet. Downloading software should only be done when
recommended. This feature is intended to permit field
upgrades for software fixes and to install new features.
Requirements for downloading new software:
• Ethernet connection for Internet access (RJ45 male
connector). Carefully insert the RJ45 connector into the
Ethernet jack in the lower right corner on the back of the
display to ensure no damage to the jack.
• Dynamic IP addressing (from DHCP server).
IMPORTANT
If these requirements can’t be met at the location of
the 833-3577, this procedure should not be done or
the 833-3577 should be moved to a location where
these requirements can be met. Failure to satisfy
these requirements can result in the 833-3577
becoming inoperable when the upgrade steps are
followed.
The above requirements should be checked prior to execution
of the software upgrade procedure on the Ethernet Setup
page. On the Ethernet Setup page a connectivity check
should be performed to validate whether access to the server
is possible.
The 833-3577 must be reset to initiate the download
procedure. Initial boot procedure of the device permits the
user to enter into Advanced Startup options within the first five
seconds after power-up.
Follow these steps:
1. Select the Advanced Startup Options button.
A Warning message is displayed. If you don’t want to
proceed with the software upgrade, you can cancel the
procedure at this time.
2. Select OK to proceed.
3. Select the “Force Application Update” checkbox.
4. Deselect the “Use Existing Application” checkbox.
5. Select the Continue button.
The software upgrade is automatic after the above
steps. The 833-3577 connects to the server, which veri-
fies the configuration file, erases the old application and
downloads the new one.
The 833-3577 may have difficulty finding the new con-
figuration file at first. In this case, the procedure
automatically starts over again until it works.