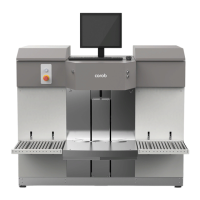
7-USING THE DISPENSER 7-3
COROB™ TATOCOLOR
After dispensing, you may remove the can from the shelf and proceed with the next dispensing
process.
7.3 Running COROB™ TATOCOLOR TA
The punch tool is a very sharp instrument. The can-holding plate is installed for safety
purposes as well. Never push the plate upward.
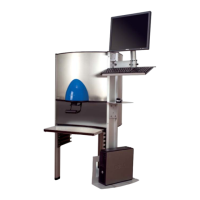
7.3.1 Positioning/loading cans
The machine is accessorized with a manual shelf allowing the cans or bins to be aligned with the
dispensing nozzles.
The manual shelf is fixed to the machine and can be raised or lowered so as to place cans of
different sizes under the dispensing nozzles.
The management computer checks for the can presence by means of a photocell located
underneath the nozzle center. Only when the can resting on the shelf is detected by the photocell
it will be possible to start dispensing.
1. Release the shelf by pulling the locking handle hidden beneath, raise or lower the shelf,
adjusting its height based on the size of the can to be used. Then release the handle to lock
the shelf in the desired position.
RISK OF CRUSHING
The shelf position must be such that it does not cause the can to interfere with the
opening movement of the automatic sliding cap, but must anyway ensure proper
engagement of the photocell.
2. Place the can on the shelf; the sliding Autocap opens automatically when the can is detected
by the photocell. The sliding Autocap closes automatically when the shelf is lowered and the
photocell disengaged or when the can is removed from the shelf.
3. After placing the can properly, proceed with manual punching (next chapter).
7.3.2 Punching the can lid
Remember to carry out manual punching BEFORE ordering the application program to
dispense the formula.
1. If illuminated, press and hold down the green enabling button
(1) and lower the punch
side lever (2) to make a hole in the can lid (Figure 7-4). If the green button is not
illuminated, it means that the can has not been correctly positioned (previous chapter).
2. Release the button and return the lever to its original position.
After punching, dispense the formula by entering the command in the application program (next
chapter).