5-INSTALLATION 5-5
COROB™ TATOCOLOR
Do not use an USB interface cable longer than 2 meters. USB not supported in Microsoft
Windows 95 or Microsoft Windows NT 4.0.
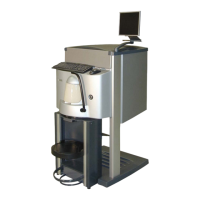
Figure 5-5
5. Load the management application program onto your computer.
– Press the computer and monitor start switches to turn them in ON position (I).
– Power up and start the machine as described in chapter 6.2.
– When the computer is booted up, install the application program (see the program user's
manual).
5.5.1 Installing the keyboard (only model TB, with sheet metal panels)
Insert the cable inside the dispensing head until it comes out from the rear and connect it to the
computer as follows:
1. Loosen the screws to remove the keyboard support panel.
2. Completely insert the keyboard cable into the hole provided.
3. Reassemble the keyboard support panel.
4. Loosen the screws to remove the rear panel of the dispensing head and pull the keyboard
cable.
5. Insert the cable in the slot provided in the rear panel and reassemble the panel.
5.5.2 Machine configuration through the management program
Use the CorobTECH configuration and calibration program at this point to configure the
machine, taking special care in associating colorants-canisters and in recording the
amount of colorant added to the canisters during installation (chapter 5.4) (see the program
user's manual).
5.6 Moistening the cap sponge
Installation now requires that you insert the sponge in the humidifier cap and moisten it for the
first time. The sponge is available among the material supplied.
The sponge serves to keep the dispensing nozzle center at a moisture level to prevent the
colorant from drying out.