EXPLANATORY NOTES ON THE MAINTENANCE ACTIVITIES
Inspection and adjustment 95XF series
3-58
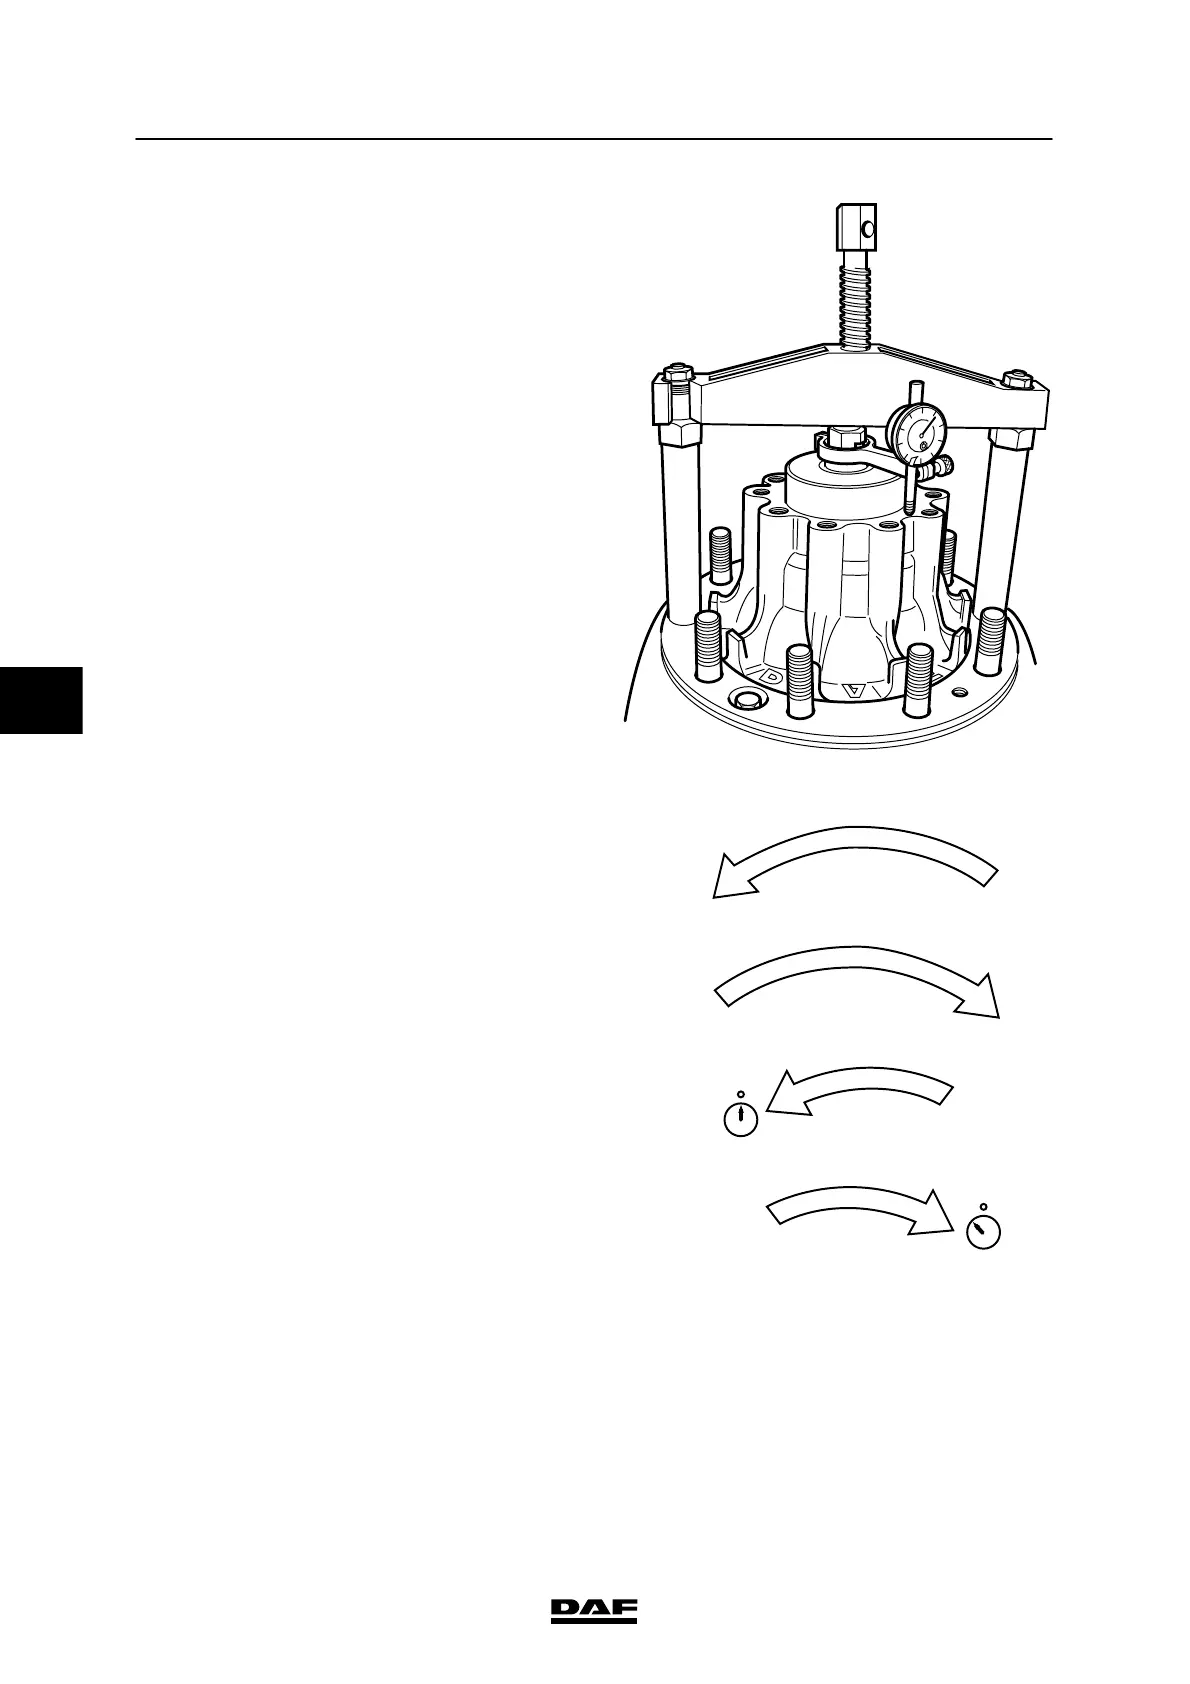
6. Fit the c entral nut (2) to the axle journal
using t he socket wrench (6).
7. Place the dial gauge in the dial gauge
holder (3) so that the stylus abuts the hub.
Make s ure that the stylus of the dial gauge
does not enter a t hreaded hole of the hub,
because t he stylus might break off when the
wheel is turned.
8. Position the bridge (5) on the extensions (1)
so that the end of the spindle fits into the
recess of the central nut (2). Tighten the
bridge with the nuts.
9. Place a torque wrench on the hexagon
head of the s pindle (4).
Press the hub firmly onto the axle journal by
screwing t he spindle in, until a tightening
torque of 40 Nm is reached.
A800149
10. Withdraw the hub by unscrewing the spindle
until a tightening torque of 40 Nm is
reached.
11. Press the hub on to the axle journal by
screwing t he spindle in until a tightening
torque of 15 Nm is reached, and set the dial
gauge to “O”.
12. Withdraw the hub by unscrewing the spindle
until a tightening torque of 15 Nm is
reached. Take the reading from the dial
gauge and compare this v alue with the
specified v alue, see “Technical data”.
If the reading falls outside the tolerance
range, the wheel bearing play should be
re-adjusted.
13. Remove t he special tool.
14. If the lock nut has been removed, the lock
plate s hould be replaced. Tighten the lock
nut to the specified tightening torque. See
“Technical data”.
40Nm
40Nm
15Nm
15Nm
(1)
(2)
(3)
(4)
A800150
5
200424