X64 Xcelera-CL PX4 User's Manual Installing X64 Xcelera-CL PX4 • 13
Installing X64 Xcelera-CL PX4 Hardware and
Driver
In a Windows 2000/XP/Vista System
• Turn the computer off and open the computer chassis to allow access to the expansion slot area.
• Install the X64 Xcelera-CL PX4 into a free PCI Express x4 expansion slot. The X64 Xcelera-CL
PX4 could also be installed in a PCI Express x8. Note that some computer's x16 slot may
support the X64 Xcelera-CL PX4. The user needs to test each computer to verify support of a x4
product.
• Close the computer chassis and turn the computer on. Driver installation requires administrator
rights for the current user of the computer.
• Windows will find the X64 Xcelera-CL PX4 and start its Found New Hardware Wizard. Click
on the Cancel button to close the Wizard.
• Insert the DALSA Sapera CD-ROM. If AUTORUN is enabled on your computer, the
installation menu is presented. Install the X64 Xcelera-CL PX4 driver.
• If AUTORUN is not enabled, use Windows Explorer and browse to the root directory of the
CD-ROM. Execute launch.exe to start the installation menu and install the X64 Xcelera-CL
PX4 driver.
• Reboot the computer when prompted. During the early stages of the Windows reboot, the X64
Xcelera-CL PX4 firmware loader application starts. This is described in detail in the following
section. Allow Windows to complete its reboot before proceeding.
• When using Windows 2000, if the Digital Signature Not Found message is displayed, click on
Yes to continue the X64 Xcelera-CL PX4 driver installation. Reboot the computer when
prompted.
• When using Windows XP, if a message stating that the X64 Xcelera-CL PX4 software has not
passed Windows Logo testing is displayed, click on Continue Anyway to finish the X64
Xcelera-CL PX4 driver installation. Reboot the computer when prompted.
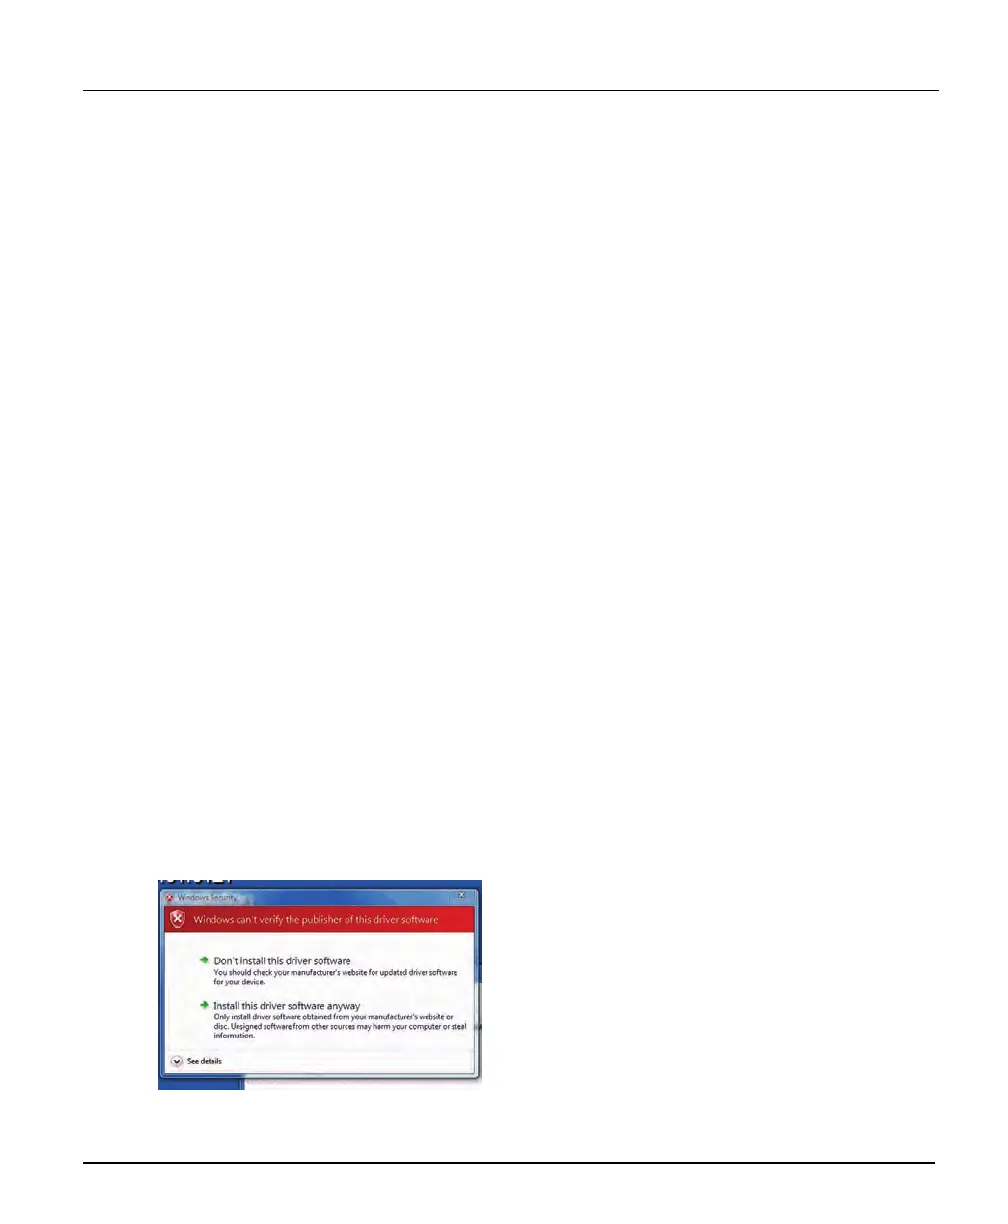
• When using Windows Vista, a message stating that Windows can not verify the publisher of the
driver software is displayed. Click on Install this driver software anyway.