Removing and Installing System Components | 211
skip to step 5; for 2U node, continue the steps.
3 Remove the interposer extender for 2U node. See “Removing the
Interposer Extender for 2U Node” on page 179.
4 Remove the interposer extender tray for 2U node. See “Removing the
Interposer Extender Tray” on page 182.
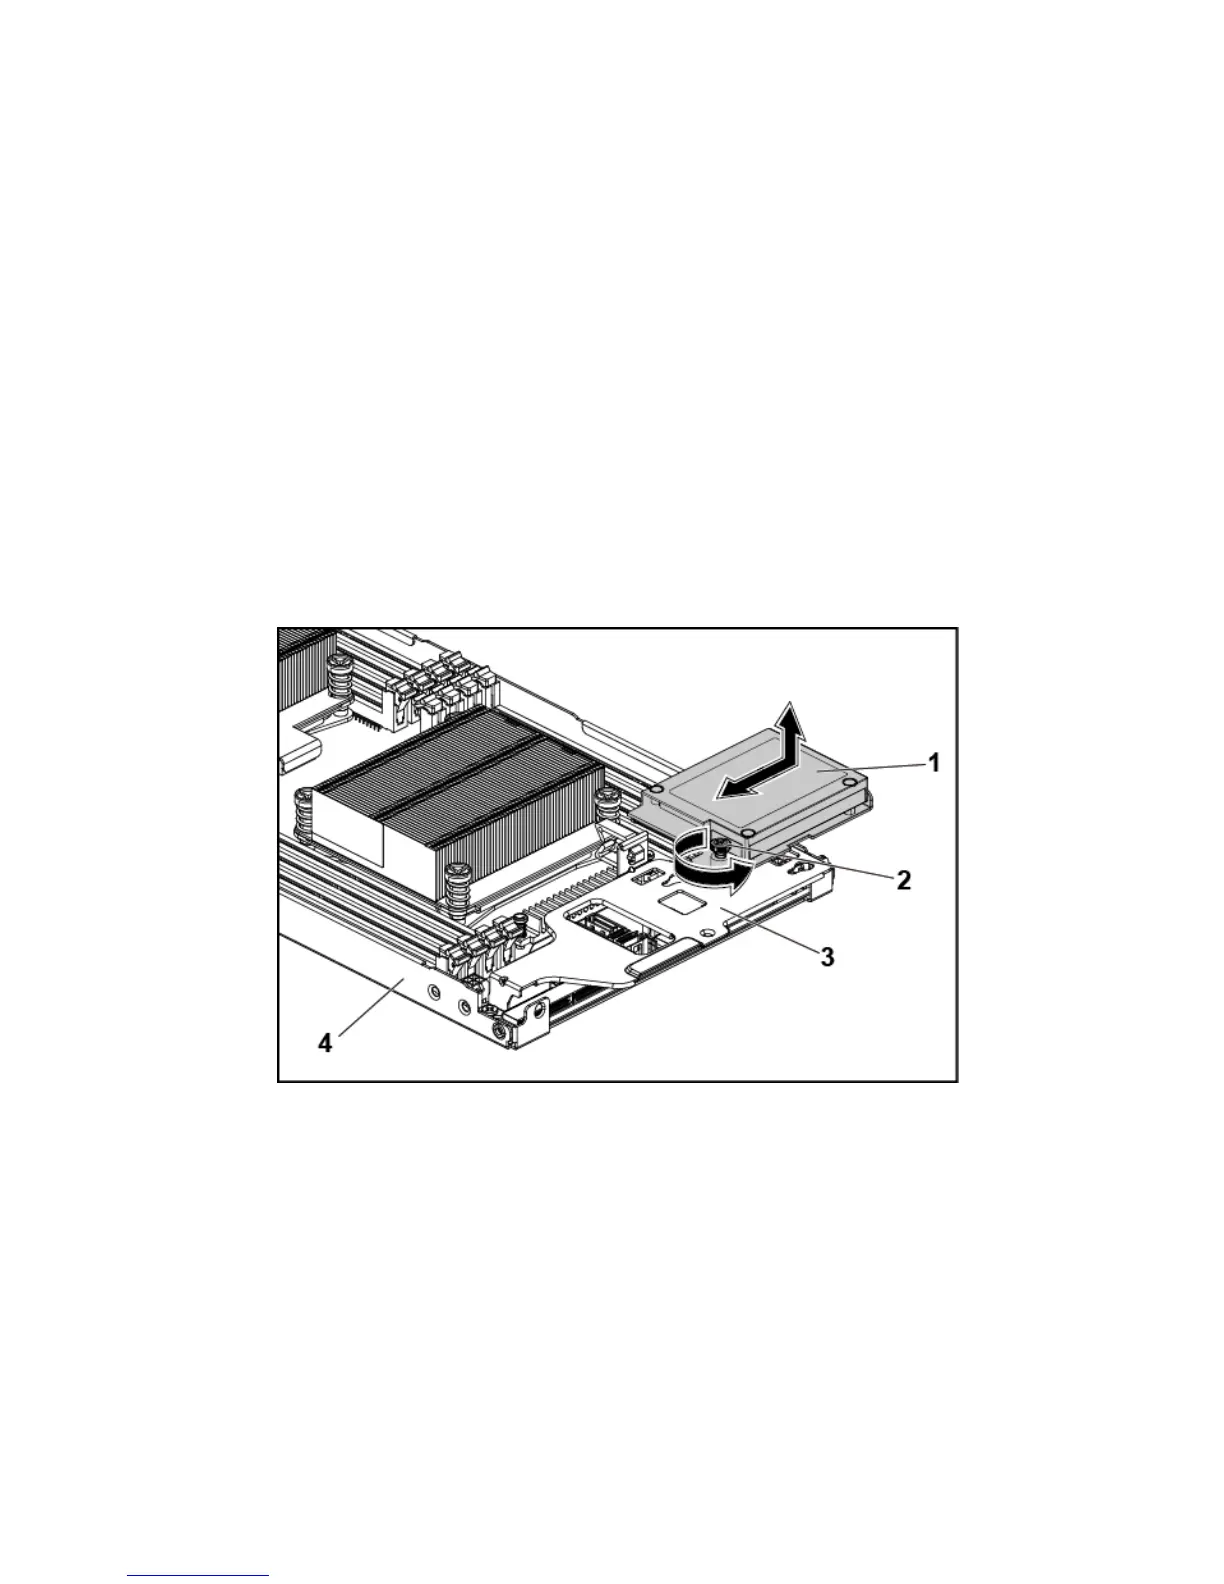
5 Disconnect the cable connecting to the LSI 9265-8i card.
6 Release the screw that secures the LSI9265-8i RAID battery assembly
to the LSI9265-8i RAID battery tray. See Figure 3-40.
7 Lift the LSI 9265-8i RAID battery assembly away from the LSI9265-8i
RAID battery tray. See Figure 3-40.

 Loading...


