Next steps
1. Replace the power distribution board.
Installing the power distribution board
Prerequisites
1. Follow the safety guidelines listed in the Safety instructions.
2. Follow the procedure listed in the Before working inside your system.
3. Remove the support bar.
4. Remove the air shroud top cover.
5. Remove the cooling fan cage assembly.
6. If required, Remove the air shroud.
7. Remove the expansion card risers or remove the full length expansion card riser.
NOTE: See cable routing section for more information.
8. Remove the riser air shroud.
9. Remove the PSU.
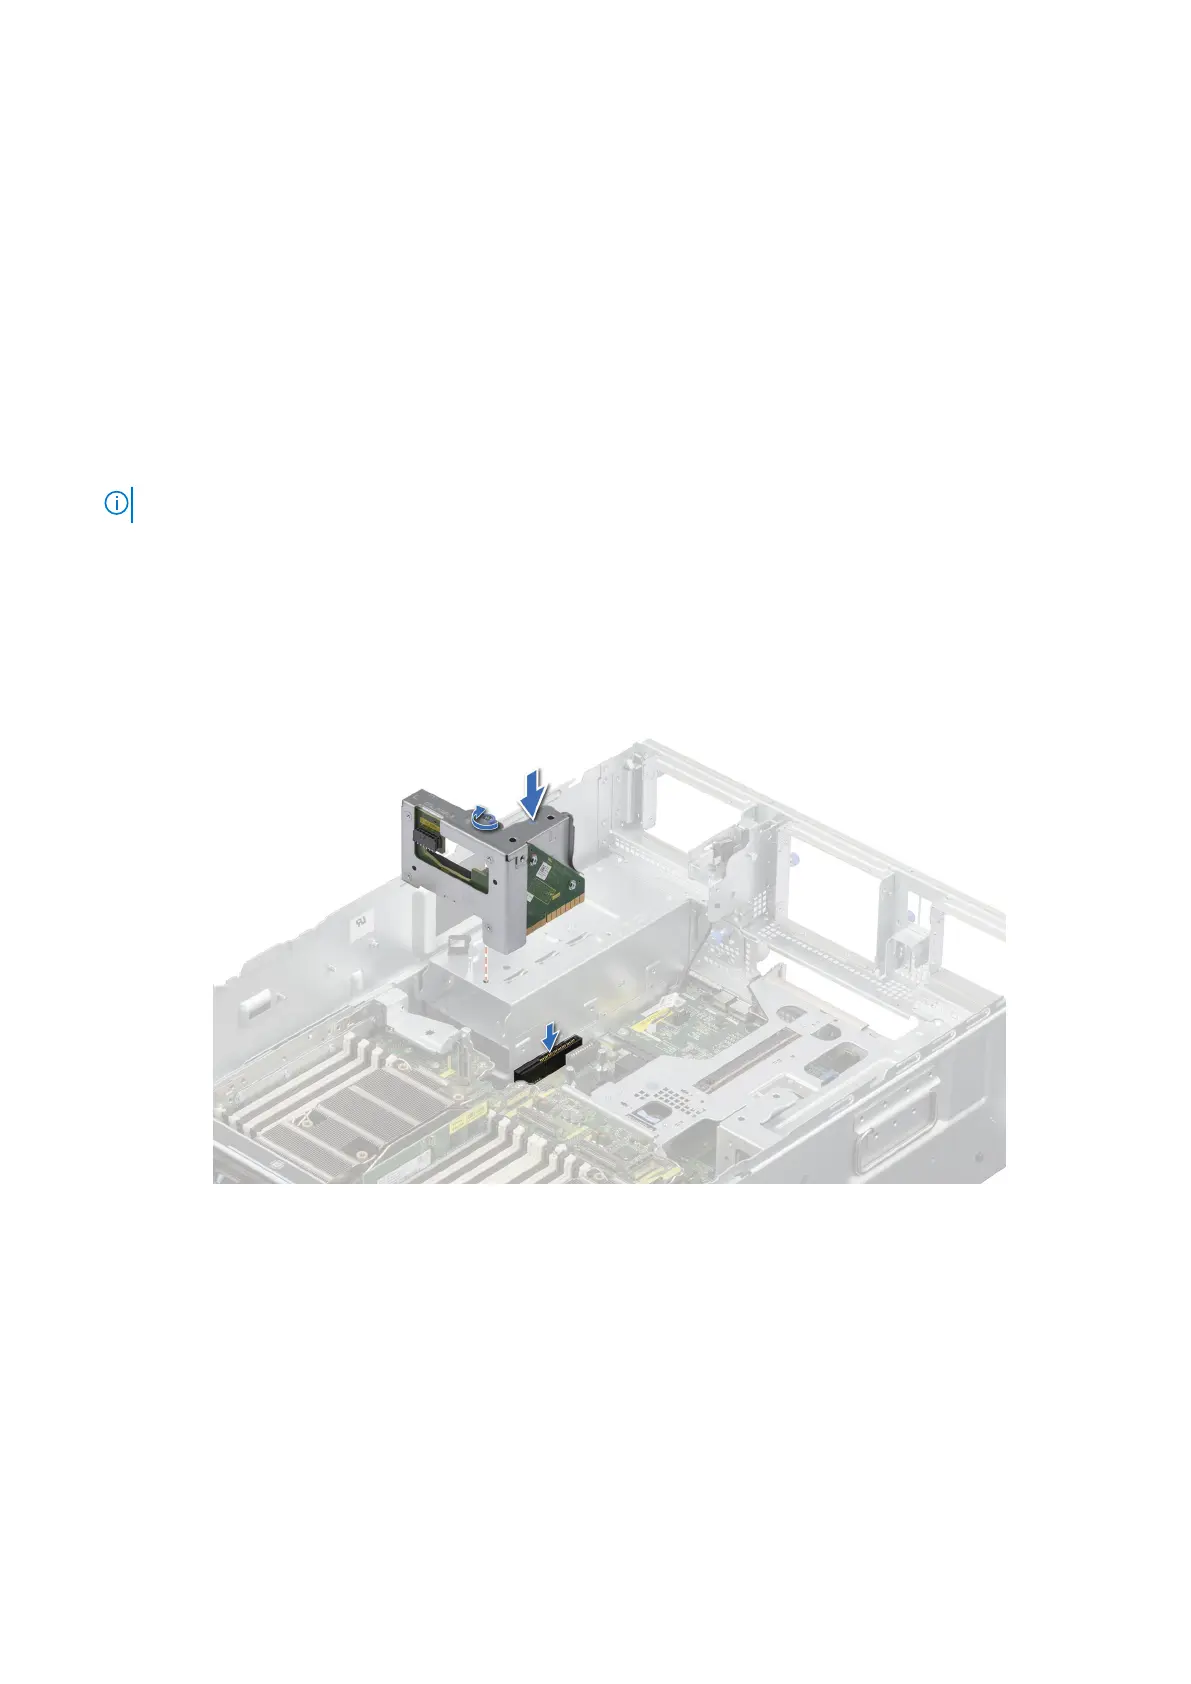
Steps
1. Align and lower the power distribution board (PDB) into the system board slot.
2. Press the blue touch point on the PDB until seated firmly.
3. Tighten the captive screw.
Figure 122. Installing the PDB
Next steps
1. Install the PSU.
2. Install the riser air shroud.
3. Install the expansion card risers or Install the full length expansion card riser.
4. If removed, Install the air shroud
5. Install the cooling fan cage assembly.
6. Install the air shroud top cover.
7. Install the support bar.
8. Follow the procedure listed in After working inside your system.
152
Installing and removing system components
 Loading...