5. Install the support bar.
6. Follow the procedure listed in After working inside your system.
7. Install any device drivers required for the card as described in the documentation for the card.
Power distribution board
This is a service technician replaceable part only.
Removing the power distribution board
There are power distribution boards (PDB) on either side of the system. The procedure to remove is similar.
Prerequisites
1. Follow the safety guidelines listed in the Safety instructions.
2. Follow the procedure listed in the Before working inside your system.
3. Remove the support bar.
4. Remove the air shroud top cover.
5. Remove the cooling fan cage assembly.
6. If required, Remove the air shroud.
7. Remove the expansion card risers or remove the full length expansion card riser.
NOTE: See cable routing section for more information.
8. Remove the riser air shroud.
9. Remove the PSU.
Steps
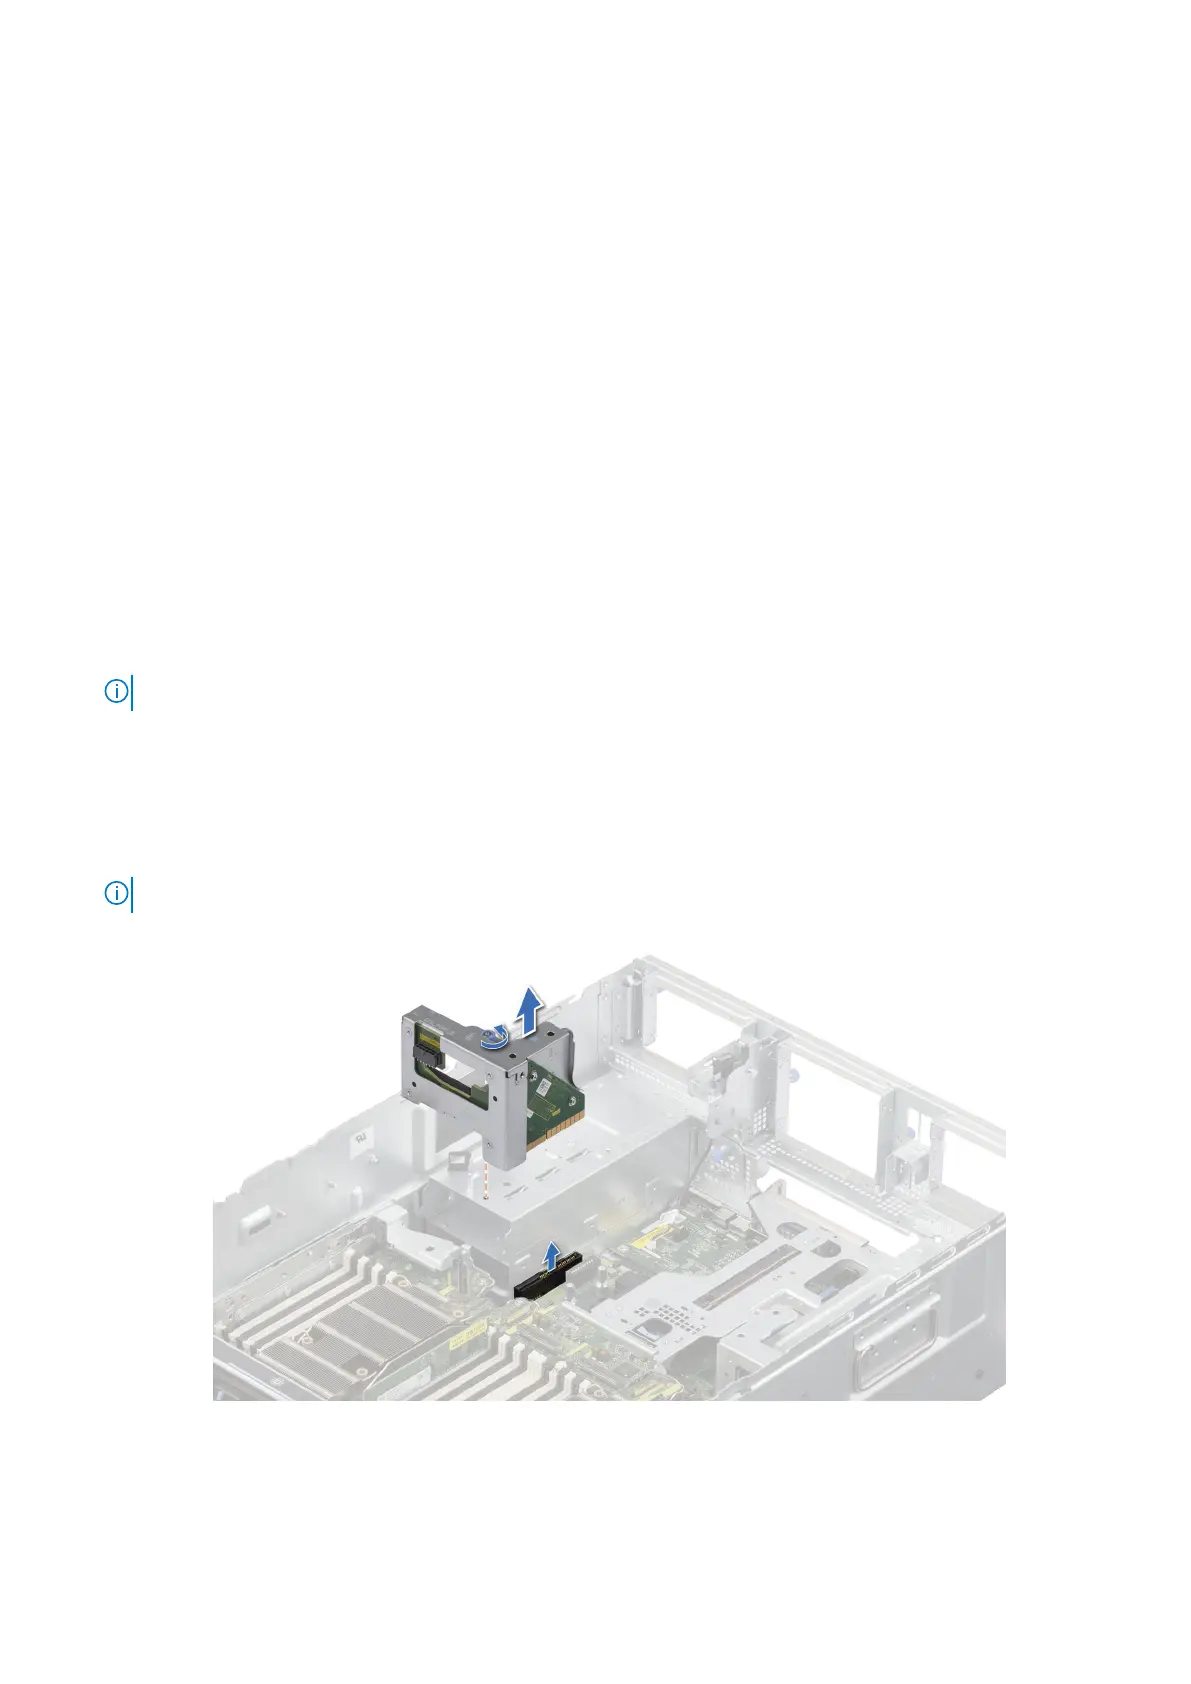
1. Loosen the captive screw.
2. Holding the touch point firmly lift the PDB from the system.
NOTE: The numbers on the image do not depict the exact steps. The numbers are for representation of sequence.
Figure 121. Removing the PDB
Installing and removing system components
151