Next steps
NOTE: Ensure that you install the heat sink after you install the processor. The heat sink is necessary to maintain proper
thermal conditions.
1. Install the heat sink module.
2. Follow the procedure listed in After working inside your system.
Installing the heat sink
Prerequisites
CAUTION: Never remove the heat sink from a processor unless you intend to replace the processor. The heat
sink is necessary to maintain proper thermal conditions.
1. Follow the safety guidelines listed in the Safety instructions.
2. Follow the procedure listed in Before working inside your system.
3. If removed, install the processor.
Steps
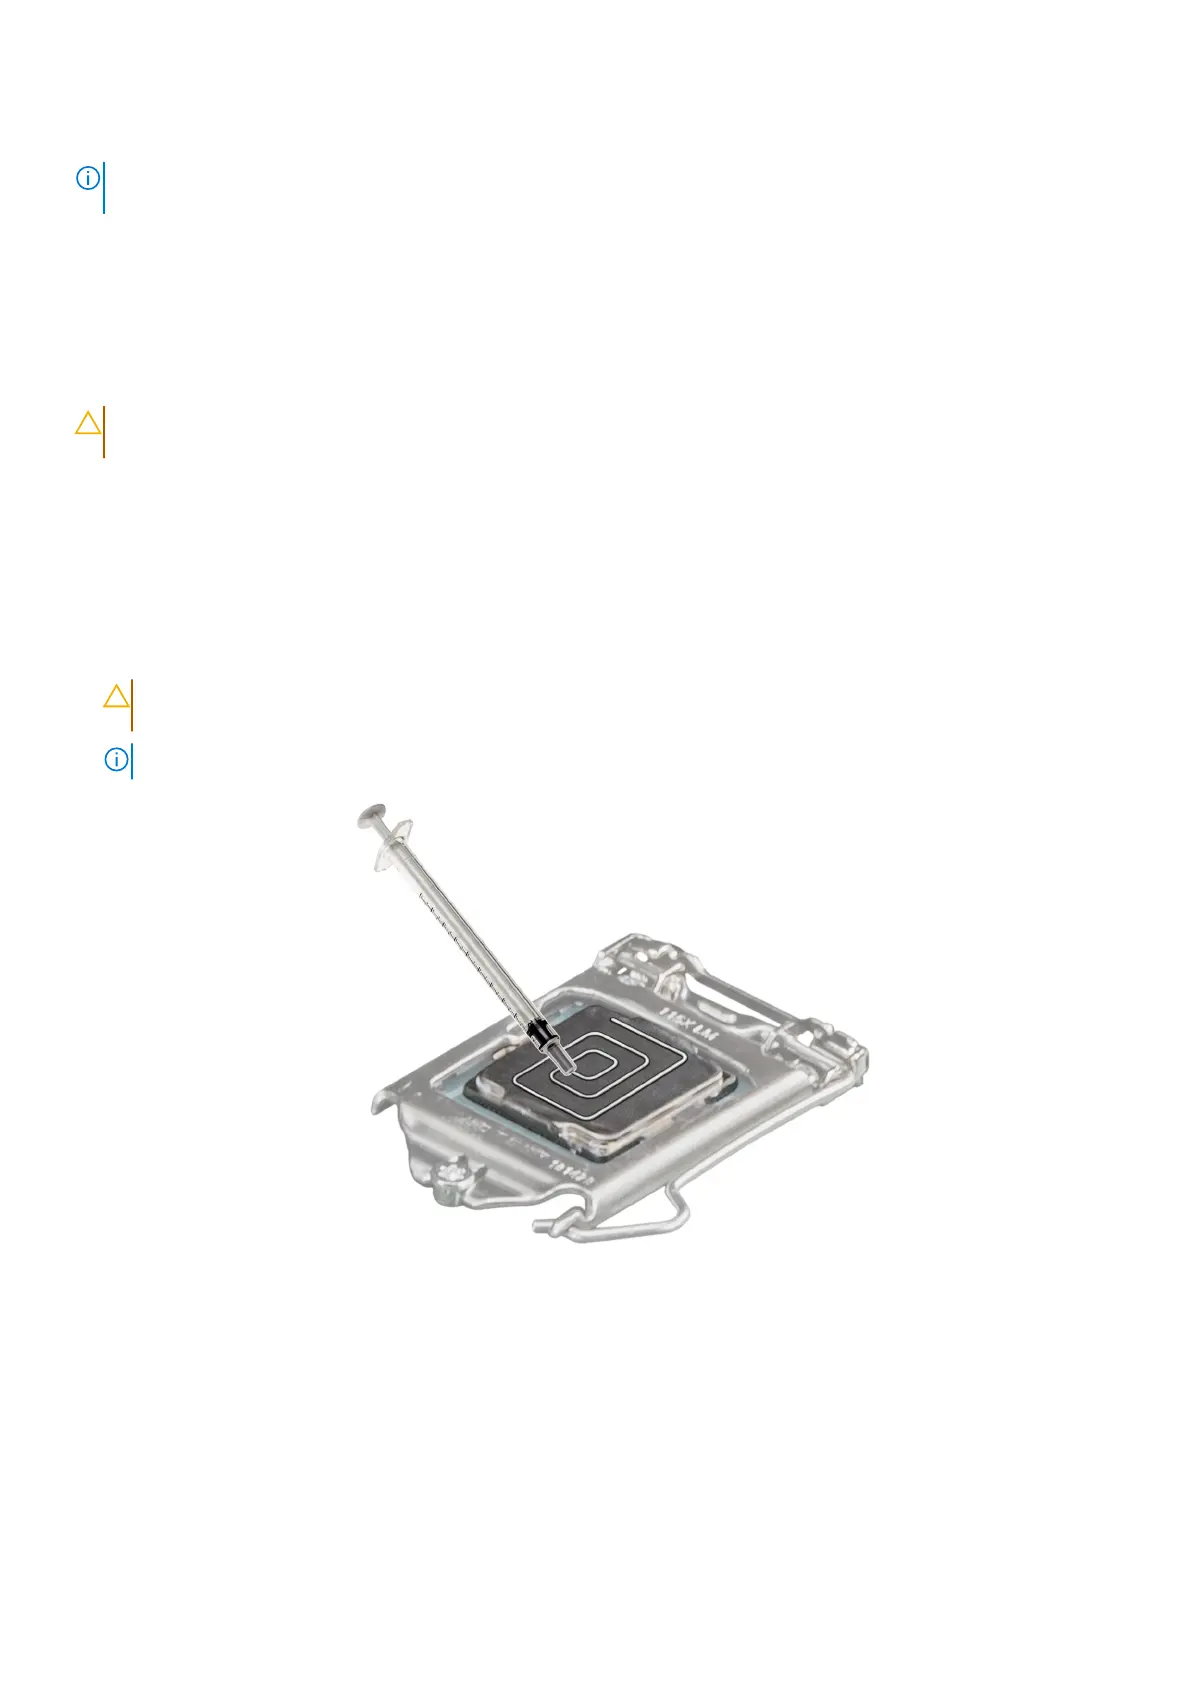
1. If you are using an existing heat sink, remove the thermal grease from the heat sink by using a clean lint-free cloth.
2. Use the thermal grease syringe included with your processor kit to apply the grease in a quadrilateral design on the top of
the processor.
CAUTION:
Applying too much thermal grease can result in excess grease coming in contact with and
contaminating the processor socket.
NOTE: The thermal grease syringe is intended for single use only. Dispose the syringe after you use it.
Figure 55. Applying thermal grease on top of the processor
3. Align the captive screws on the heat sink with the hole on the system board.
4. Using the Phillips 2 screwdriver, tighten the captive screws on the heat sink in the order below:
a. In a random order, tighten the captive screws three turns.
b. Tighten the captive screw diagonally opposite to the screw you tighten first.
c. Repeat the procedure for the remaining two captive screws.
d. Return to the first screw to tighten it completely.
e. Check all the captive screws to ensure they are firmly secured.
92
Installing and removing system components