Jackson User Manual rev 2.2 www.diamondsystems.com Page 47
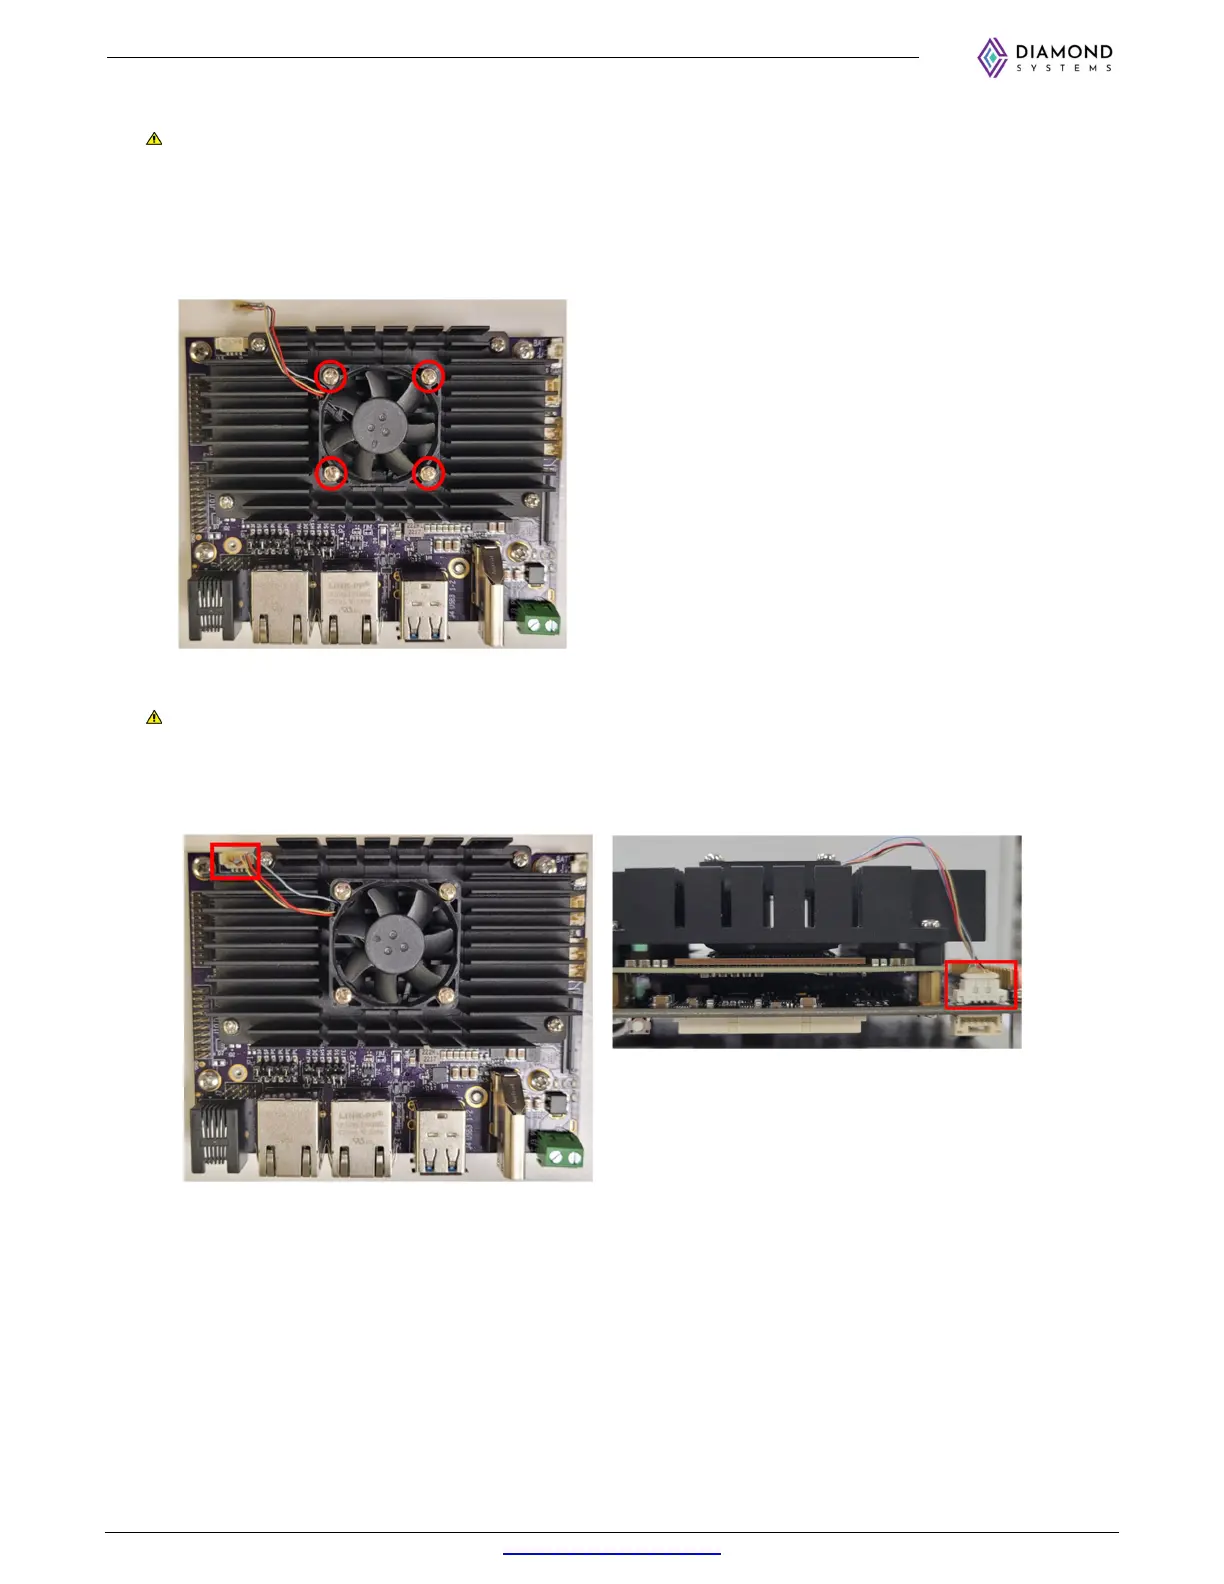
8. Place fan on heat sink in orientation shown in photo.
Note that the Fan label should face down and the position of the 4-wire cable should be on top as shown
in the image. In this orientation, air will blow down and out across the heat sink for improved heat
dissipation.
9. After placing the fan, install 4 M2.5 x 10mm long screws to hold fan in place. It is recommended to install
all 4 screws loosely to ensure proper fan alignment, then tighten all 4 screws.
10. Plug fan cable into board connector J15 as shown below.
Note that the fan connector is delicate and can be difficult to insert by hand. We recommend using fine
pliers to aid in the installation. Ensure the proper orientation of the fan cable connector. Alternatively, you
can install the fan connector prior to installing the module and heat sink for easier finger access, then
install it over the heat sink as a final step.