69ECLYPSE Connected Thermostat (ECY-STAT)
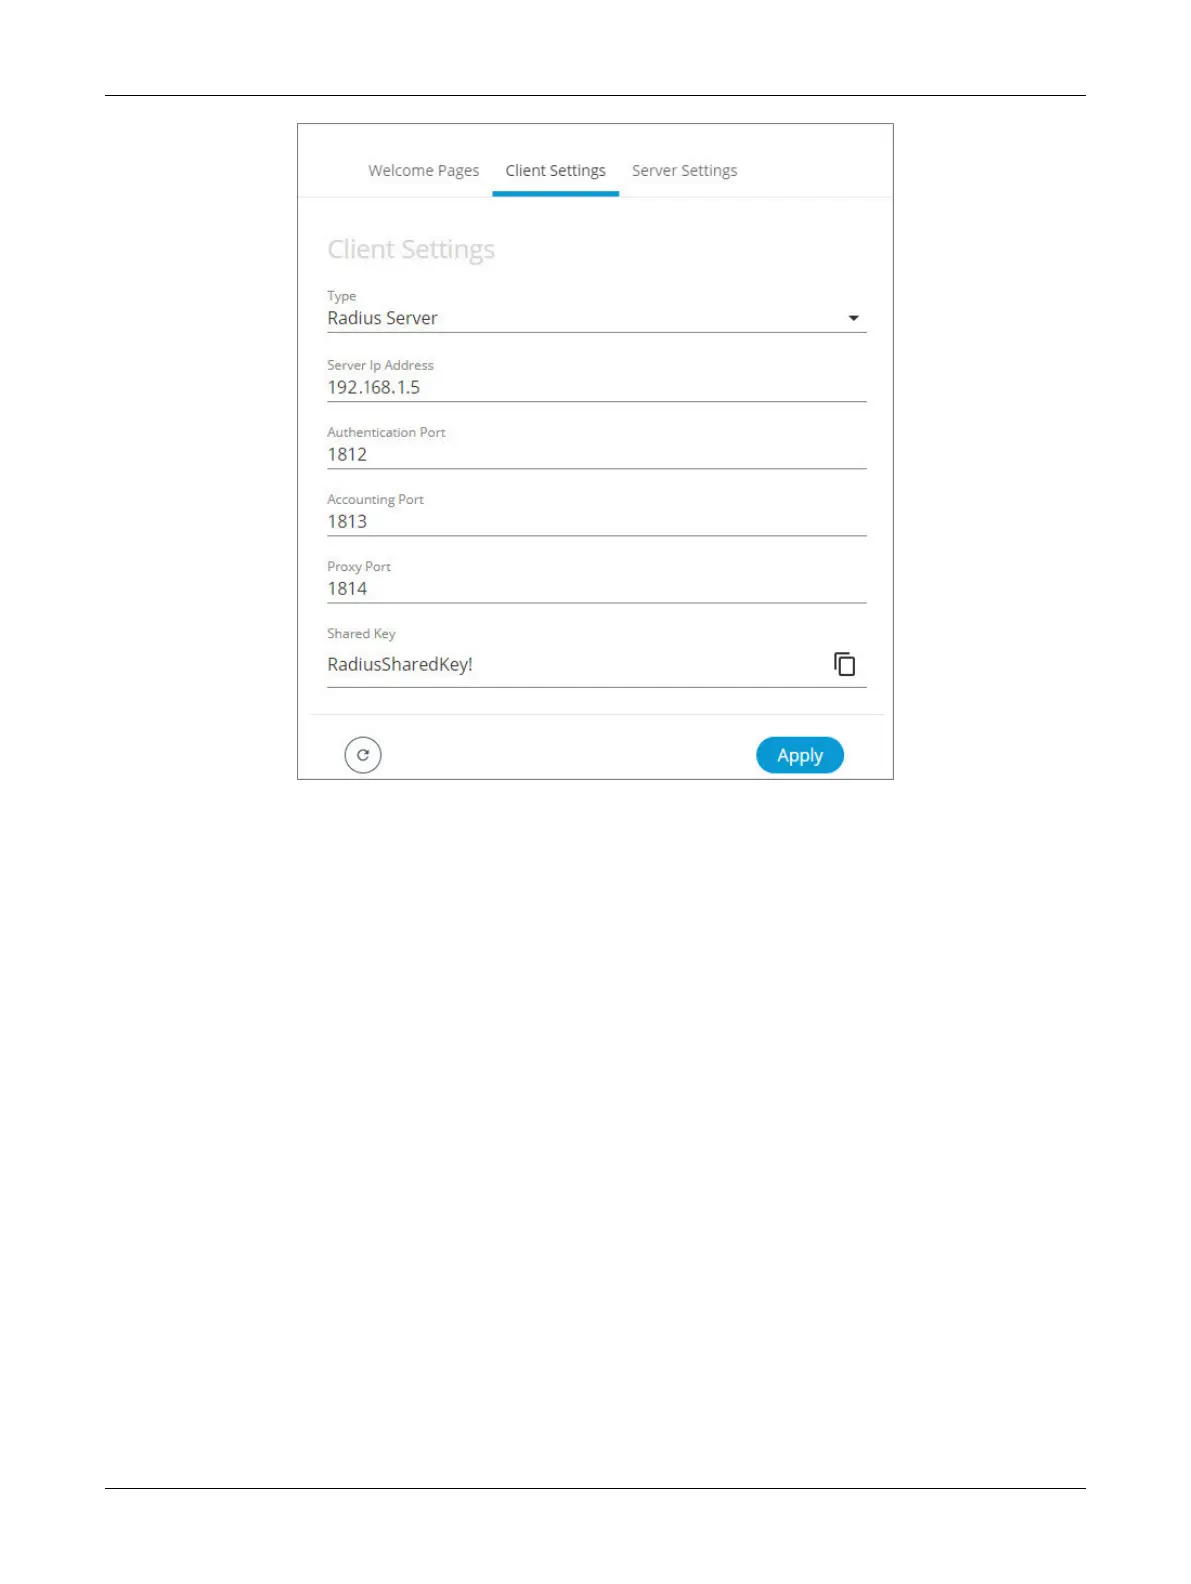
5. In Type, select Radius Server.
6. In Server IP Address, enter the IP address of the EC-Net Radius Server.
7. Set the port numbers as needed. Port values 1812 and 1813 are standard RADIUS port numbers
but other port number can be used. See RADIUS Server Settings.
8. In Shared Key, you must enter the same shared key as the one entered in EC-Net. See previous
procedure: Setting Up the RADIUS Server in EC-Net.
9. Click Apply. You will be prompted to enter the Radius Server credentials. Once the credentials are
granted the Radius client is setup.
10. Now to setup the SSO Server, select the Server Settings tab and make sure the Server Mode is
set to On.
11. In Type, select Single Sign On (SSO).
12. In Access Token, an access token is displayed by default. If required, you can generate a new
one or manually enter a custom access token. This exact access token will be needed to setup the
SSO clients (see Setting Up the SSO Client).
13. Click Apply.
Setting Up the SSO Client
See Setting Up the SSO Client.
ECLYPSE Web Interface