DTG M Series Maintenance Manual Initial Setup & Basic Operations
17. Repeat steps 12-16 above as necessary until, on average (across the page), the position of
the L-R print direction dots are aligned with the R-L print direction dots. Load new paper
as necessary.
If it is necessary to load new paper, press the EJECT button to set the printer to a “media unloaded”
mode, set the new paper and manually re-position the media tray as described in steps 6 & 7 above.
If the [Enter] key is pressed without changing the parameter value, Bi- D E n d will be displayed (it
is assumed that this parameter value is accepted as the final parameter adjustment). Press the
[Back] key to change the parameter value if required.
Press the [Cancel] key to move one level up the Self-Diagnosis menu structure.
Power the printer off to exit the Self-Diagnosis mode.
18. Repeat the above steps to adjust the Bi-D High2 value (Select Bi-D H i gh2 from the
Adjustment Menu).
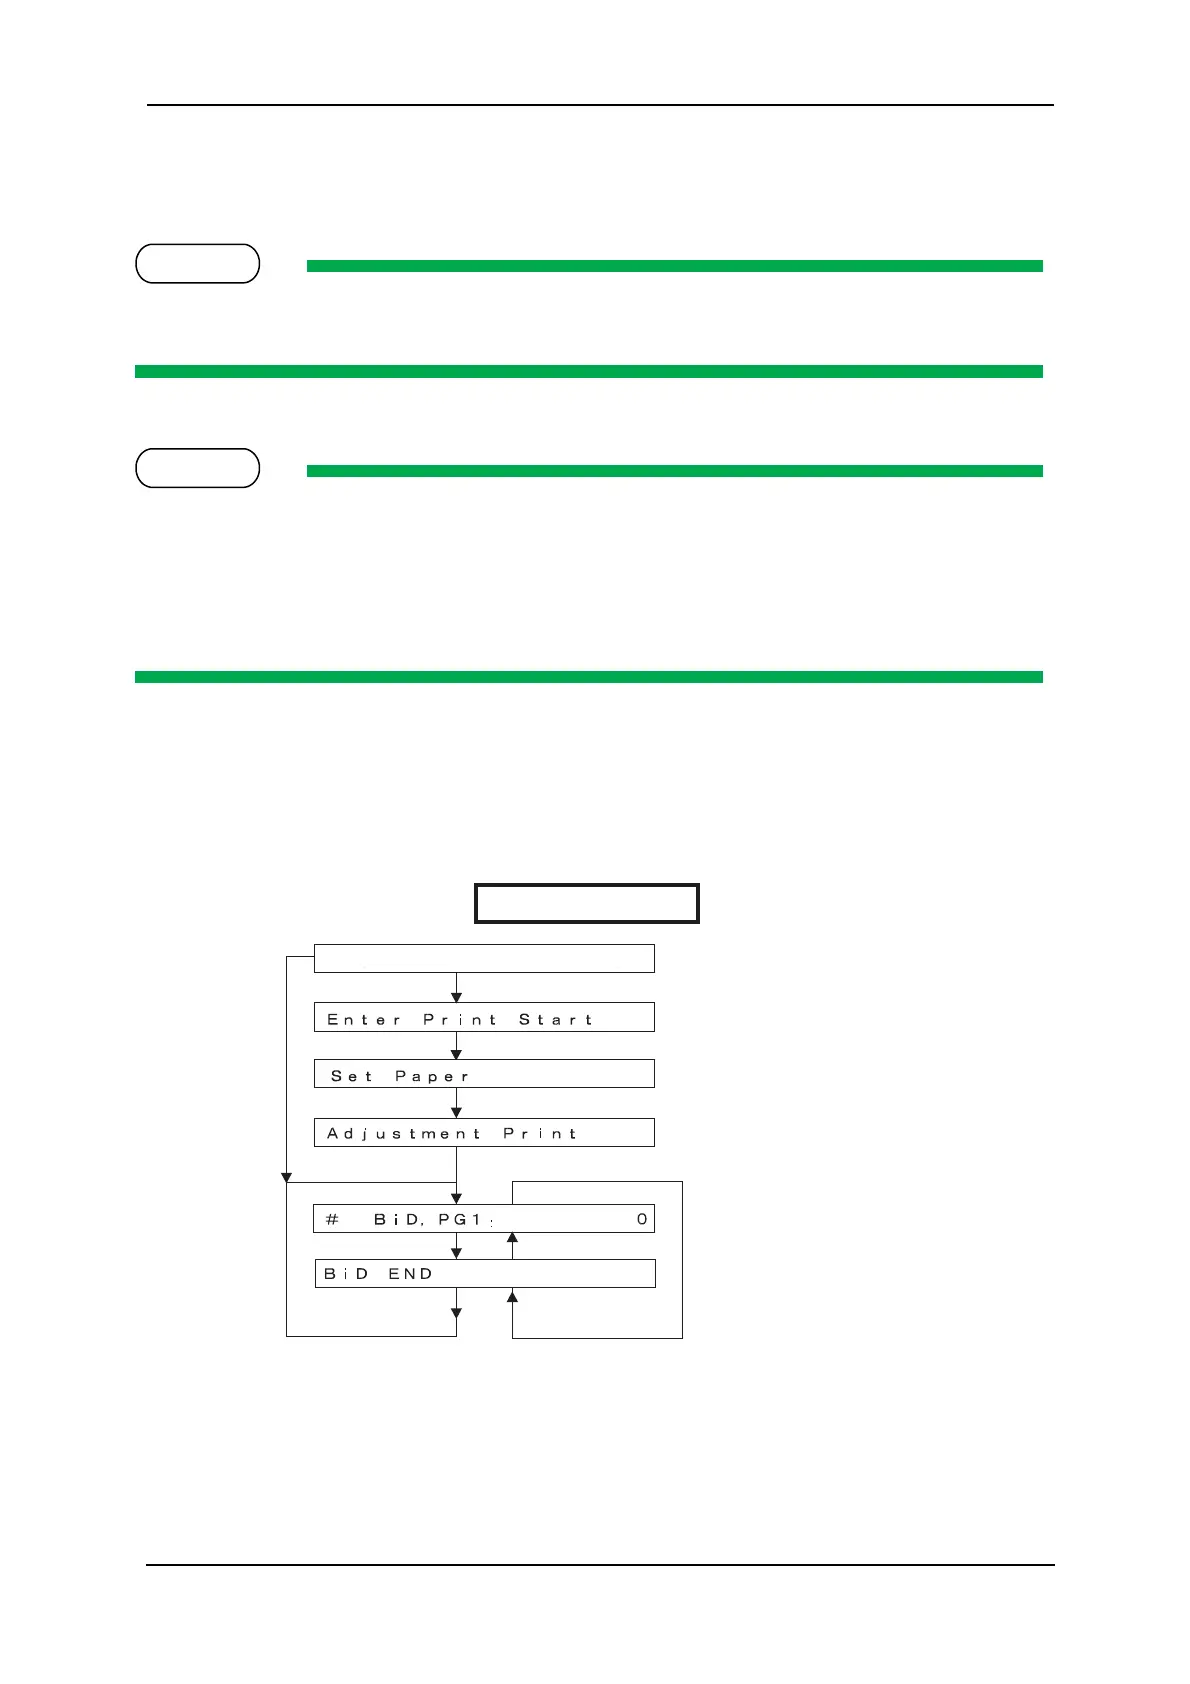
The below diagram gives an overview of the menu flow within the Bi-D adjustment utility.
Ex.) Bi-D Adjustment High2
[Cancel] key
[Enter] key
If media is not set
Media set
Next menu
Finish printing
Previous menu
Previous menu
Adjustment printing
1 pulse (= 1/2880 inch)
increments
Next menu Previous menu
 Loading...