DTG M Series Maintenance Manual Initial Setup & Basic Operations
3.6.5 Checking media height
The Printer has an interactive protection system that monitors the height of the media on the
media tray by means of a safety beam that continually watches the gap between the print head and
the media. This is to help prevent damage to the print head caused by collision with the media or
platen. The safety system can be disabled by pressing and holding both the UP and DOWN keys
until the media status light turns yellow. In this condition the automatic safety system will be
disabled and only the DOWN button will be operational.
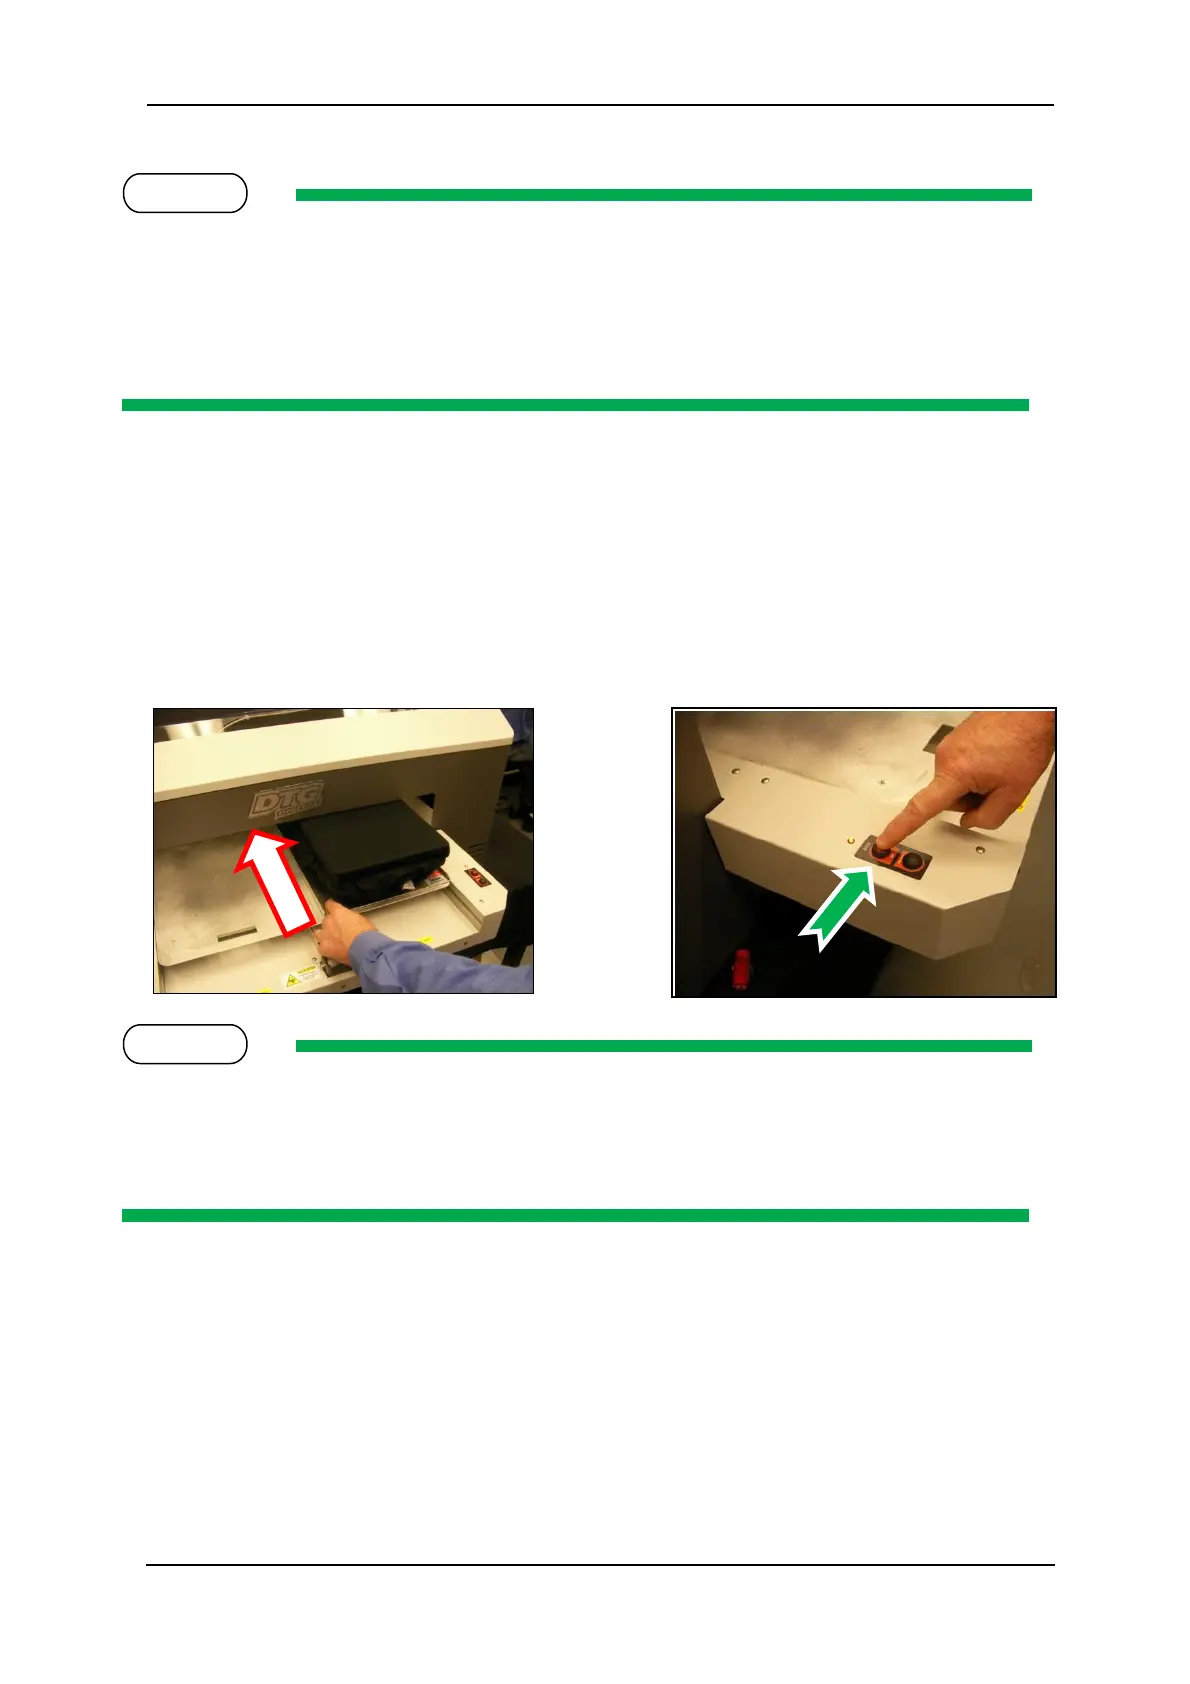
1. Push the platen tray forwards so that about half of the platen is inside the printer. If the
platen is too high the platen LED will turn red and the platen will lower its self. If the platen
LED is yellow the printer is in platen gap lock mode, press both the UP and DOWN buttons
together to turn the lock mode off. The platen LED should go green to indicate all is well and
the optimum print head gap is now set.
2. To set the correct height press and hold the UP button, the platen will begin to rise until the
internal safety beam detects that the platen height is correct. The platen LED will go red and
the platen will stop moving, release the UP button and the LED will turn green indicating
that the platen height is now set.
The platen LED has three different colours during operation. GREEN which indicates that the platen
should not be high enough to a collision between print head and media.. YELLOW indicates that the
automatic head protection system is OFF and there is a possibility of catastrophic collision damage
to the print head. When the indicator is RED the platen bed will begin lowering itself to try and
protect the print head from possible collision damage.
3. Press the LOAD button and the printer will emit a series of beeps and after a short delay the
platen will move into the printer. Do not impede the platen tray during operation as this
may damage the printer