Getting Started
24 EchoNous Bladder & Vein User Guide
To use it without the stand (hand held), connect the tablet with the tablet power supply.
Setting up the system
To set up the system with an optional EchoNous AI Station, refer to EchoNous stand setup. To configure the
System for mobile use, follow the instructions below:
1. Press and hold the Power button for two seconds to turn the EchoNous Display on.
2. The application setup wizard will run. Set up the following:
0.1 Language.
0.2 Date and time
0.3 Wi-Fi connectivity.
0.4 Probe selection.
0.5 Registration information.
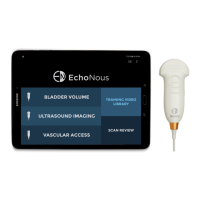
After setup, the Home screen is displayed, and the device is ready to use with the default settings. The default
settings are appropriate where there is a single user of the System and patient data is not saved to remote
servers. The System can be further customized by setting preferences (see Settings
).
Basic device control
The System communicates with the user in a number of ways:
• Menus
• Screens and windows
• Message boxes
• Icons
Navigate by using the touch screen with common control gestures, such as tap, drag, pinch, spread, and swipe.
The system controls and status are shown in FIGURE 4.
Home screen.
• Recharge the System only with the power supplies (chargers)
provided.
• The EchoNous power supply is a dedicated unit to be used
exclusively with the EchoNous System only.
• Only connect the power supplies to a mains supply rated at 100-240V
and 50-60Hz.
• Do not use the device or power supply if there are signs of damage.