Other Functions
54 EchoNous Bladder & Vein User Guide
The source for patient names is a preference setting (see Settings), which may be local storage or a remote server.
The list of patients is displayed under the Existing Patients tab. Tap the patient name to select a patient from the
list. When querying patients from a remote server, you may need to type a few letters into the search field to
display patients.
• The Search icon can be used to find an existing patient.
• Tap the Barcode icon or use a barcode scanner to search using a patient’s barcode.
• Tap the Skip icon to bypass patient data entry. You will be prompted to enter patient details again when
saving the exam.
• Tap the New Patient tab to enter the details for a new patient using the on-screen keyboard. Now you can
enter the family name, given name, EMR identifier, sex, and date of birth.
Printing
Tap the Printer icon to print to a network (see Network printer setup (optional)) or Bluetooth printer (see
Bluetooth printer setup (optional)
).
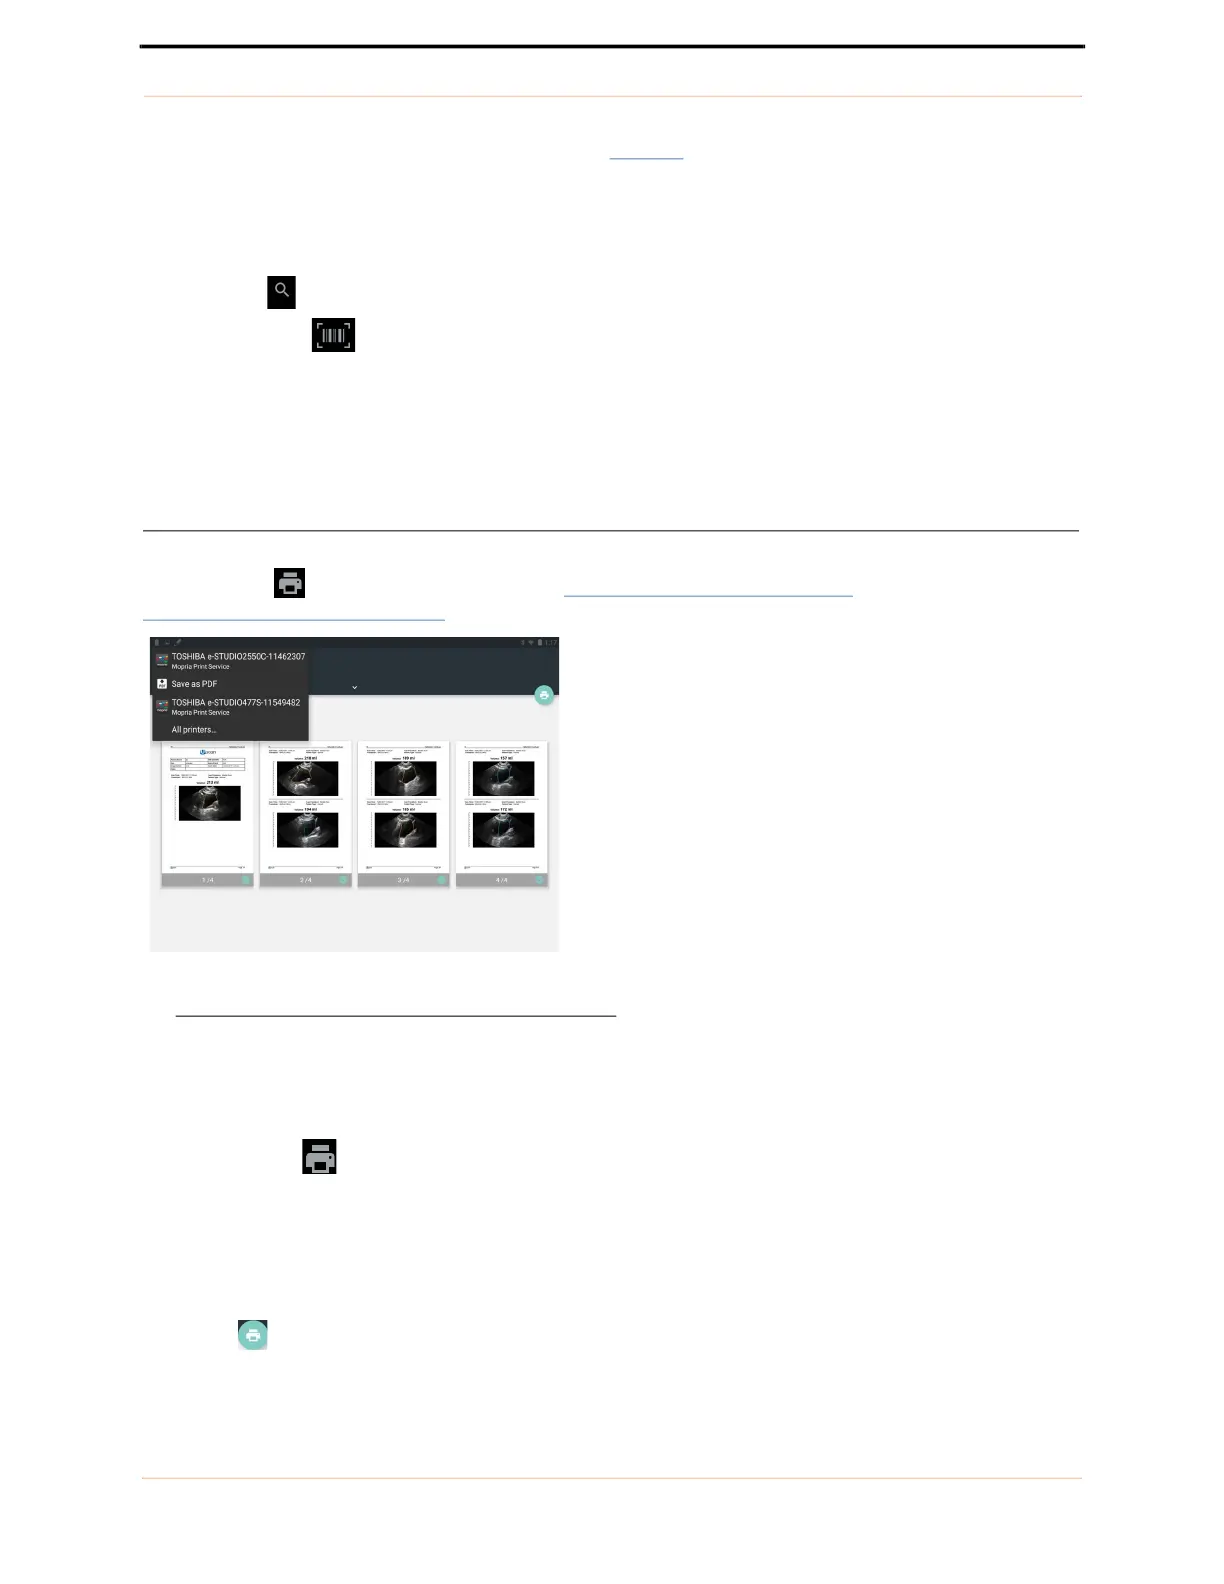
FIGURE 41. Network printing
Network printing uses the Mopria service (see www.mopria.org), which enables printing to thousands of network
printer types. The EchoNous System display needs to be connected via WiFi to the same network as the printer.
To print:
1. Tap the Printer icon.
2. Tap PRINT ALL to print all scans or PRINT SELECTION to print only selected scans.
3. Select the printer from the drop-down list box.
4. If required, adjust the number of copies, paper size, color, orientation, or any other options provided by the
printer.
5. Tap the button to send to the printer.