EchoNous Bladder & Vein User Guide 27
Network printer setup (optional)
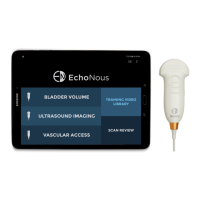
— Hide home screen Vascular Access button – check to remove the disabled Vascular Access button from the
home screen. If the EchoNous Vein probe was enabled during initial setup, this setting will have no effect.
• Bladder Volume – tap to see bladder volume preferences
— Default Patient Type – tap to change the default patient type (Normal, Pediatric, Deep, Pregnant,
Phantom, “Use last selected value”, or “Ask each time”).
— Strict Probe Positioning Rules - check to prevent fanning for bladder volume scans unless the bladder or
pubic bone is detected.
• Vascular Access – tap to see vascular access preferences.
— For Default Patient Type, tap to change the default patient type (Adult, Pediatric, “Use last selected value”,
or “Ask each time”).
— Enable 4 to 5 CM - Enable setting if depths of 4 to 5 CM are desired.
• Administration – Refer to Advanced device and IT setup
section for advanced user management and
setting up several devices with the same preferences.
• Maintenance – provides maintenance related functionality including access to software updates.
• System Settings – provides access to tablet system settings, including Wi-Fi, Bluetooth, Display settings,
Location services, linked accounts for device tracking, Language, and Date & time.
Network printer setup (optional)
Network printing enables the Mopria Print Service. The Mopria Print Service enables printing to Mopria certified
multifunction printers from many manufacturers which are on a connected WiFi network (see www.mopria.org
).
FIGURE 5. Printer type
To set up a network printer:
1. Tap Menu, and select Settings.