Acclarix AX8/Acclarix AX7 Diagnostic Ultrasound System User Manual Transducers and Biopsy
- 81 -
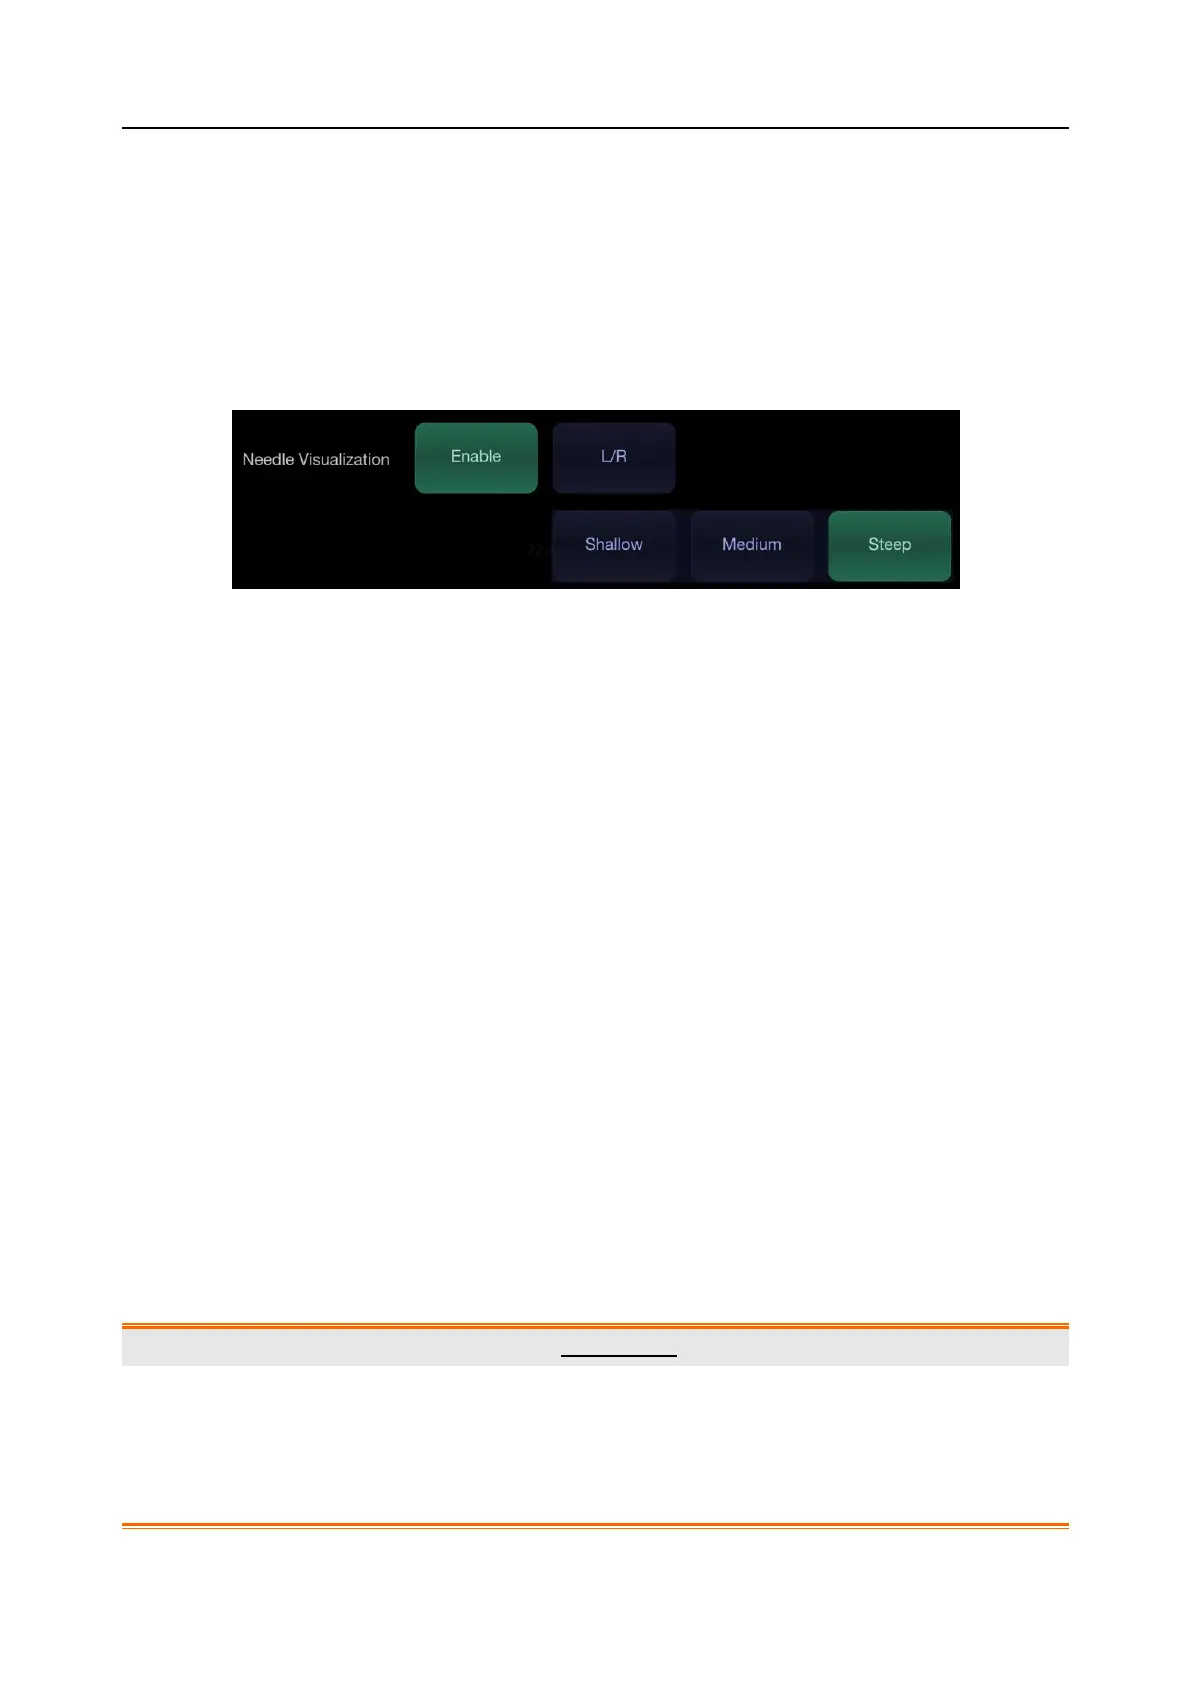
Needle Visualization is invoked by pressing the Needle button on B-mode touch screen, and then
the Enable button in the Needle Visualization section of the Needle touch screen. The following
parameters can be adjusted when it is active.
Enable: Enables or disables Needle Visualization.
L/R: press to display the angle line on left side or right side of the image field.
Shallow/Medium/Steep: press to enhance the needle visibility for different needle inserted
angles: 16° (Shallow), 24° (Medium) and 40° (Steep). For best results use the angle line that
is closest to perpendicular to the needle path.
Figure 6-7 Touch Screen for Needle Enhancement Visualization
6.6 Center Line
The Center Line is a vertical dotted line displayed at the middle of the image field, representing the
middle of ultrasound beam. The Center Line helps to locate the position and depth of a target disease
focus for out-of-plane biopsy, lithotripsy and etc..
To use Center Line:
1. Press Center-Line on B-mode touch screen to activate Center Line.
2. A dotted center line is displayed vertically at the middle of the image field. The position and
direction of the center line cannot be changed.
3. Move the transducer to locate the target.
4. Use distance measurement to obtain the depth of the target.
Note:
Center Line is not available on intra-cavity transducers.
6.7 Needle Guide Bracket Cleaning and Sterilization
NOTE:
1. Use proper sterilization technique at all times when performing a biopsy.
2. Ensure that protective gloves are worn.
WARNING
1. The needle guide bracket kits are not disinfected or sterilized before delivery. The operator
should sterilize the needle guide kit before the first use and after each subsequent use.
2. Inspect the bracket for damage such as cracks or breakage. If damage is evident, discontinue
use of bracket and contact your Edan representative for disposal guidance.
3. Sterilize the bracket before disposal or sending back to manufacturer for repair.
 Loading...