Chapter 3 Description of the Machine
3-5
E1 Semi-automatic screen printer
System Manual
EKRA / Doku Eisermann 03_SYSTEM_PDF.FM
30.8.02
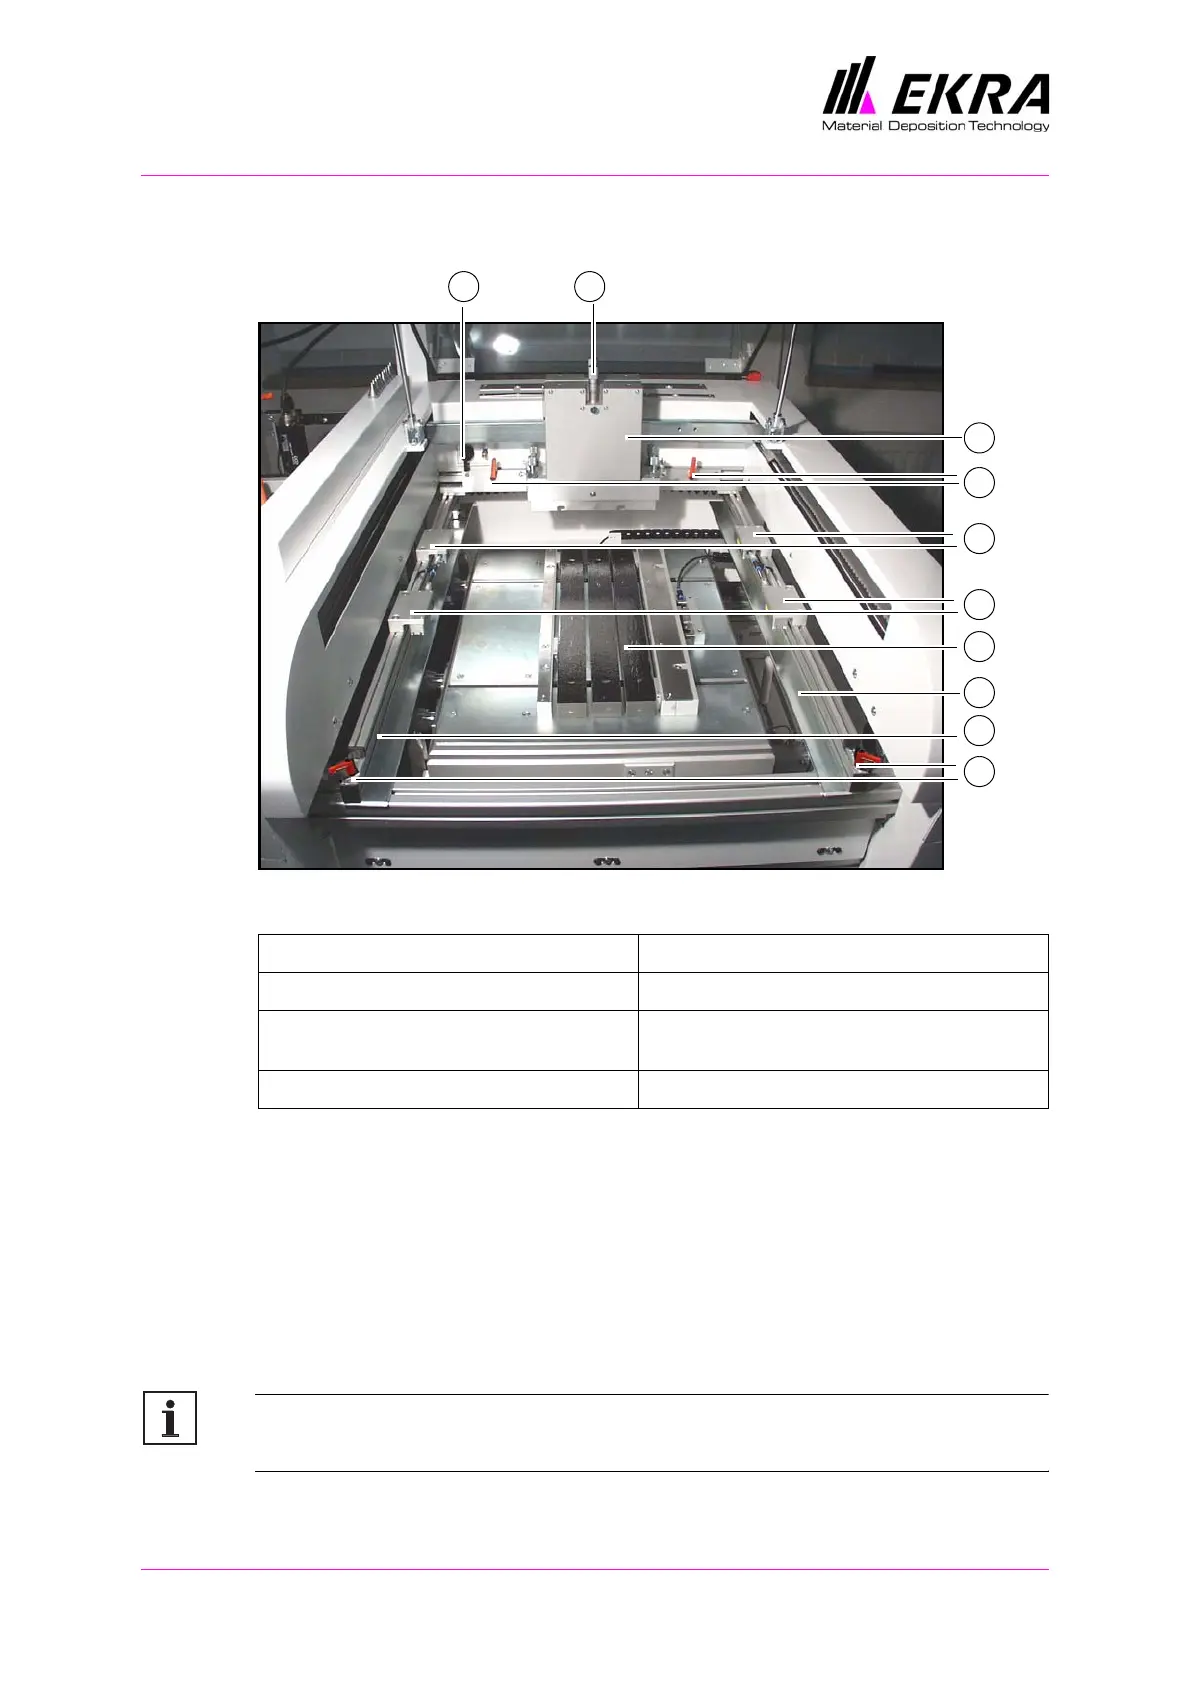
Print area, with cover open
Fig. 8. Print area, with cover open
The cover can be opened upwards in order to allow the print material to be
placed in the machine and to change the printing squeegee and the flood-
ing squeegee.
The stencil guideways for the screen frame are adjustable. Release the
levers at the front and rear, and adjust the position of both guideways.
Once the screen fits perfectly in the guideways, lock all levers. To clamp
the behind, actuate the screen clamping switch. The clamping cylinders are
pressurised and clamp the screen in place.
Note:
Always align the screen layout centrally.
1 Locking lever, stencil guideway 5 Squeegee head
2 Stencil guideway 6 Down stop micrometers
3 Printing table with PCB holder and PCB
supports
7 Screen clamping switch
4 Clamping cylinder for screen frame
2
7
1
4
5
2
4
6
1
3