Chapter 3 Description of the Machine
3-6
E1 Semi-automatic screen printer
System Manual
EKRA / Doku Eisermann 03_SYSTEM_PDF.FM
30.8.02
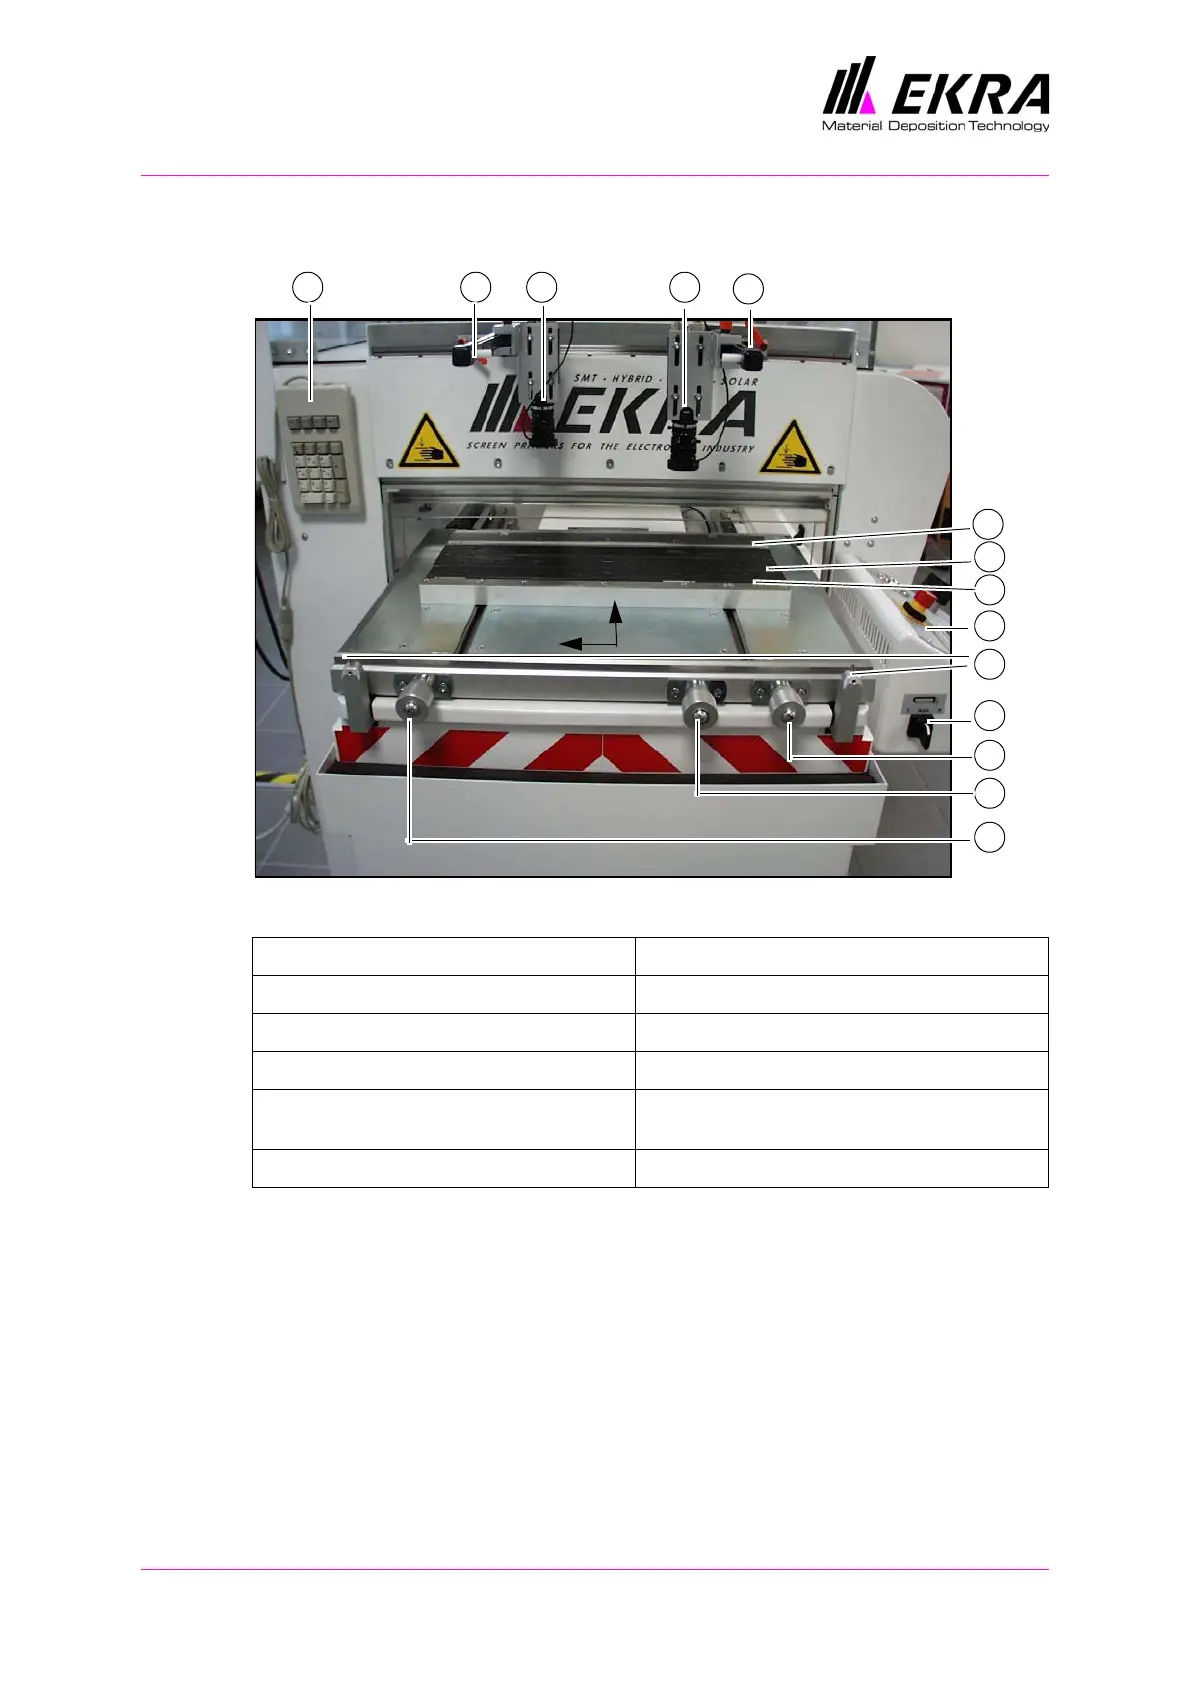
Printing table
Fig. 9. Printing table
On the E1, the printing screen is fixed and the print material (substrate etc.)
is aligned with the screen. To do this, place the test print film in the
machine and perform a printing cycle. Then align the PCB with the printed
image on the film by adjusting the printing table manually. The PCB is fixed
in the printing nest (optionally with vacuum suction) with the clamping rails.
1 Control desk 7 Table adjustment in X-direction
2 Clamping strips, PCB holder 8 Table adjustment in Y-direction
3 PCB support 9 Table adjustment in X-direction
4 MOPS cameras 10 PCB clamping switch
5 Locking handle for locking camera posi-
tion
11 Register pins, test print film
6 MOPS operating keypad
1
2
3
2
4
5
45
7
8
9
10
11
X
Y
6