42
9500
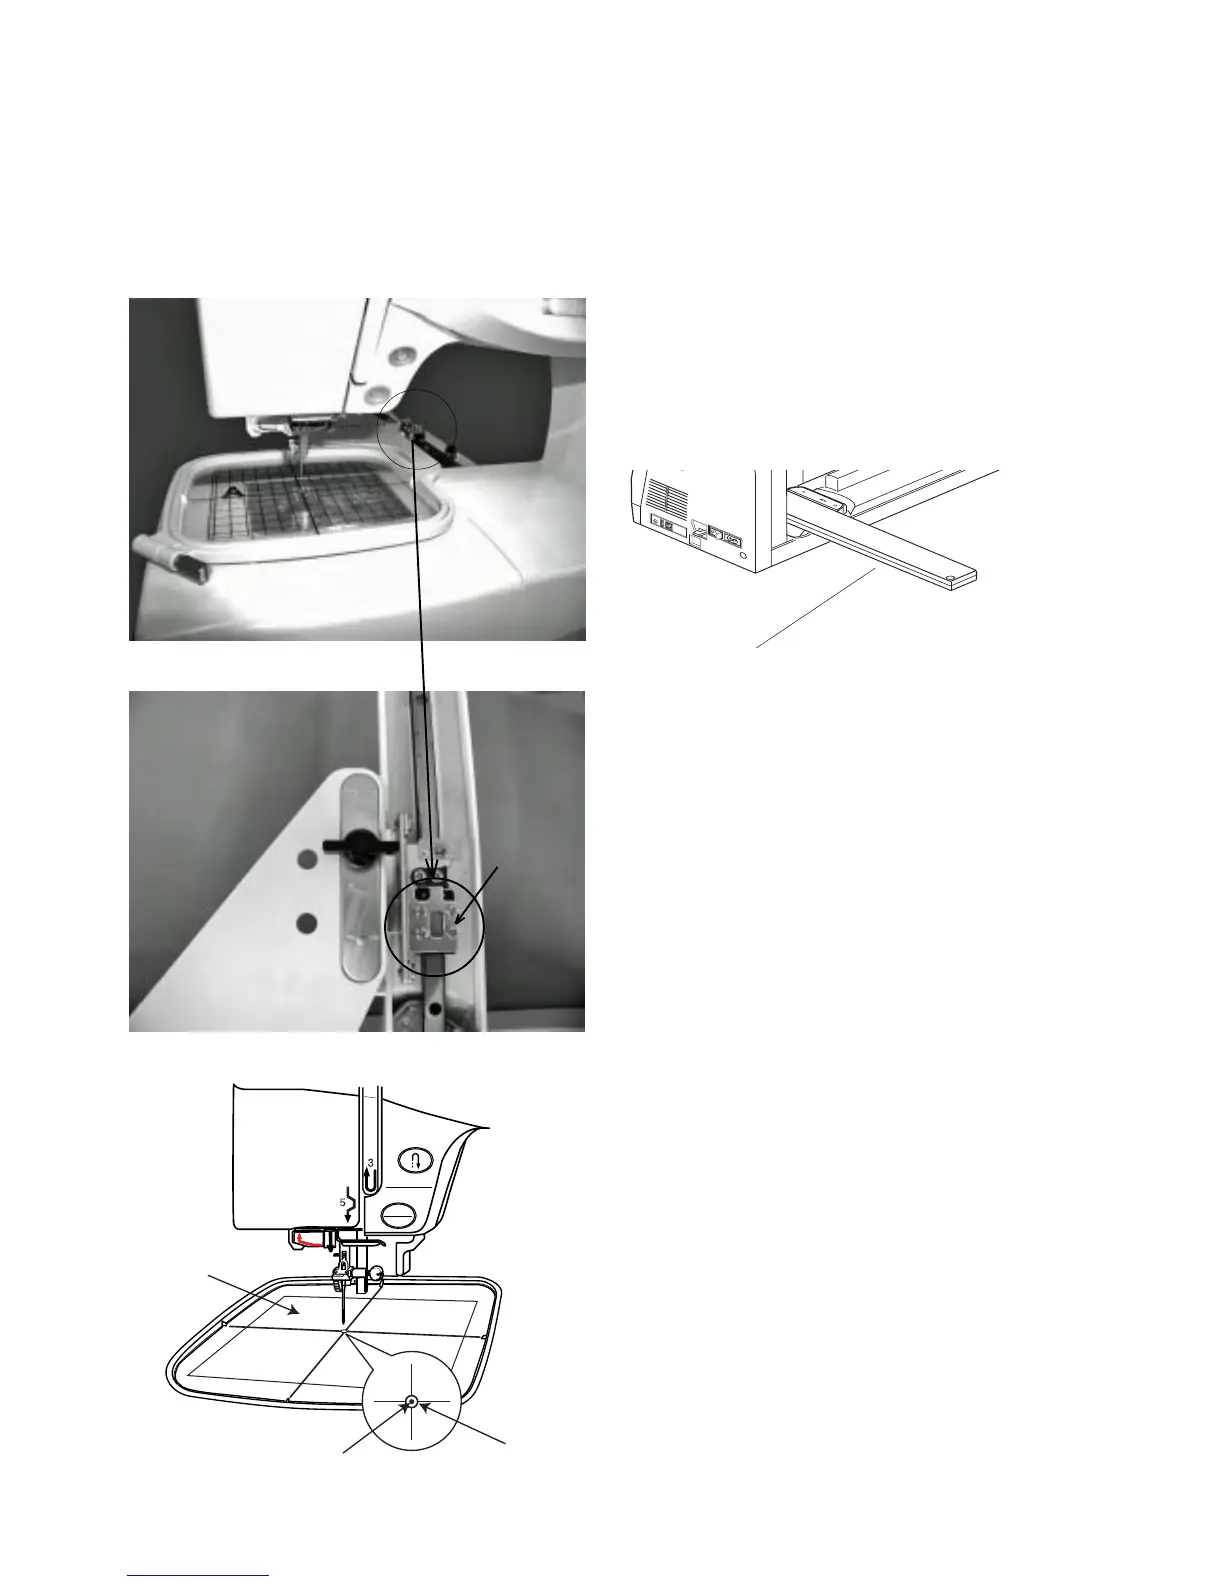
Adjust the sewing start position as follows. (Method of not removing base)
Adjusting the Sewing Start Position
Note:
If the start position shifts greatly, see page 41.
1 Remove the Y carriage cover .
2 Remove the foot holder and attach the embroidery
hoop (ST).
3 Place the template on the embroidery hoop (ST).
4 Turn the power switch ‘ON”. Select the embroidery mode
and select pattern NO.1.
5 Check the needle if it is enter the start position hole
of the template.
6 Turn the power switch “OFF”.
7 When threr is a gap, loosen Screws (A) (4 pcs) and
adjust that the needle comes to center.
8 Turn the power switch “ON” again. Select the patternNO.
1 and check the start position.
9 Remove the template and the embroidery hoop. Select
the conventional sewing mode and return the carriage
to normal position.
10 Turn the power switch “OFF” and attach the Y carriage
cover.
START
STOP
(A)
q
q
w
w
e
r
r
e