Powering Up the SSA
2-14 Installation
4. Ifyouare installingasecondpowersupply,removethecoverplatefromtherightpower
supplybaybyunscrewingthescrewsthatattachthecoverplatetotheSSA.
Keepthecoverplateintheeventyouneedtoremovethepowersupply.
5. Repeatsteps2–3toinstallthepowersupplyinthe
rightpowersupplybay.
6. Tightenthecaptivescrewsofthepowersupplies.
Powering Up the SSA
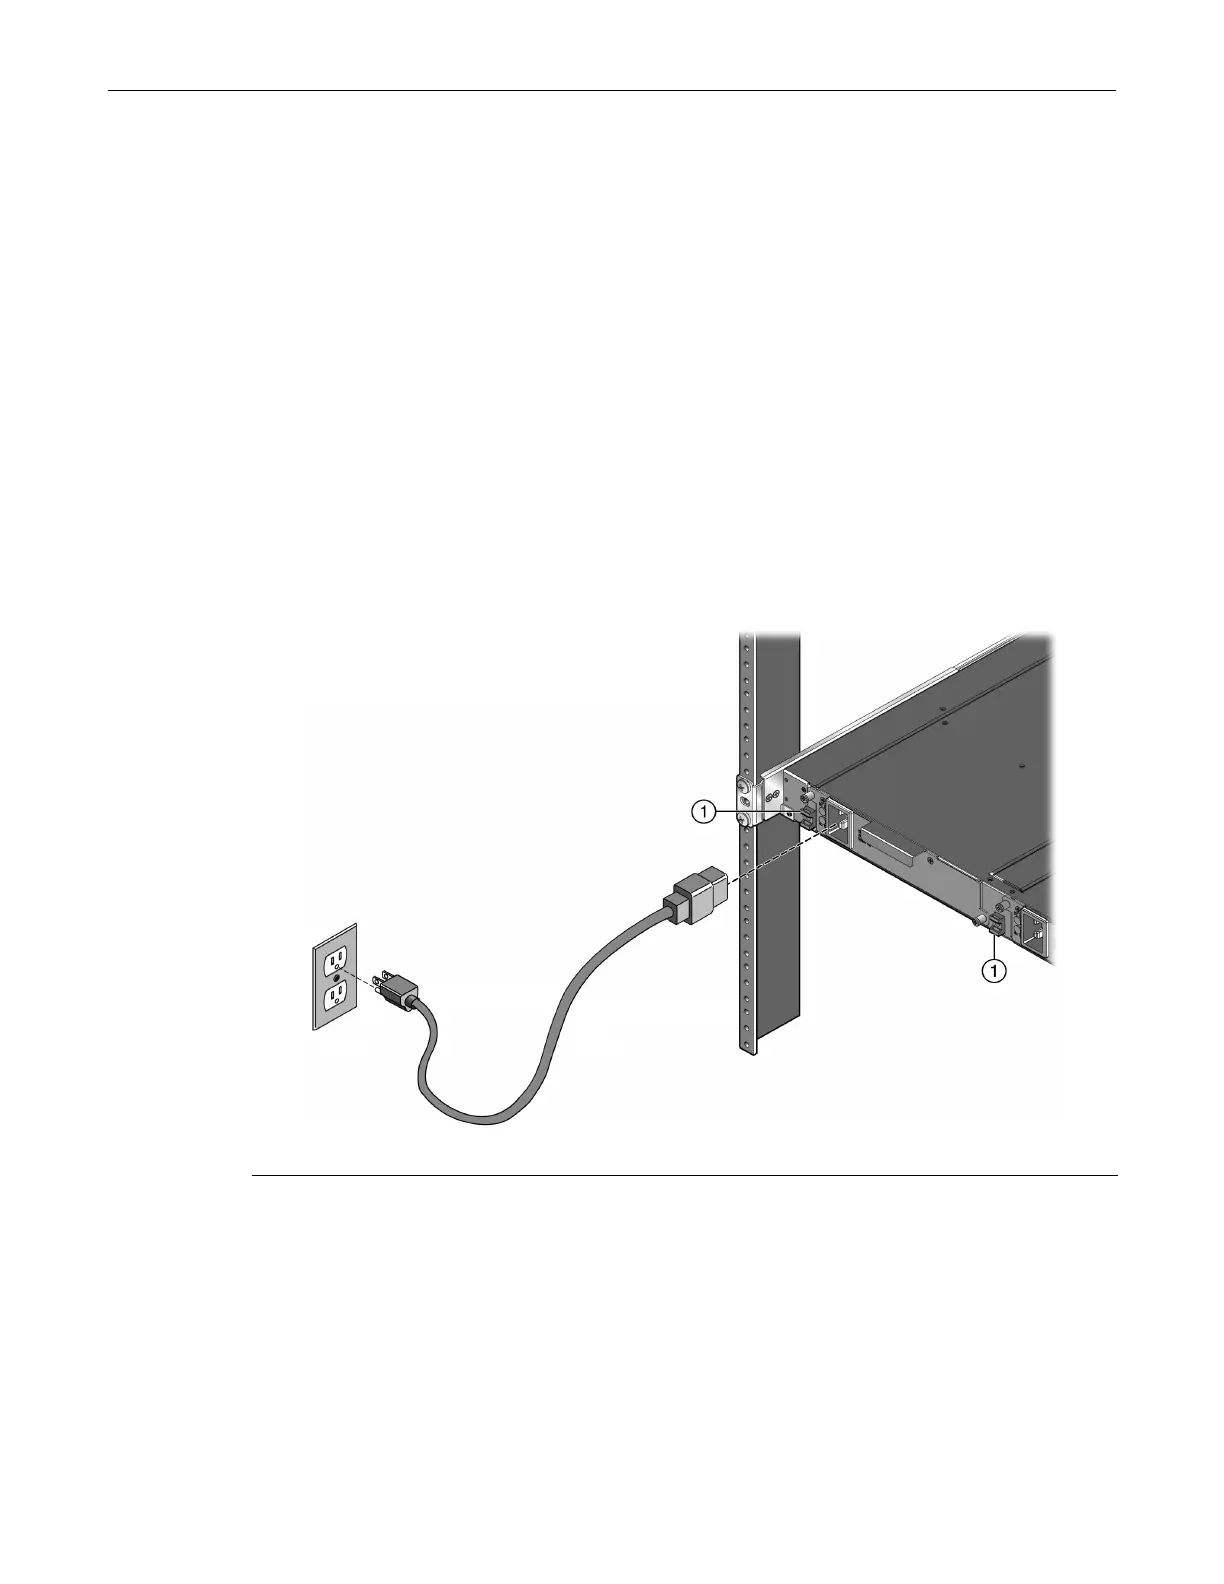
ToconnecttheSSAtothepowersources:
1. Plugapowercordintoeachpowersupply’sACpowerreceptacle.
2. PlugthecordintoadedicatedgroundedACoutletasshowninFigure 2‐11.
Totakeadvantageofredundancycapabilities,plugeachpowercordintoaseparatededicated
ACoutlet.
3. (Optional)Secure
eachpowercordtotheSSAbytyingthepowercordstotheplasticbrackets,
adjacenttothepowersupplybays,withcustomer‐suppliedzipties.
Figure 2-11 Connecting Power to the SSA
ThePWRLED,locatedonthefrontpanel,turnsON(green)andtheCPULEDturnsreduntilthe
SSAcompletesitsinitialization.
Whenthe
initializationprocessissuccessful,theCPULEDturnsgreen.IftheCPULEDdoesnot
turngreen,refertoChapter 3,Troubleshooting,fortroubleshootinginformation.
1 Plastic brackets for securing AC power cords to the SSA
 Loading...