AcuLaser C2800/C2800D/C3800/C3800D Revision C
DISASSEMBLY/REASSEMBLY Disassembly/Reassembly 239
Confidential
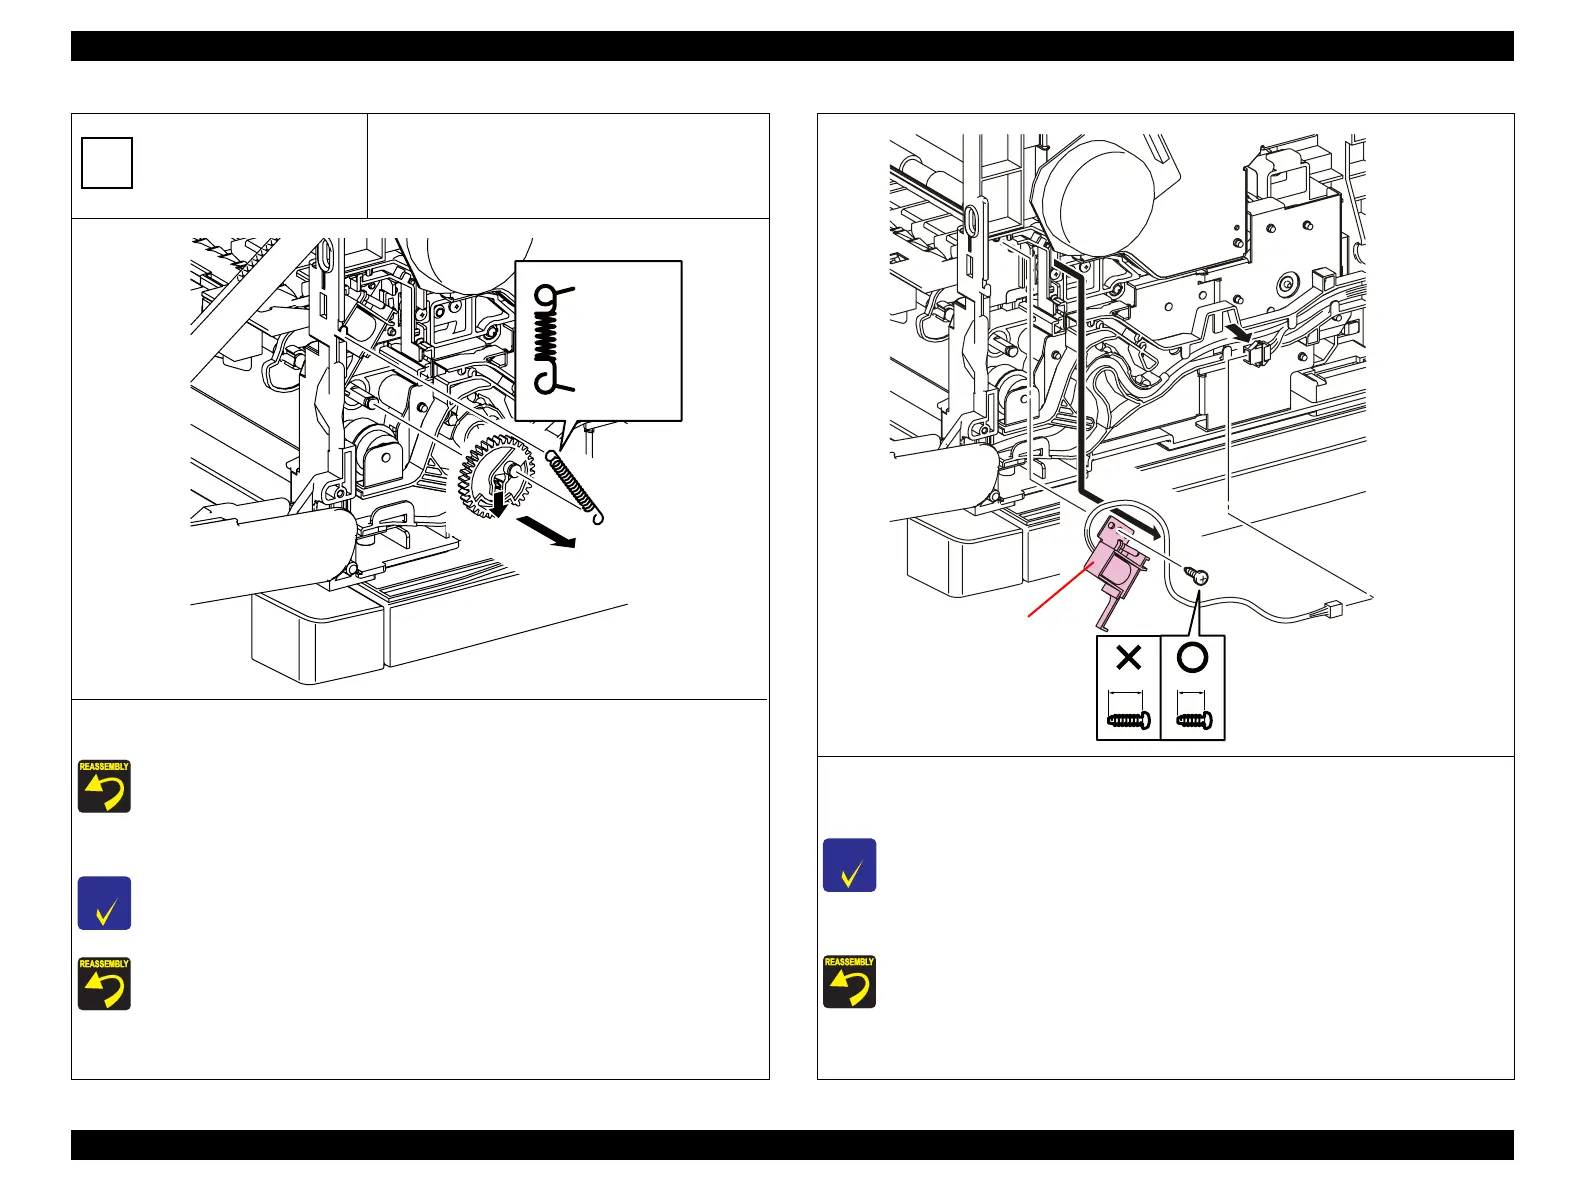
SOLENOID FEED MSI
1. Remove the SPRING FEED MSI.
Mind the correct orientations when installing the SPRING FEED MSI.
Install the SPRING FEED MSI so that its oval figure side hitches on the GEAR MSI.
2. Release the tab on the GEAR MSI, and remove the GEAR MSI from the SHAFT MSI.
C H E C K
P O I N T
The mid connector should remain connected to the main unit.
For easier operation, make the D-cut surface of the SHAFT MSI face upward.
NEXT>>
D
Kmy03019E
2)-1
2)-2
1)
Attach to the
main unit
Attach to
GEAR MSI
3. Disconnect the connector (P/J236) of the SOLENOID FEED MSI.
4. Release the harness of the SOLENOID FEED MSI from the DUCT MSI SOL and the DUCT DRV PH.
C H E C K
P O I N T
Harness color (gray) of the SOLENOID FEED MSI does not correspond with the harness
color on the main unit sided (yellow).
5. Remove the screw (silver, self-tapping, 8 mm) that secures the SOLENOID FEED MSI to the main unit.
Be sure to use 8-mm screw when securing the SOLENOID FEED MSI. Using 10-mm screw
may damage the frame.
6. Remove the SOLENOID FEED MSI from the main unit.
Kmy03020EB
3)-2
3)-1
4)
5)
6)
10mm 8mm
SOLENOID FEED MSI