LX-300+/1170 Revision C
Troubleshooting
roubleshooting 62
3.2 Troubleshooting
3.2.1 Initialization Check
Before troubleshooting, check the following basic items.
1. When printer can perform printing, perform self-test and check if any troubles occur.
2. When the printer cannot perform any printing, check the setting by “Default Setting”.
(Refer to Chapter 1.)
3. Check if the outside and inside the printer is noticeably dirty or if any parts are broken.
If there is dirt, perform cleaning referring to Chapter 6 “Maintenance”.
4. Make sure each harness is connected properly.
5. Make sure no remarkable friction among printer mechanism gears. Make sure all gears
are linked properly.
6. Make sure there is no dirt nor scratch on rollers inside the printer.
7. Perform EEPROM clear as needed. Inside setting is reset to the factory default setting.
(Refer to Chapter 1.)
3.2.2 Check Performance By Self-Check Function
LX-300+/1170 has self-check function and it supervises the printer condition constantly. If
any problem occurs, it indicates error by indicator LED and in some cases it notifies error to
the operator by beeping the buzzer. Identify error cause, referring to the indication first. If
error is not solved, perform unit repair.
3.2.2.1 Indicator LED
The table below shows the indicator LED and the printer condition.
o Paper Out Error
This error will be indicated when printer fails to feed paper or paper is run out.
n
Solution
Set paper properly and try paper feed again.
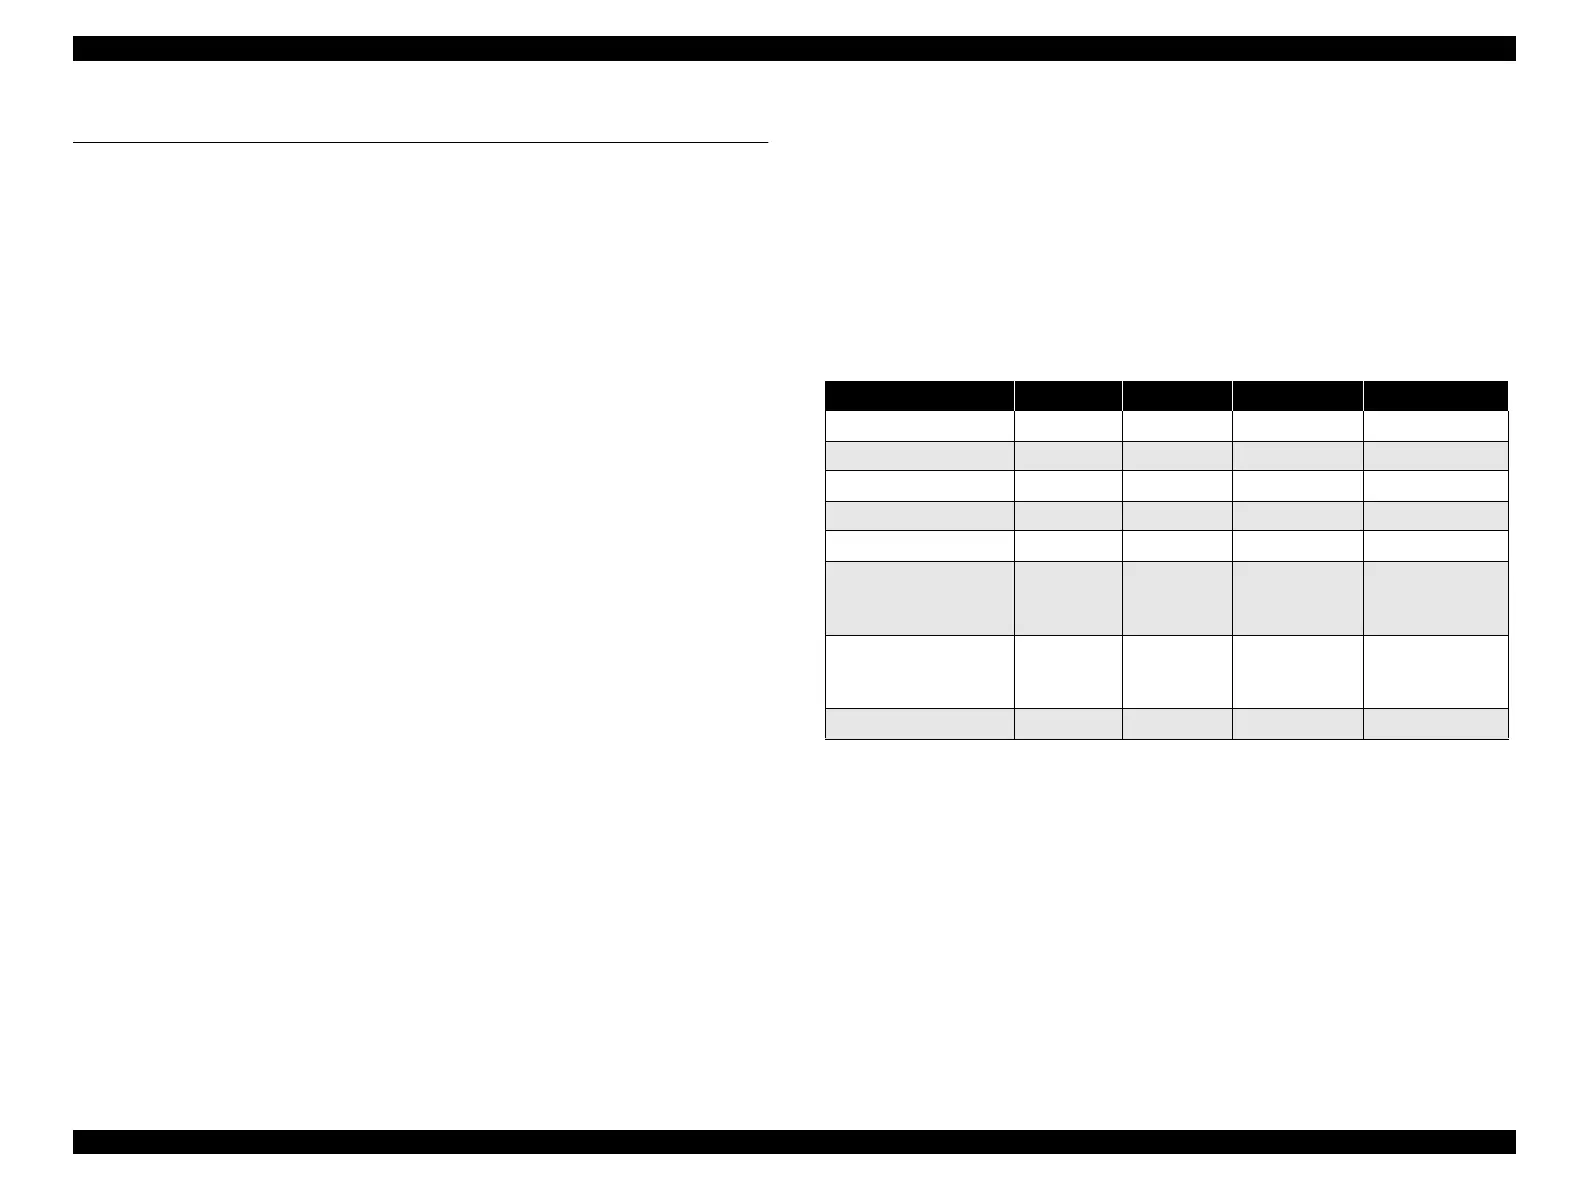
Table 3-1. Indicator LED
Printer Condition Pause Paper Out Front Buzzer
Pause ON - - -
Paper Out Error ON ON - Shoot beep x3
Release Lever Error ON - - Long beep x5
Paper Eject Warning ON BLINK - -
MICRO Adjust BLINK - - -
Tear Off - -
According to
LED On/Off
combination
-
Font Select - -
According to
LED On/Off
combination
-
Fatal Error BLINK BLINK BLINK -

 Loading...


