EasyManuals Logo

Epson LX-300+ Service Manual

Epson LX-300+
129 pages
To Next Page IconTo Next Page
To Previous Page IconTo Previous Page
Page #82 background imageLoading...
Page #82 background image
LX-300+/1170 Revision C
Disassembly and Assembly Disassembly and Assembly 82
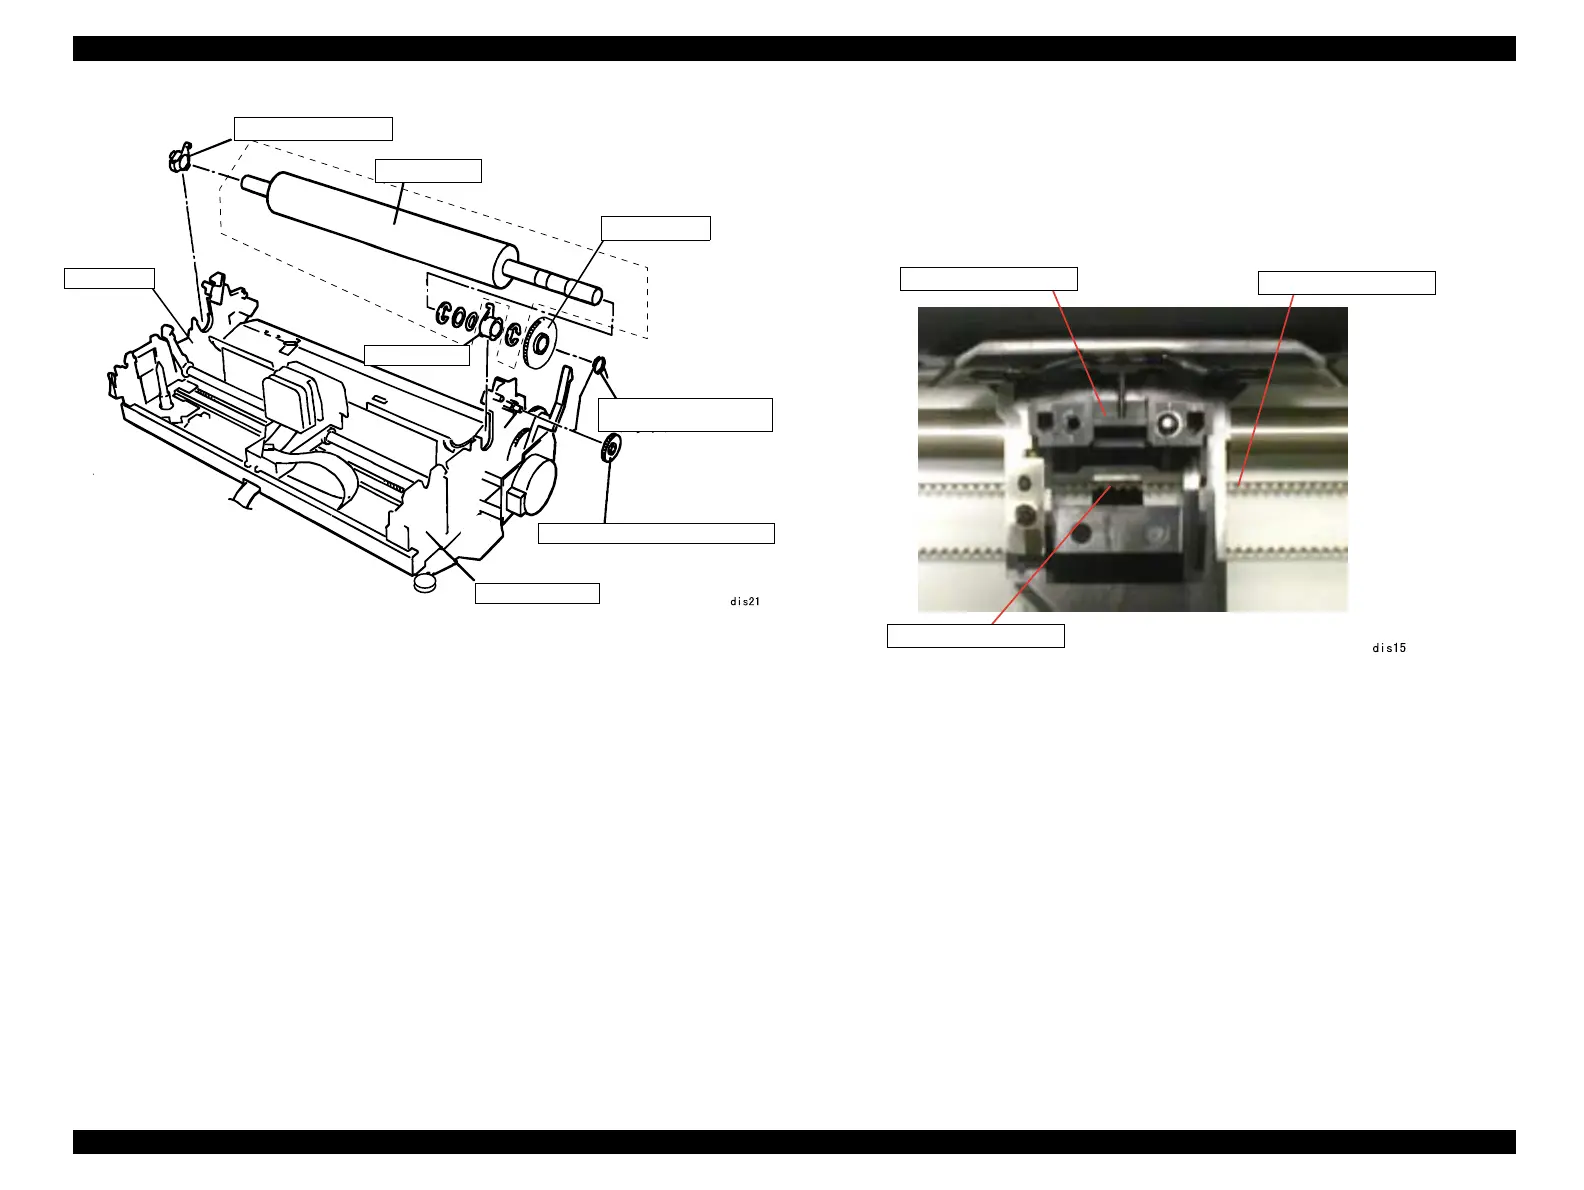
Figure4-13. Platen Removal
4.2.7.3 Carriage Unit Removal
1. Remove the printer mechanism. (See 4.2.3 "Printer Mechanism Removal".)
2. Remove the printhead. (See 4.2.1 "Printhead Removal".)
3. Remove the timing belt from the carriage installation point.
Figure4-14. Timing Belt Removal
4. Remove the CR shaft grounding plate from the base frame on the left side of the
printer.
Bushing, 11
Platen
Gear, 34
Platen grounding wire
Combination gear, 17.5, 27
Right frame
Left frame
Bushing, 11
Carriage Unit
Timing Belt
Installation Point

Table of Contents

Other manuals for Epson LX-300+

Questions and Answers:

Question and Answer IconNeed help?

Do you have a question about the Epson LX-300+ and is the answer not in the manual?

Epson LX-300+ Specifications

General IconGeneral
EmulationEpson ESC/P, IBM PPDS
Print Method9-pin, impact dot matrix
InterfaceParallel
Paper HandlingFriction feed
Dimensions366 x 275 x 159 mm
Paper Width4 - 10 inches

Related product manuals