LX-300+/1170 Revision C
Disassembly and Assembly Disassembly and Assembly 76
4.2.3 Printer Mechanism Removal
1. Remove the upper housing. (See 4.2.2 "Upper Housing Removal".)
2. LX-300+: Remove 3 screws (C.B.P., Tite, 3x10 F/ZN;Torque 0.78-0.98 N.M.)
securing the upper shield plate to the lower housing.
LX-1170: Remove 4 screws (C.B.P., Tite, 3x10 F/ZN; Torque 0.78-0.98 N.M.)
and 2 screws (C.B.S., Screw, 3x4 F/Zn;Torque 0.78-0.98 N.M.)
securing the upper shield plate to the lower housing.
3. Remove the shield cover.
Figure4-3. Upper Shield Plate (LX-300+)
4. LX-300+: Remove 2 screws with washer (C.B.B., (W(13), 3x14 F/ZN)
securing the printer mechanism to the lower housing.
See Figure 4-3 on page 76.
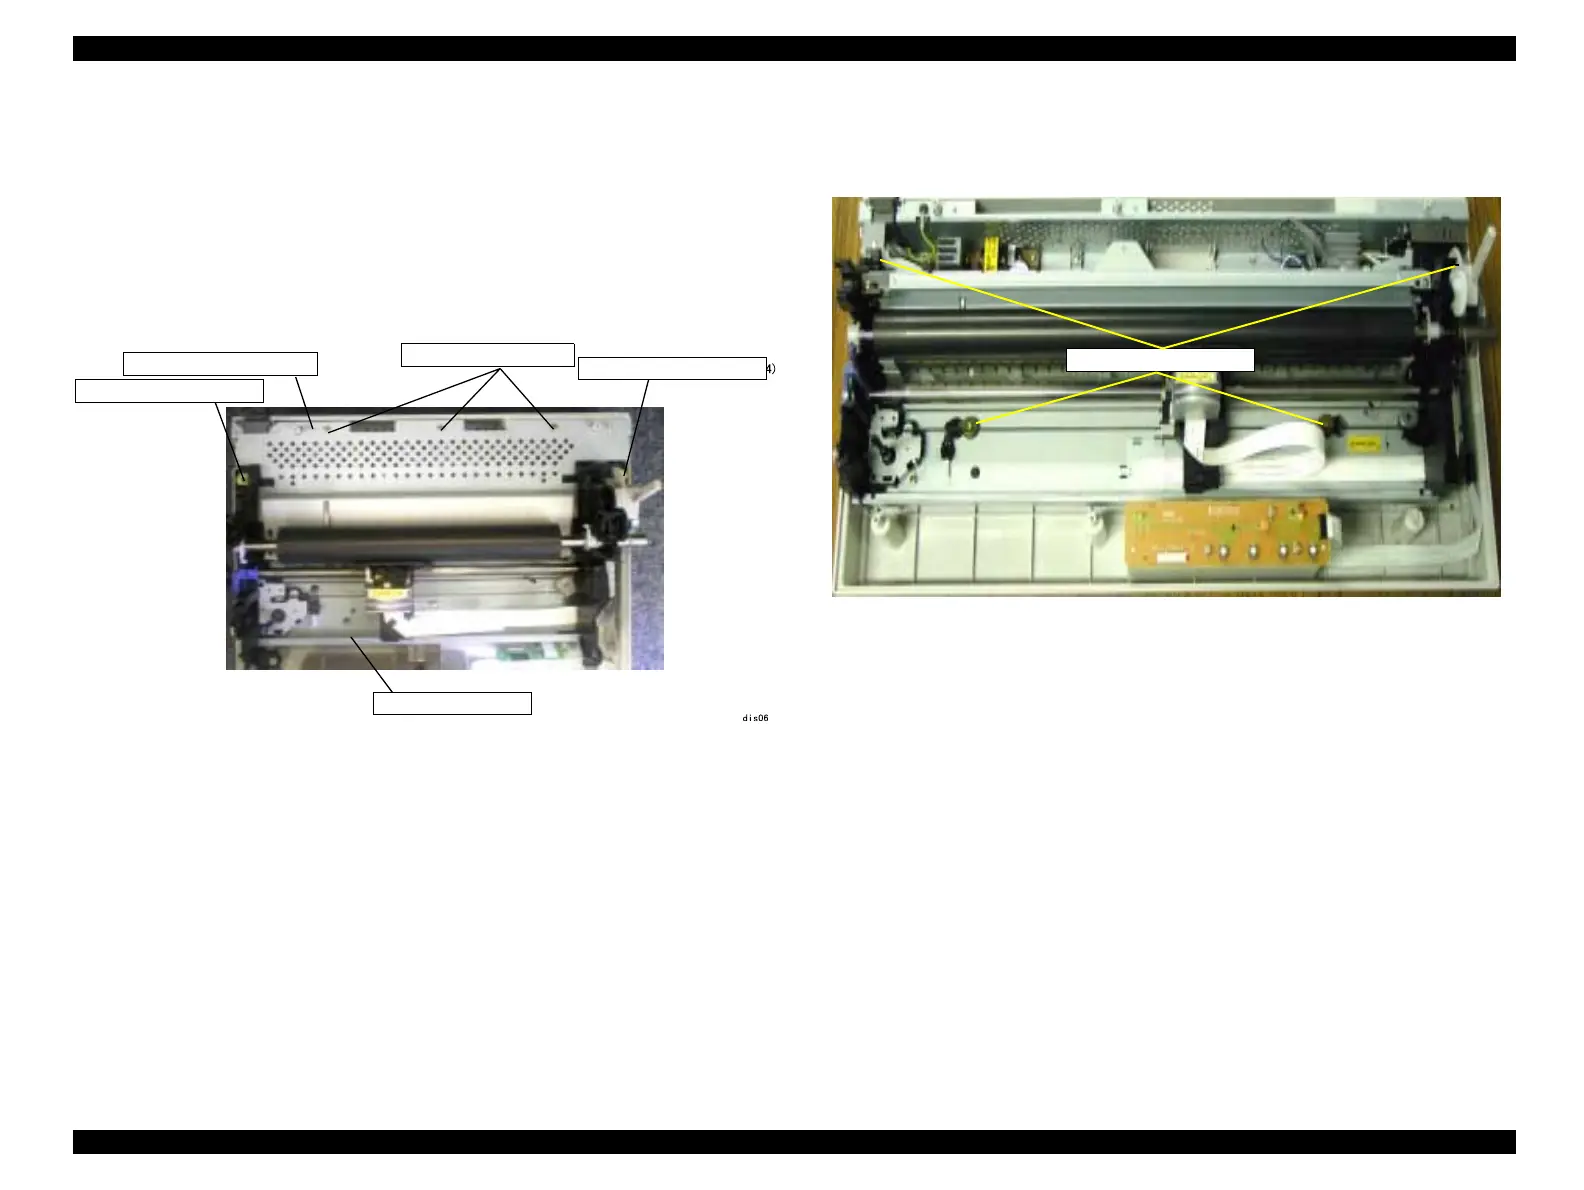
LX-1170: Remove 4 screws with washer (C.B.B., (W(13), 3x14 F/ZN)
securing the printer mechanism to the lower housing.
See Figure 4-4 below.
Figure 4-4. Printer Mechanism Removal (LX-1170)
Upper Shield Plate
C.B.P., Tite, 3x10 F/ZN)
Printer Mechanism
C.B.B., (W(13), 3x14 F/ZN
C.B.B., (W(13), 3x14 F/ZN
C.B.B., (W(13), 3x14 F/ZN

 Loading...


