LX-300+/1170 Revision C
Adjustment
verview 89
5.1 Overview
This chapter explains the adjustment required after disassembling the printer.
5.1.1 Platen Gap Adjustment
Platen gap adjustment is required at the following cases.
o Printhead is replaced.
o Carriage is replaced.
o CRguideshaftisremoved.
o Parallelism adjust bushing is removed.
o Printing is too thin.
o Ink ribbon often gets jammed.
Follow the steps below before performing the platen gap adjustment.
1. Remove the upper housing. (Refer to Ch4.)
2. Set the PG adjust lever to “0”.
3. Remove the printhead and remove the ribbon mask.
4. Re-install the printhead.
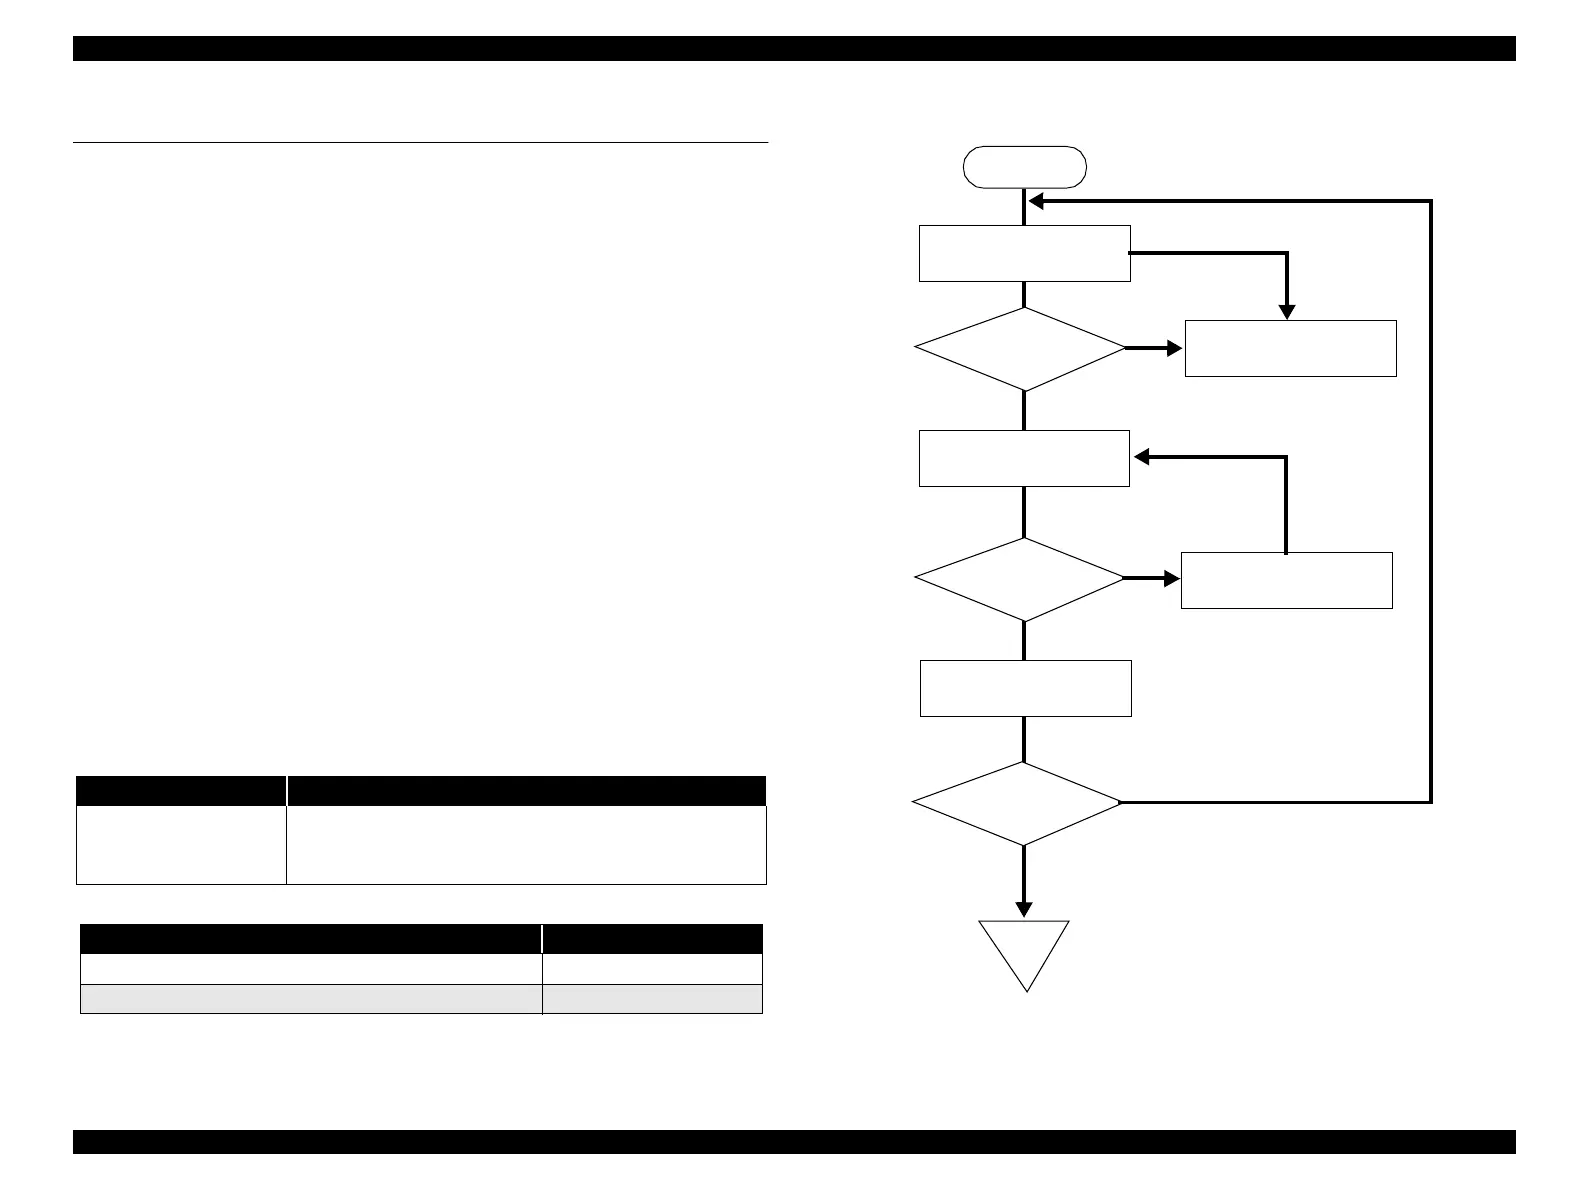
5. Follow the procedure in the flowchart below for the adjustment.
Figure5-1. Platen Gap Adjustment
Table 5-1. Adjustment Method
Platen Gap Setting Judging Method
0415 ± 0.015mm
Thickness gauge 0.40mm falls down by its own weight: OK
Thickness gauge 0.43 mm does NOT fall down by its own
weight: NG
Table 5-2. Parallelism Adjust Bushing
Rotational direction of the parallelism adjust bushing Platen gap
Platen side Widen
Front side Narrowed
START
Move the carriage unit to the
left end.
Move the carriage unit to the
right end.
Is the platen gap
within the range of the
setting?
Move the carriage unit to the
center.
Adjust the platen gap at the
left end.
Adjust the platengap at the
right end.
END
Is the platen gap
within the range of the
setting?
Is the platen gap
within the range of the
setting?

 Loading...


