5-44 Disassembly, Assembly, and Adjustment Rev. A
Confidential
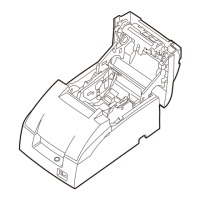
8. Secure the auto cutter assembly to the cutter plate assembly with screw. In doing so, there
should not been gap between rightmost of auto cutter assembly and cutter plate.
9. Align the auto-cutter plate assembly with the holes of the auto-cutter fixing plate.
10. Attach the auto-cutter plate assembly to the auto-cutter fixing plate. Make sure the holes for
the shafts of the auto-cutter plate assembly match the holes in the auto-cutter fixing plate.
Insert the hook end of the spring in the hole in the auto-cutter plate assembly first, and the
Auto-cutter assembly
Auto-cutter plate assembly
(0.59 to 0.78 N • m (6 to 8 kgf • cm)]
CBS-tite (M3x4)
 Loading...

