351
TRIM AND TILT
TRIM AND TILT SERVICE
14
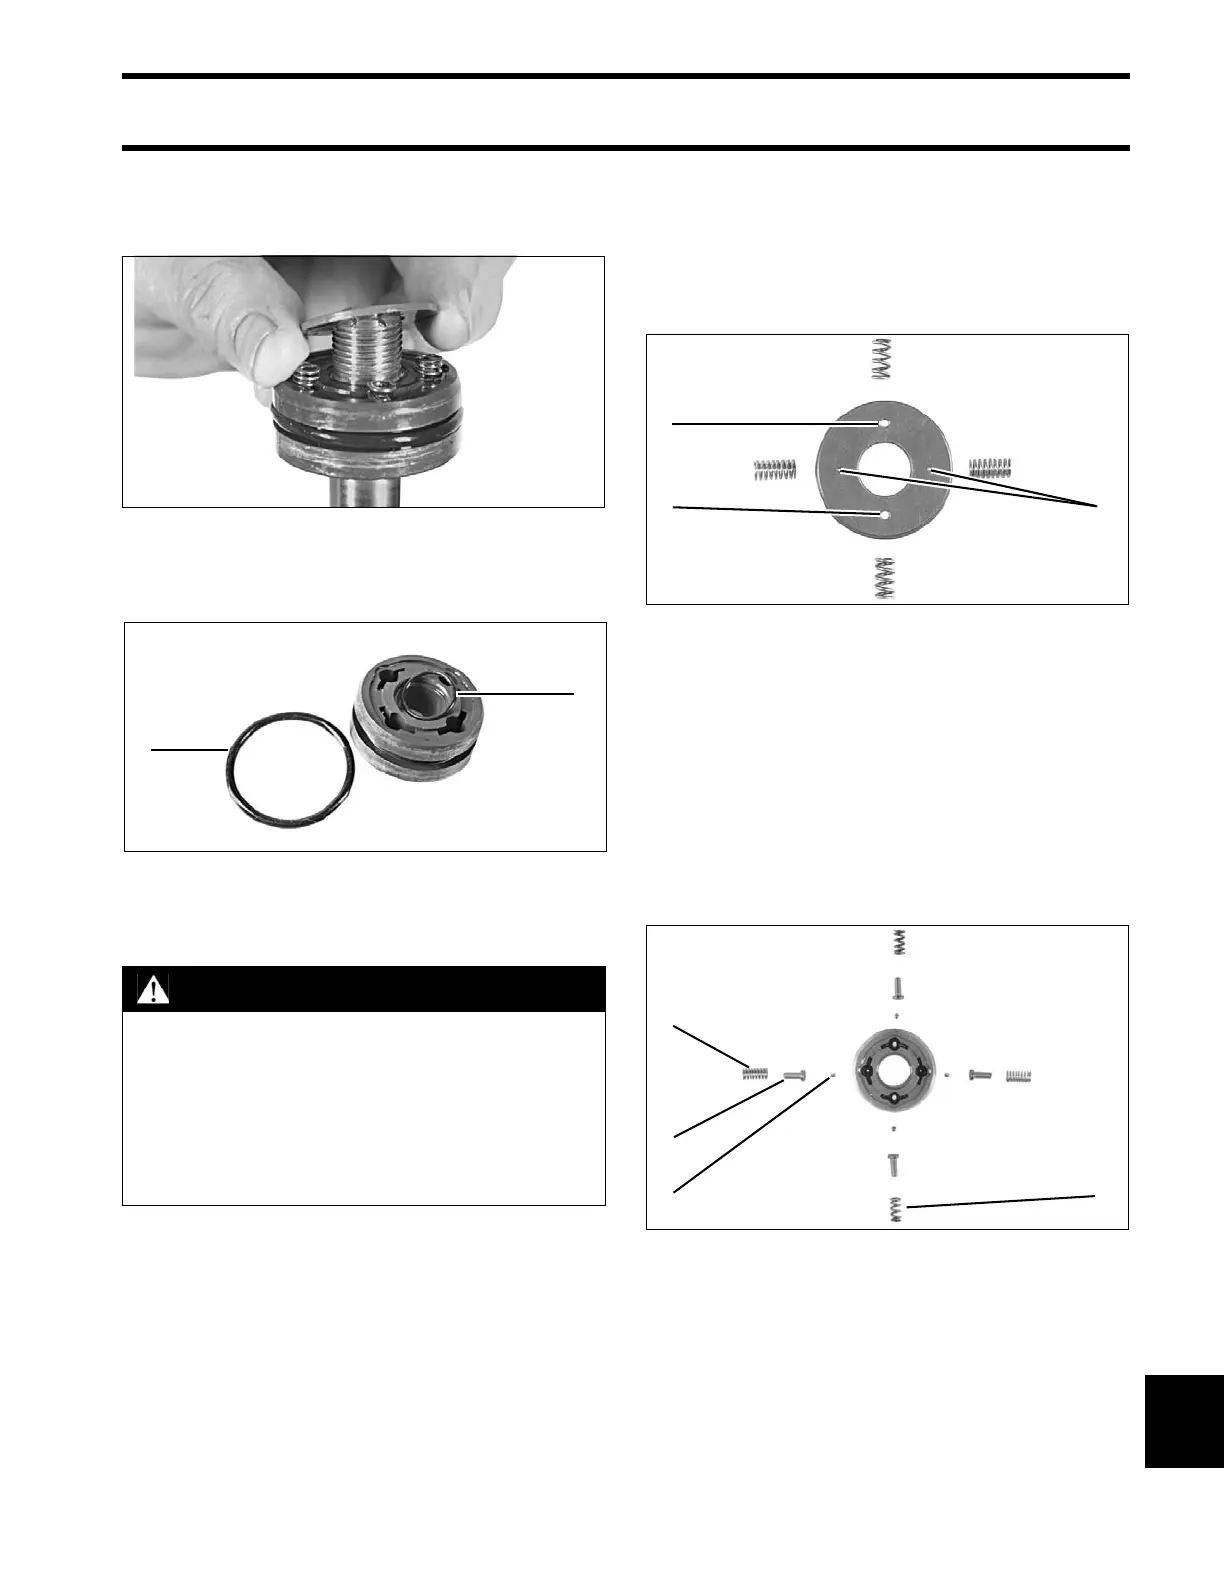
Remove the washer. Slide the tilt piston off the
rod. Be careful not to lose the springs, plungers,
or small check valves in the piston assembly.
Remove and discard the small inner O-ring and
large outer O-ring.
Tilt Piston Identification
Two of the piston relief holes are small, the other
two holes are larger. Two of the springs have five
coils and the other two have nine coils. On assem-
bly, the two five-coil springs go in the large relief
holes, and the two nine-coil springs go in the small
relief holes.
Tilt Piston Assembly
Piston check balls and plungers are identical.
Lubricate and install a new outer O-ring on the tilt
piston. Place one ball, one plunger, and one
spring in each hole in the piston as indicated.
The two five-coil springs go in the large relief
holes and the two nine-coil springs go in the small
relief holes. Set the piston aside.
41784
1. Small inner O-ring
2. Large outer O-ring
41819
WARNING
Different tilt pistons are used on hydraulic
units for various outboard models. All
plungers and check balls are identical.
The tilt piston assemblies contain valving
specific to certain models. To provide
impact protection, it is important the cor-
rect piston assembly be installed.
1. Small piston relief holes
2. Large piston relief holes
41879
1. Five-coil spring
2. Nine-coil spring
3. Piston check ball
4. Plunger
41817