A1400 AIR 31 532129 04 - Rev.B
200
37,5
200
30
80
30
30
28
Translation of the original instructions
ENGLISH
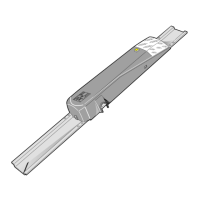
8. INSTALLING THE HEAD SECTION
ceiling
Screws and dowels not supplied.
3. Continue according to the intended type of installation:
- FASTENING TO THE WALL 31
- SELFSUPPORTING FASTENING with OPTIONAL 32 acces-
sory profile - if provided for specific requirements.
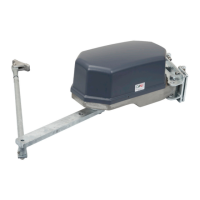
8.2 WALL FASTENING
!
The supporting wall must be adequate for the weight of the entry door
(automation with leaves). It is recommended to use dowels with adequate
screws and tightening torque.
1. Lift the support profile to the established fastening height.
2. Mark the drilling points on the wall.
!
Check the horizontal with a spirit level.
3. Drill the holes on the wall.
- Use suitable drill bits for the wall material.
4. Lift the support profile. Start fastening at a vertical slot at one end
and a horizontal slot at the other end.
!
Check the horizontal with a spirit level.
5. First fasten it in the centre and then fasten it at the other points,
alternating vertical and horizontal slots at a distance of 200 mm
28.
Upon completing head section installation, reposition the components you
have moved and reassemble the electronics module in the correct position.
Finally, fit again the safety cables and the casing.
RISKS
PERSONAL PROTECTIVE EQUIPMENT
REQUIRED TOOLS
Ø 8 mm
8-10-13
5
For manual lifting, there should be 1 person for every 20 kg to be lifted.
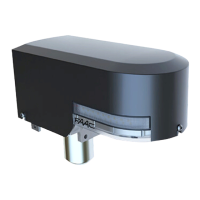
8.1 PRELIMINARY OPERATIONS
1. To be able to perform fastenings, the casing and electronics mod-
ule must be temporarily disassembled and the components must
be moved as they are a hindrance.
To make subsequent replacing easier, mark components’ positions.
- With the automation on the ground, extract the safety cables
and remove the casing.
- Loosen the screws of the electronics module and remove it.
- Loosen the screws of the components that are a hindrance (e.g.
motors) and slide them along the profile.
2. Establish the fastening height of the support profile:
- for leaves with a 2.5 m standard height frame, consider overall
dimensions of 115 - 113
HA = LH - 27
- for leaves with a frame height of less than 2.5 m consider overall
dimensions of 116 - 114
HA = LH - 19.5
- for doors with glass leaves without a frame, consider overall
dimensions of 117 - 115
HV = LH - 31
!
The minimum distance between the top of the support profile and the
ceiling must be 80 mm 28.
Check the horizontal with a spirit level.

 Loading...