A1400 AIR 58 532129 04 - Rev.B
80
0.0
RESET/SETUP
DL2
DL11
MAIN
F1
USB
+
-
F
ERR
BAT1
OPEN
EMERG
BAT2
SIC
_
OP
SIC
_
CL
J10
J14
J11
J12
J13
V G
S1
G
T
J
J17
V RX TX G
J8
E1 G E2
J7
T1 G
T2
R1
G R2
J9
V G 01 02 02
J22
J21
V
G
I1
I2
G
I3
I4
V
J18
G CH CL G
J23J24
J25
V G
S2
G
T
J4
1
2
4
3
1
2
2
1
81
Translation of the original instructions
ENGLISH
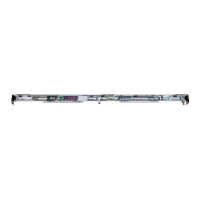
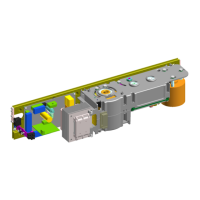
12.6 INSTALLING THE A1400 AIR DM ELECTRONIC BOARD
!
Before proceeding, disconnect the mains power supply and disconnect
the emergency battery.
1. Remove all connections.
2. Remove the screw 80- and the screw with washer 80-.
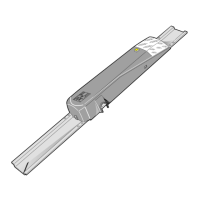
3. Remove the board from the support.
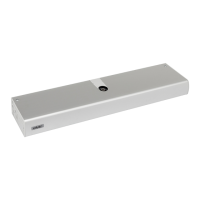
4. Unscrew the 2 screws 81- and remove the plastic cover by
removing the 2 plastic pins from the board 81-
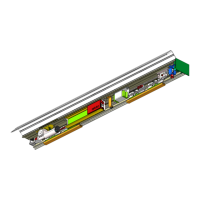
5. Install the 4 plastic posts 82- in the 4 holes on board E1SLand
fasten them using the screws provided .
6. Insert the two metal plugs as far as they will go into the connector
of board E1SL 82-
7. Insert the 2
nd
motor board onto the other end of the plugs until
it rests against the connector 83-.
8. Fasten the 2
nd
motor board using the 4 posts and the other 4
screws provided 83-.
9. Replace the plastic cover, inserting the 2 plastic pins into board
E1SLand fasten it in place using the 2 screws 81- .
10. Insert the new E1SLboard into the seats 80-.
11. Fasten using the screw and screw with washer .
!
The washer 80- ensures that the board is earthed.
12. Restore all connections.

 Loading...