• Place the components on the front tie rod. Press the
components down so that they snap into the tie rod.
• Swing the components carefully backwards. Make
sure there is sufficient space for the flat seals.
• Push the upper tie rod as far as possible into the CP
terminal and screw it in a few turns.
• Align the components of the CP terminal on a flat
surface so that they are not offset against each o-
ther.
• Tighten first the upper tie rod and then the lower tie
rod with 0.3 Nm. Then tighten both tie rods with
2 Nm.
– With MP, AS-i or CP connections:
PLEASE NOTE
Replace the flat seals between the valve block and
the connecting plate if these seals are more than
one year old. You thereby guarantee reliable sealing
for your CP terminal.
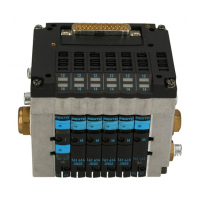
The flat seals are seated at the bottom of the electrical
connector plate (see digram).
1
Flat seal
Fig. 5/4: Position of the flat seal on the electrical
connector plate
1
5. Maintenance and conversion
CPV... 9802 5-9
 Loading...