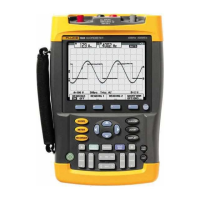
Fluke 190-062, -102, -104, -202, -204, -502, -504
Service Manual
4-12
2. Select the Test Tool setup:
a) Recall the setup (see Standard Test Tool Setup). Press
SAVE
,
F2
(RECALL) and select SETUP. Press
ENTER
, select the setup name, and
press
ENTER
to recall the setup.
b) Press
, press
F4
(INPUT A OPTIONS...), and select
Attenuator: Normal | Bandwidth: 10 kHz or 20 kHz for the available setting in
the ScopeMeter.
c) Press
B
, press
F4
(INPUT B OPTIONS...), and select
Attenuator: Normal | Bandwidth: 10 kHz or 20 kHz for the available setting in
the ScopeMeter.
d) Press
, press
F4
(INPUT C OPTIONS...), and select
Attenuator: Normal | Bandwidth: 10 kHz or 20 kHz for the available setting in
the ScopeMeter.
e) Press
D
, press
F4
(INPUT D OPTIONS...), and select
Attenuator: Normal | Bandwidth: 10 kHz or 20 kHz for available setting in the
ScopeMeter.
f) Press
CLEAR
to clear the softkey menu and the full 8-divisions display.
3. Press
and use
mV
RANGE
and
RANGE
to set the Input A sensitivity range to
the first test point in Table 4-3. Do this also for channel B, C, and D.
4. Set the 5502A to source the appropriate dc voltage.
5. Observe readings
A, B, C, and D and check they are within the range shown
under the appropriate column.
Due to calibrator noise, occasionally OL (overload) can be shown.
6. Continue through the test points.
7. When you are finished, set the 5502A to 0 (zero) Volt and Standby.
Artisan Technology Group - Quality Instrumentation ... Guaranteed | (888) 88-SOURCE | www.artisantg.com

 Loading...


