EasyManuals Logo

Fronius Primo 3.0-1 Service Manual

Fronius Primo 3.0-1
Go to English
160 pages
To Next Page IconTo Next Page
To Previous Page IconTo Previous Page
Page #127 background imageLoading...
Page #127 background image
127
EN
Replacing the internal fan
Preparatory work
Set the DC disconnector to OFF
Disconnect the AC supply
Remove the DATCOM cover
Disconnect the data communication cables if necessary
Release the device from the wall bracket and remove.
Remove the power stage set cover
Replacing the in-
ternal fan
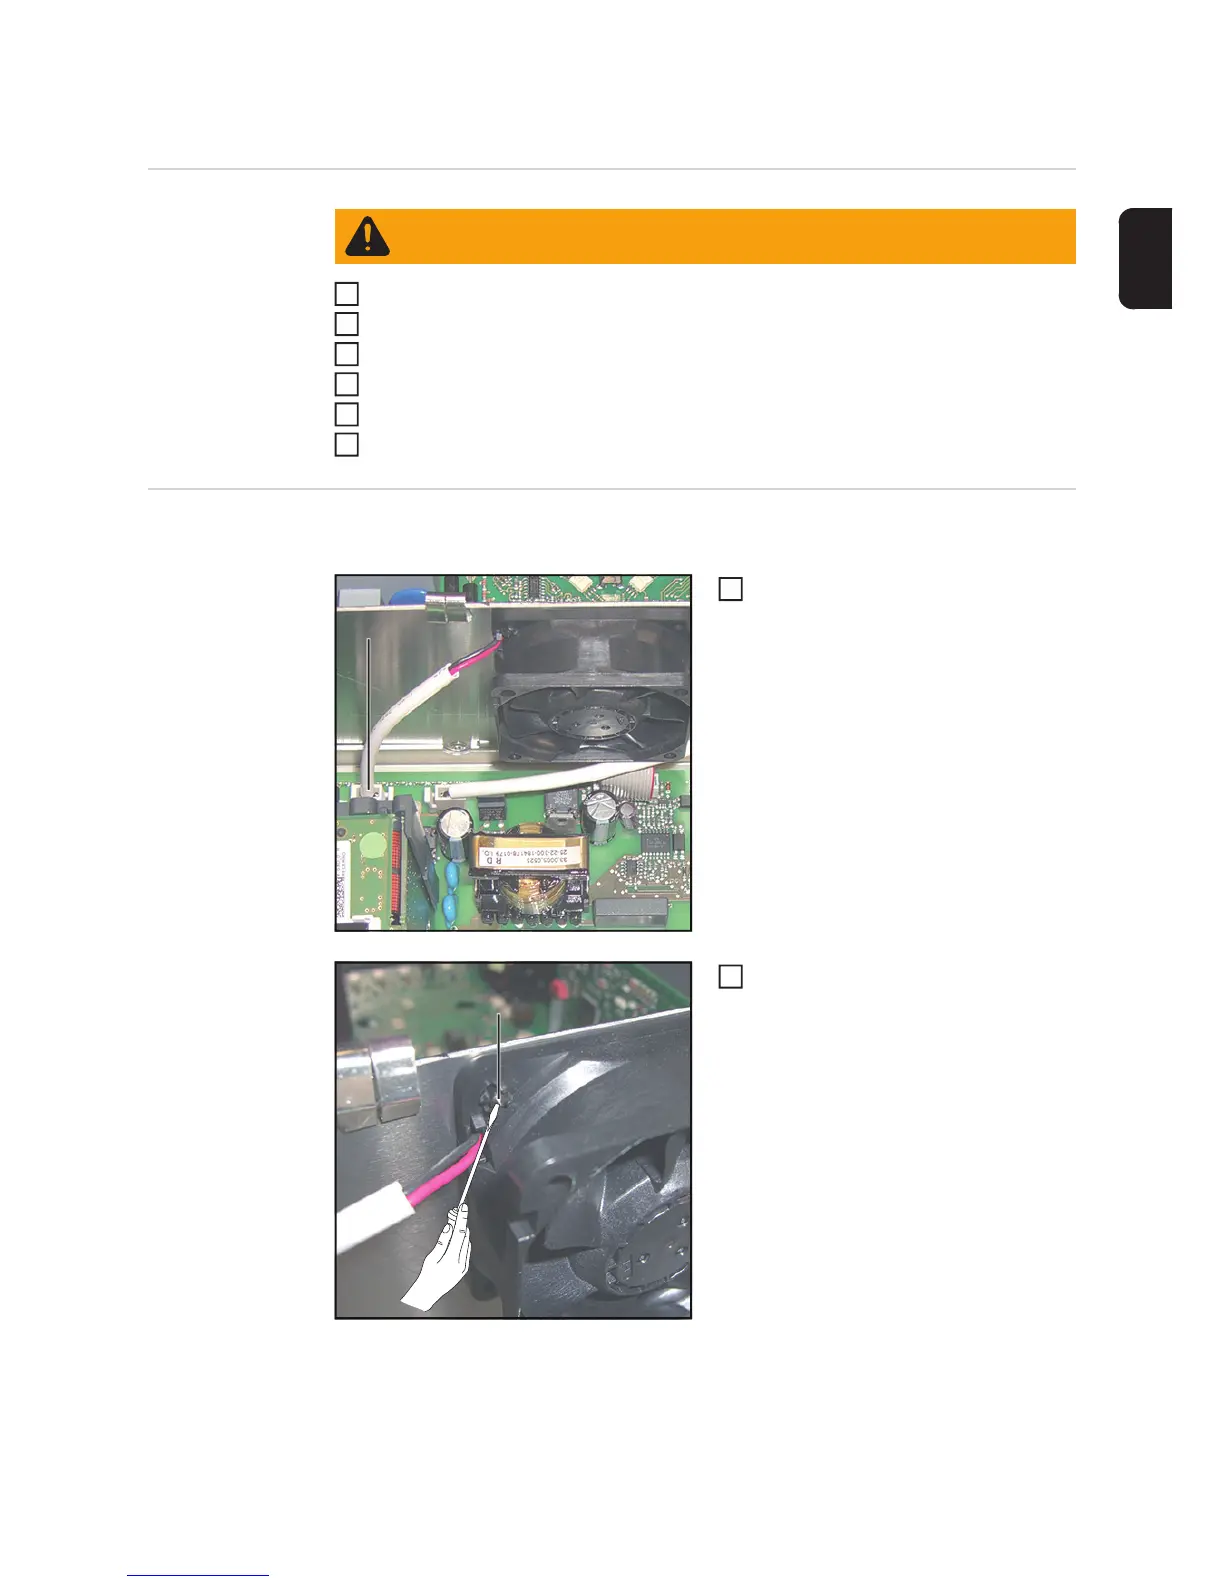
Removing the internal fan:
Disconnect the Molex plug (1)
Remove the internal fan:
Push the plastic expansion pin out
of the rivet using a screwdriver
Pull the fan off the rivet
Inserting the internal fan:
IMPORTANT! Observe the direction of the air flow when installing the new fan. The fan
must blow air into the power stage set area above the RECERBO PC board.
WARNING! An electric shock can be fatal.
Follow the five safety rules.
1
2
3
4
5
6
(1)
1
(2)
2

Table of Contents

Other manuals for Fronius Primo 3.0-1

Questions and Answers:

Question and Answer IconNeed help?

Do you have a question about the Fronius Primo 3.0-1 and is the answer not in the manual?

Fronius Primo 3.0-1 Specifications

General IconGeneral
PurposeSolar panel
Efficiency98 %
Output power3000 W
Input current12 A
Input voltage80 - 1000 V
Output voltage- V
Input frequency50 - 60 Hz
Power supply typeAuto
Adjustable output voltage-
International Protection (IP) codeIP65
Product colorBlack, Grey
Built-in displayYes
Operating temperature (T-T)-40 - 55 °C
Weight and Dimensions IconWeight and Dimensions
Depth204 mm
Width431 mm
Height645 mm
Weight21500 g

Related product manuals